

Calling Setup
Calling Setup in Close
To make calls, you can download our Mac/Windows application, use our mobile app, or make calls straight from your browser.
Mac/Windows Desktop app
Download Close Desktop app here
Once you’ve installed the desktop application, simply log in with your Close account you’ve set up earlier.
Calling from Web Browser
We support the two latest versions of Safari, Chrome, Opera, Firefox, Brave, and Edge. Make sure your browser is updated to the newest version for best functionality.
To set up browser calling, head over to the phone icon in the upper-right and make sure your browser has access to your microphone.
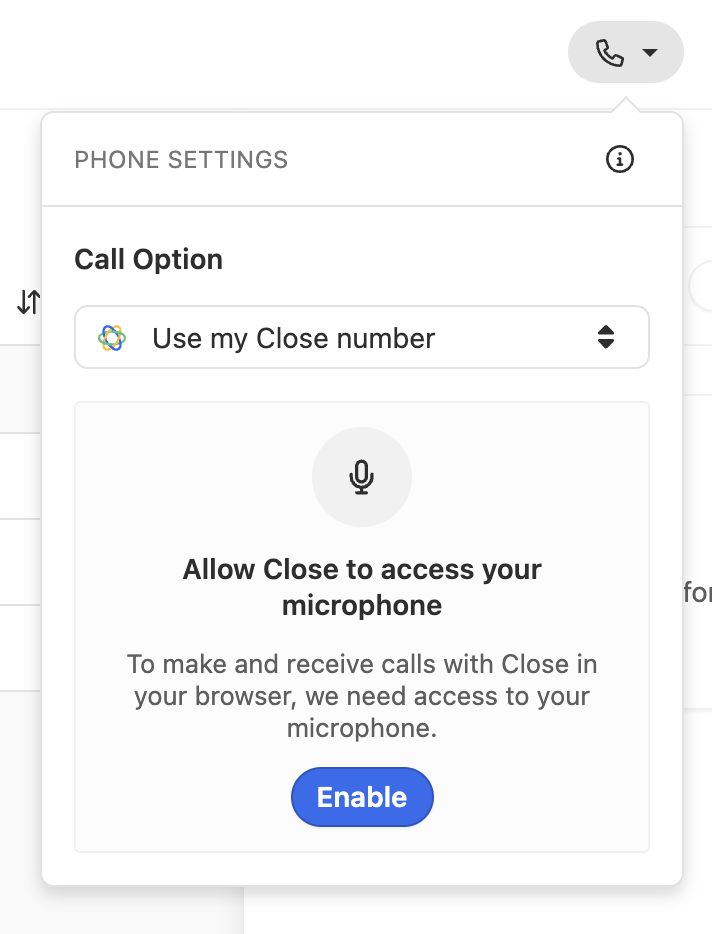
Close can also display browser notifications for incoming calls, in case you’re not currently looking at Close in the browser when you receive a call.
To enable browser notifications, open the phone icon if it’s not already opened from the previous step.
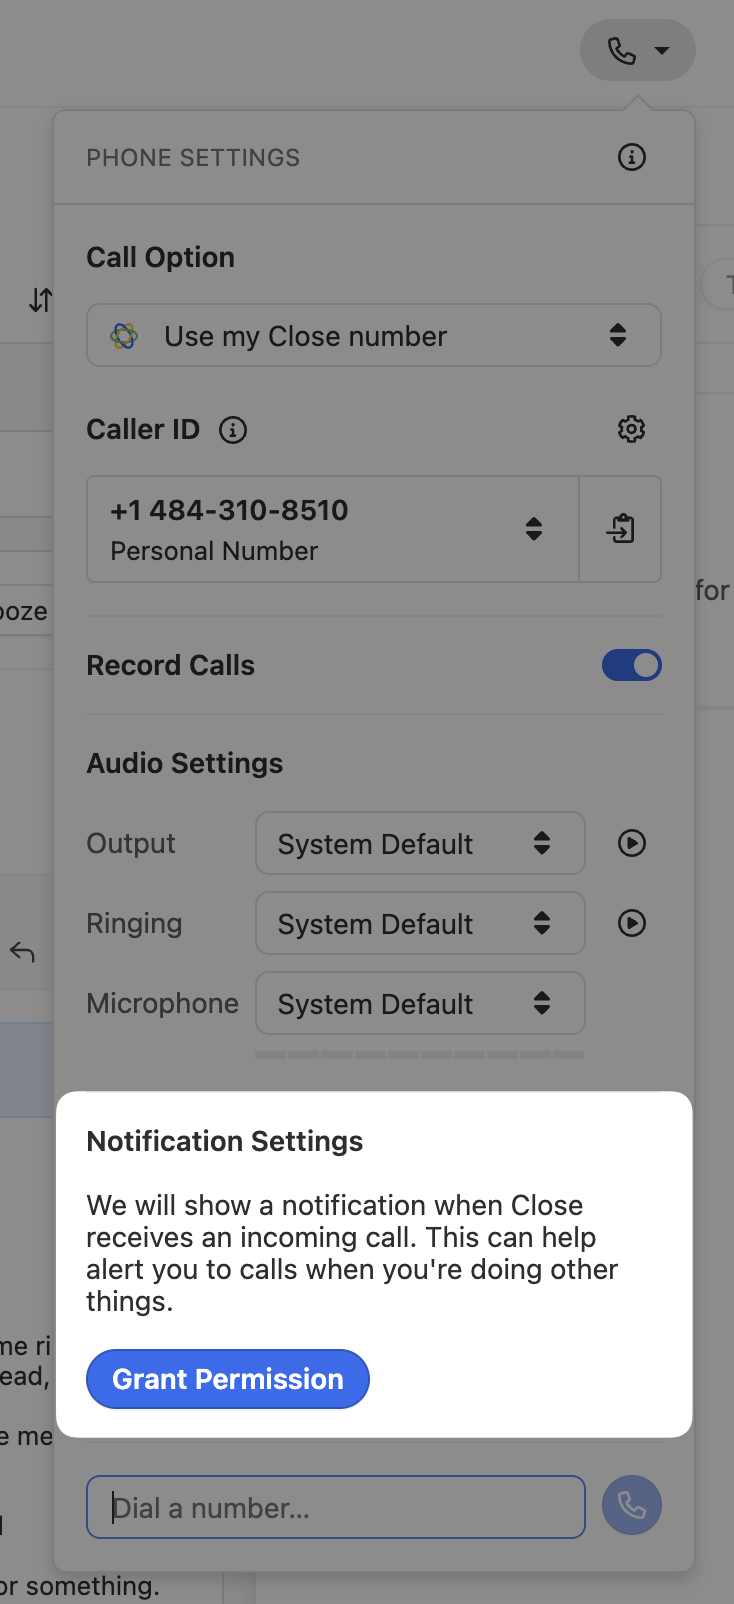
Under Notifications Settings, click Grant Permission and follow the steps as shown in your browser.
Having trouble with notifications?
Check out our guide on troubleshooting browser notifications within Close.
Once you’ve provided microphone and notification permissions, you’re all set to make and receive calls!
Mobile app
Stay in contact with your leads anywhere you go with the Close mobile app.
Download the Close iOS app here.
Download the Close app on your Android here.
Regardless of your mobile device, you can head to the App Store or Google Play and search for Close CRM
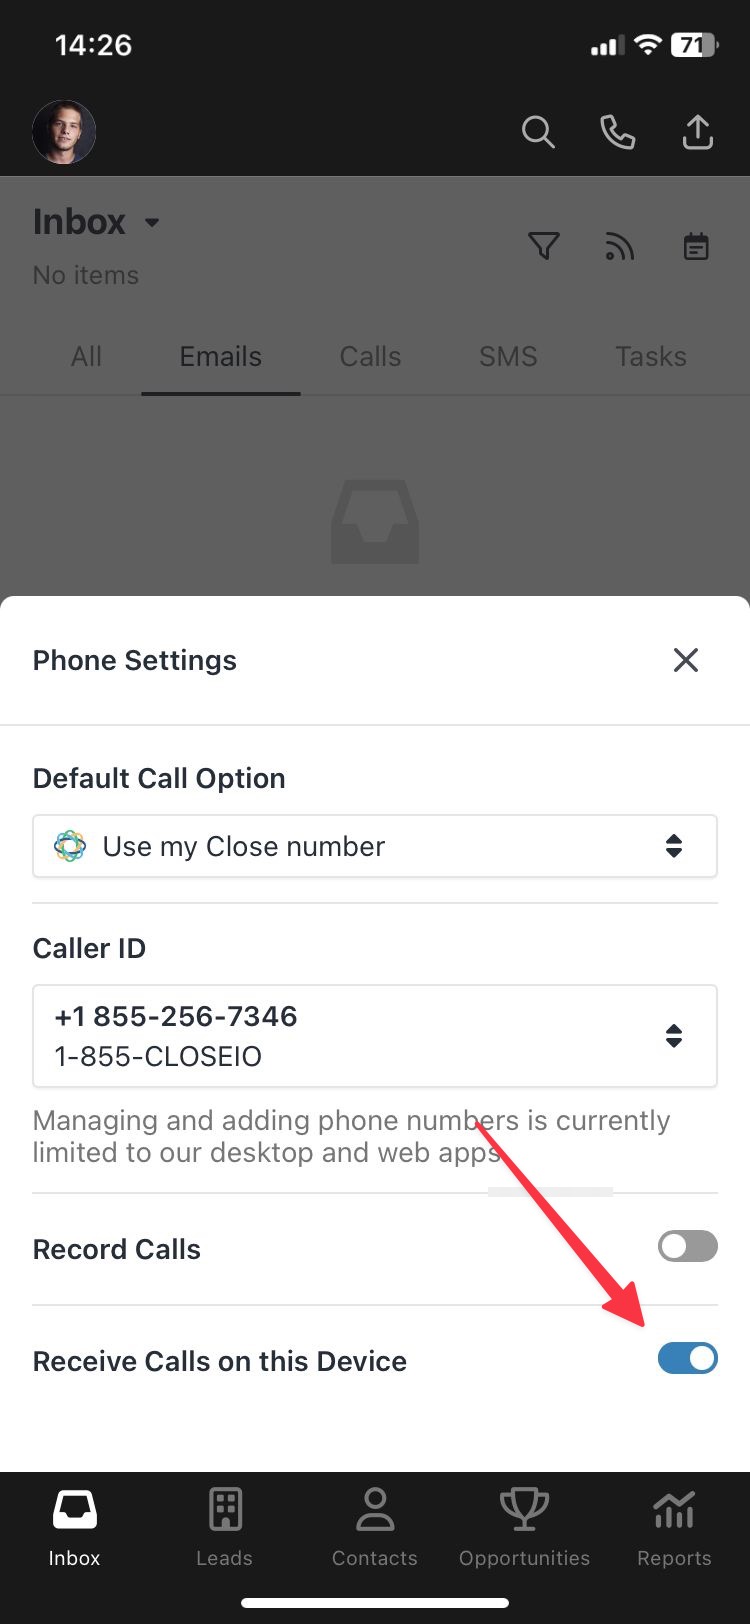
Once you’ve installed the mobile application, log in with your Close account you’ve set up earlier and, optionally, enable the Receive Calls on this Device option within the phone popover if you want to receive incoming calls on your mobile phone:
Adding a Phone Number
To add a phone number, go to Settings > Communication > Phone & Voicemail and select New Number. Close shows you a number that’s available to rent, along with its monthly cost, before you commit to it.
To choose a different one, search by city or area code and pick from the results - results update as you type. Search is available for US numbers; for other countries, enter the country and area code and Close will find a number for you.
Every number in Close supports every feature - members, caller ID, voicemail, forwarding, lead-based routing, phone menus, and round robin - so you configure a number after it’s added, not before.
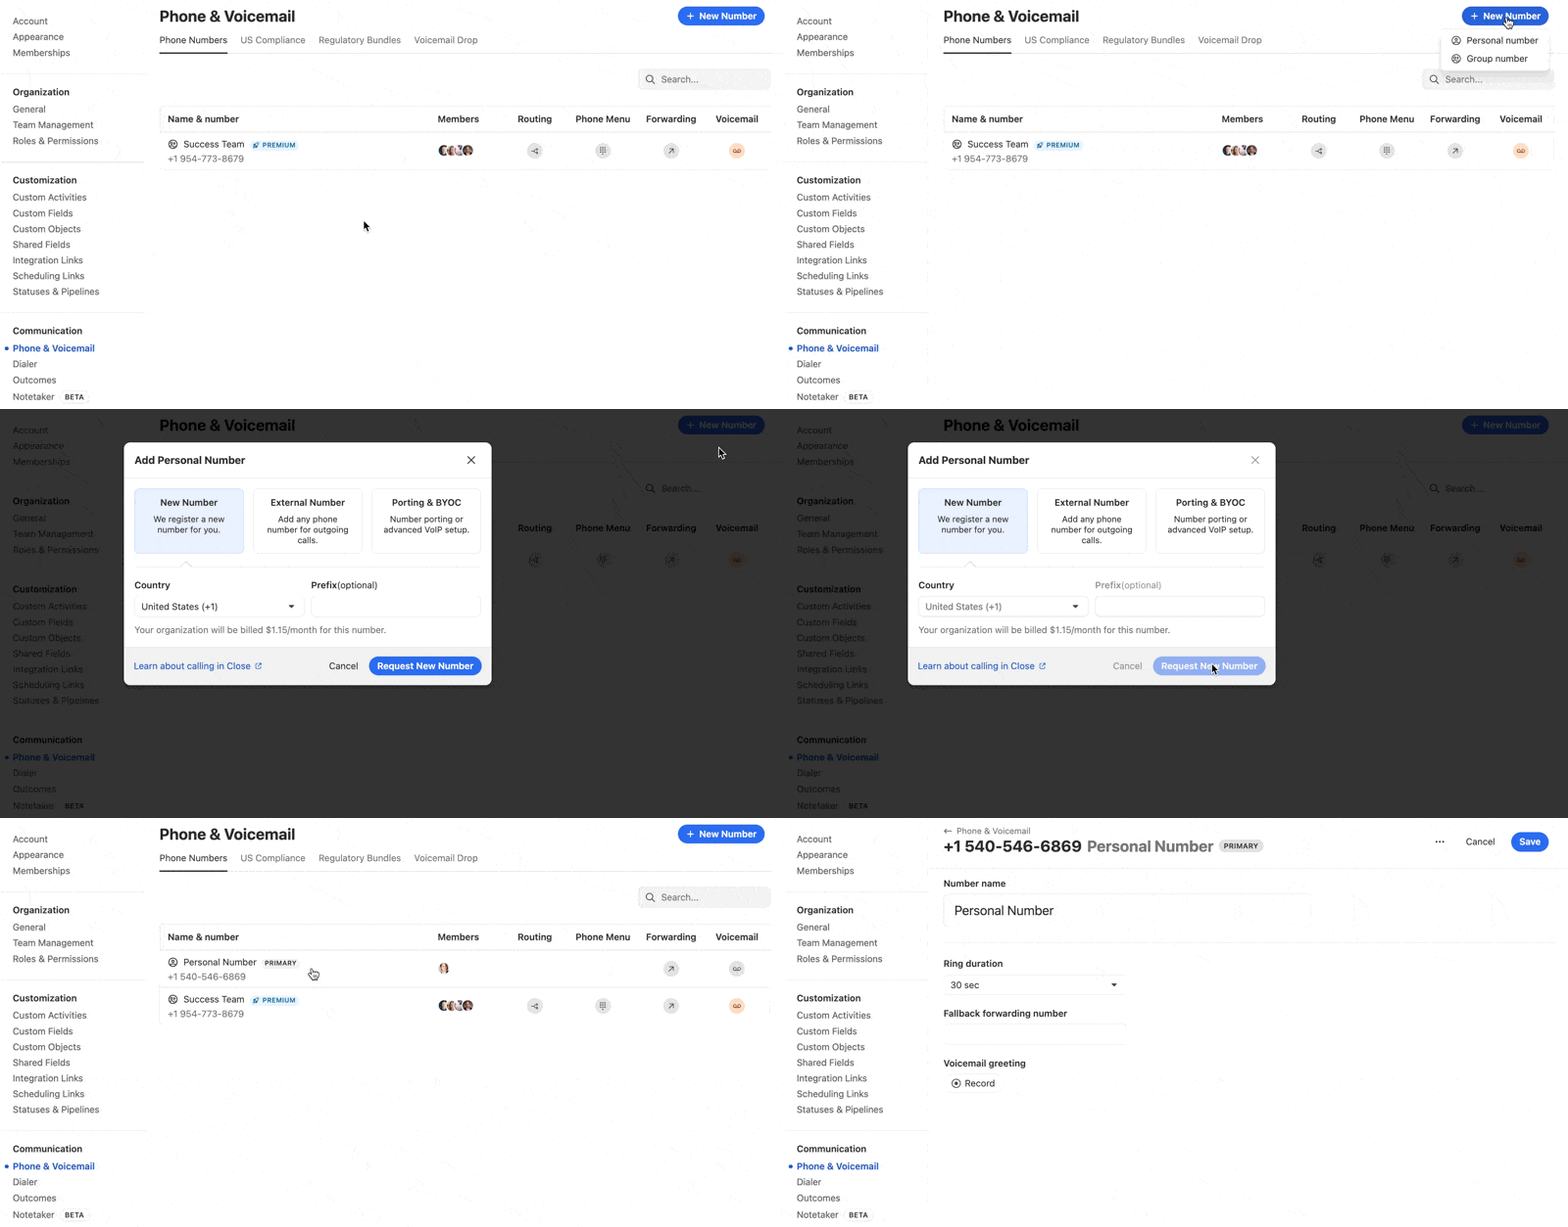
If you don’t search for an area code, we’ll pick one for you at random.
Some area codes in large metropolitan areas are considered exhausted by our carrier and will have no numbers available. If your search returns nothing, try an overlaying area code for the same metro - 929 for New York City where 212 has none, for example.
Your primary number
If you have more than one number, one of them is your primary number. It’s the default caller ID for your outbound calls and SMS, and it’s the number Workflow SMS steps send from.
Your primary number is shown at the top of your list under Settings > Communication > Phone & Voicemail. It can be any number you’re a member of.
Changing your caller ID for a single call doesn’t change which number is primary. If you need your primary number changed, contact Support.
Phone number regulatory compliance
Due to regulatory requirements, depending on the country and area code, you may be required to submit some address/ID documentation first via Regulatory Bundles. Once those bundles are reviewed and approved by our telephony provider Twilio you’ll be allowed to procure the number. You can read more about specific country regulations at Twilio Phone Number Regulations.
As an example, US numbers and UK mobile numbers don’t require any documentation, while UK local and AU local/mobile numbers require documentation before you can procure the number.
Who can change what
Some phone number settings are personal preferences and some affect how the number represents your organization. The second group requires the Manage Team Phone Numbers permission, which Admins and Super Users have by default.
The rule of thumb: if a number is yours alone, you can manage your own experience of it. As soon as a number is shared, or a change affects how the number behaves for the organization, it needs the permission.
Settings you can’t change are shown as read-only rather than hidden, so you can see how a number is configured and ask an admin if you need it changed.
Users with Manage Team Phone Numbers can change any setting on any number in the organization.
Phone number types
These types describe where a number comes from and what it can do. They are not the same thing as the personal, group, and premium distinction Close used previously - that distinction no longer exists, and every number now supports every feature regardless of its type.
In Close we offer three (3) main types of phone numbers:
- Internal (Close issued) numbers
- External numbers
- BYOC (virtual) numbers
Internal (Close issued) numbers
These are the ones you can procure as explained above - you request a phone number country and area code and we’ll try to procure it for you and add it to your Close account. Internal numbers are the default and the most common type of numbers in Close.
- can make outbound calls
- can receive inbound calls
- can send/receive SMS messages (assuming we support the country)
- you are charged a monthly phone rental fee + any telephony (calling/SMS) usage
- can port it out at any time to another provider as explained here
External numbers
These numbers are owned by your current telephony provider (e.g. AT&T, T-Mobile, etc.), but they can be added to Close so that you can make outbound calls only while having callees see your Caller ID (your phone number) during the call. These numbers are also often called verified caller ID numbers.
- can make outbound calls
- cannot receive inbound calls to Close - any inbound calls will go to your current mobile phone
- cannot send/receive SMS messages
- you are charged for any telephony (calling) usage for those outbound calls - although the number is registered with your provider, the outbound calls from Close are still routed through Close’s infrastructure
To add an external number, go to your Settings > Communication > Phone & Voicemail > + Add > External Number, and follow the instructions.
Once this number is verified, you’ll be able to select it from your available numbers when calling out of Close in phone-popover.
BYOC (virtual) numbers
These numbers are owned by your current telephony provider, but the main difference between BYOC and External-type numbers is that BYOC numbers can be used to receive inbound calls to Close as well via call forwarding if your provider supports it.
- can make outbound calls
- can receive inbound calls (not supported in the mobile app at the moment)
- can’t send/receive SMS messages
- you are charged for any telephony (calling) usage
Important note: you might be charged double for your incoming calls depending on the setup of your BYOC provider.
To learn more about BYOC and how to set it up, take a look at our Bring Your Own Carrier (BYOC) guide.
Voicemail Greeting + Voicemail Drop
Close has two features related to voicemail.
- An inbound voicemail greeting for each number you have set up,
- The ability to drop a pre-recorded voicemail when making outbound calls (available only on our Growth and Scale plans - legacy Enterprise plan).
To set these up, look for the Voicemail Greeting and Pre-Recorded Voicemail Drop options in Settings > Communication > Phone & Voicemail > Voicemail Drop. Simply record your message and you’re done!
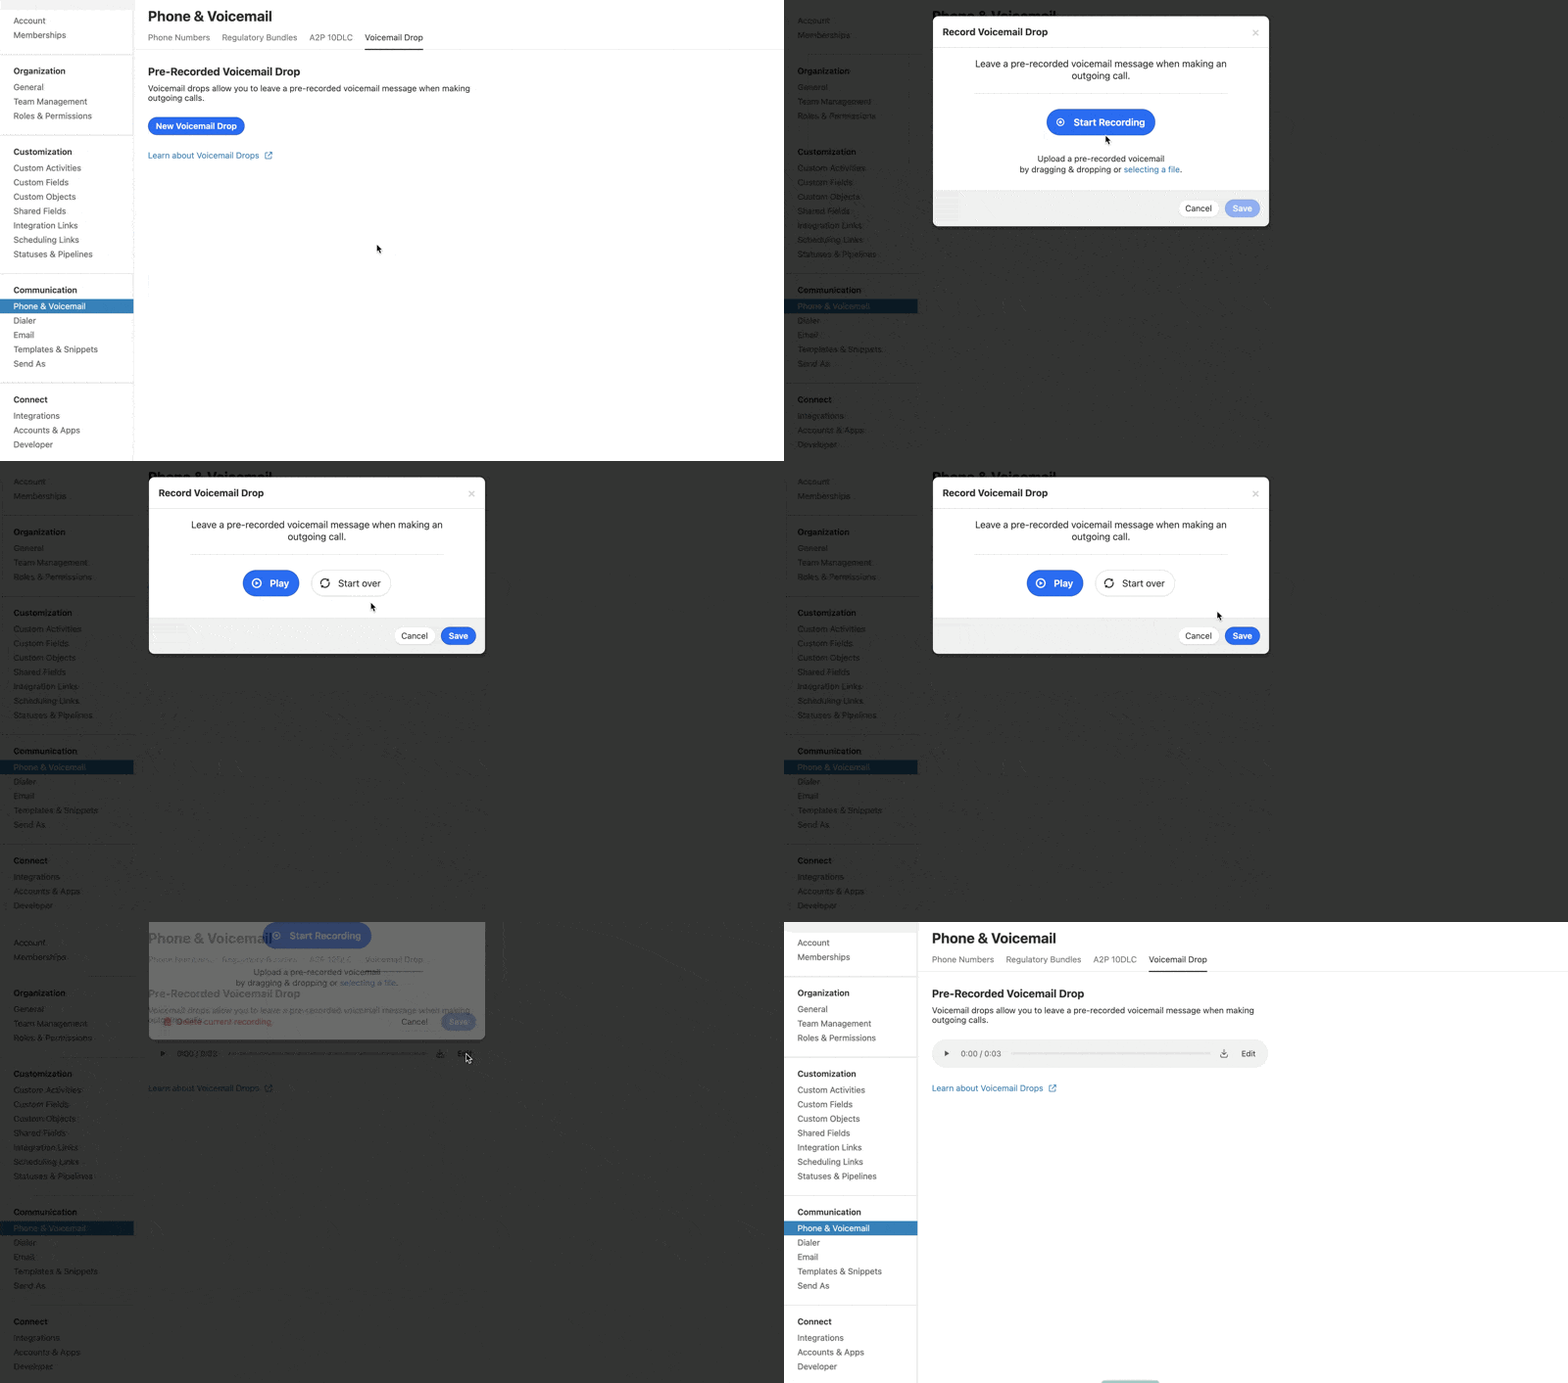
If you have a pre-recorded MP3 you can also use the select a file option and upload that.
In order to leave a voicemail drop, you have to wait until after the voicemail “beeps” before you can leave your pre-recorded voice message.
Call forwarding
If you aren’t actively using Close when you receive an incoming call, you may miss it - unless you set up call forwarding. This will forward all incoming calls to your Close number to the phone number you enter (such as a cellphone number).
Under your Close phone number, click Fallback forwarding: Enable and enter the desired number - that’s it!
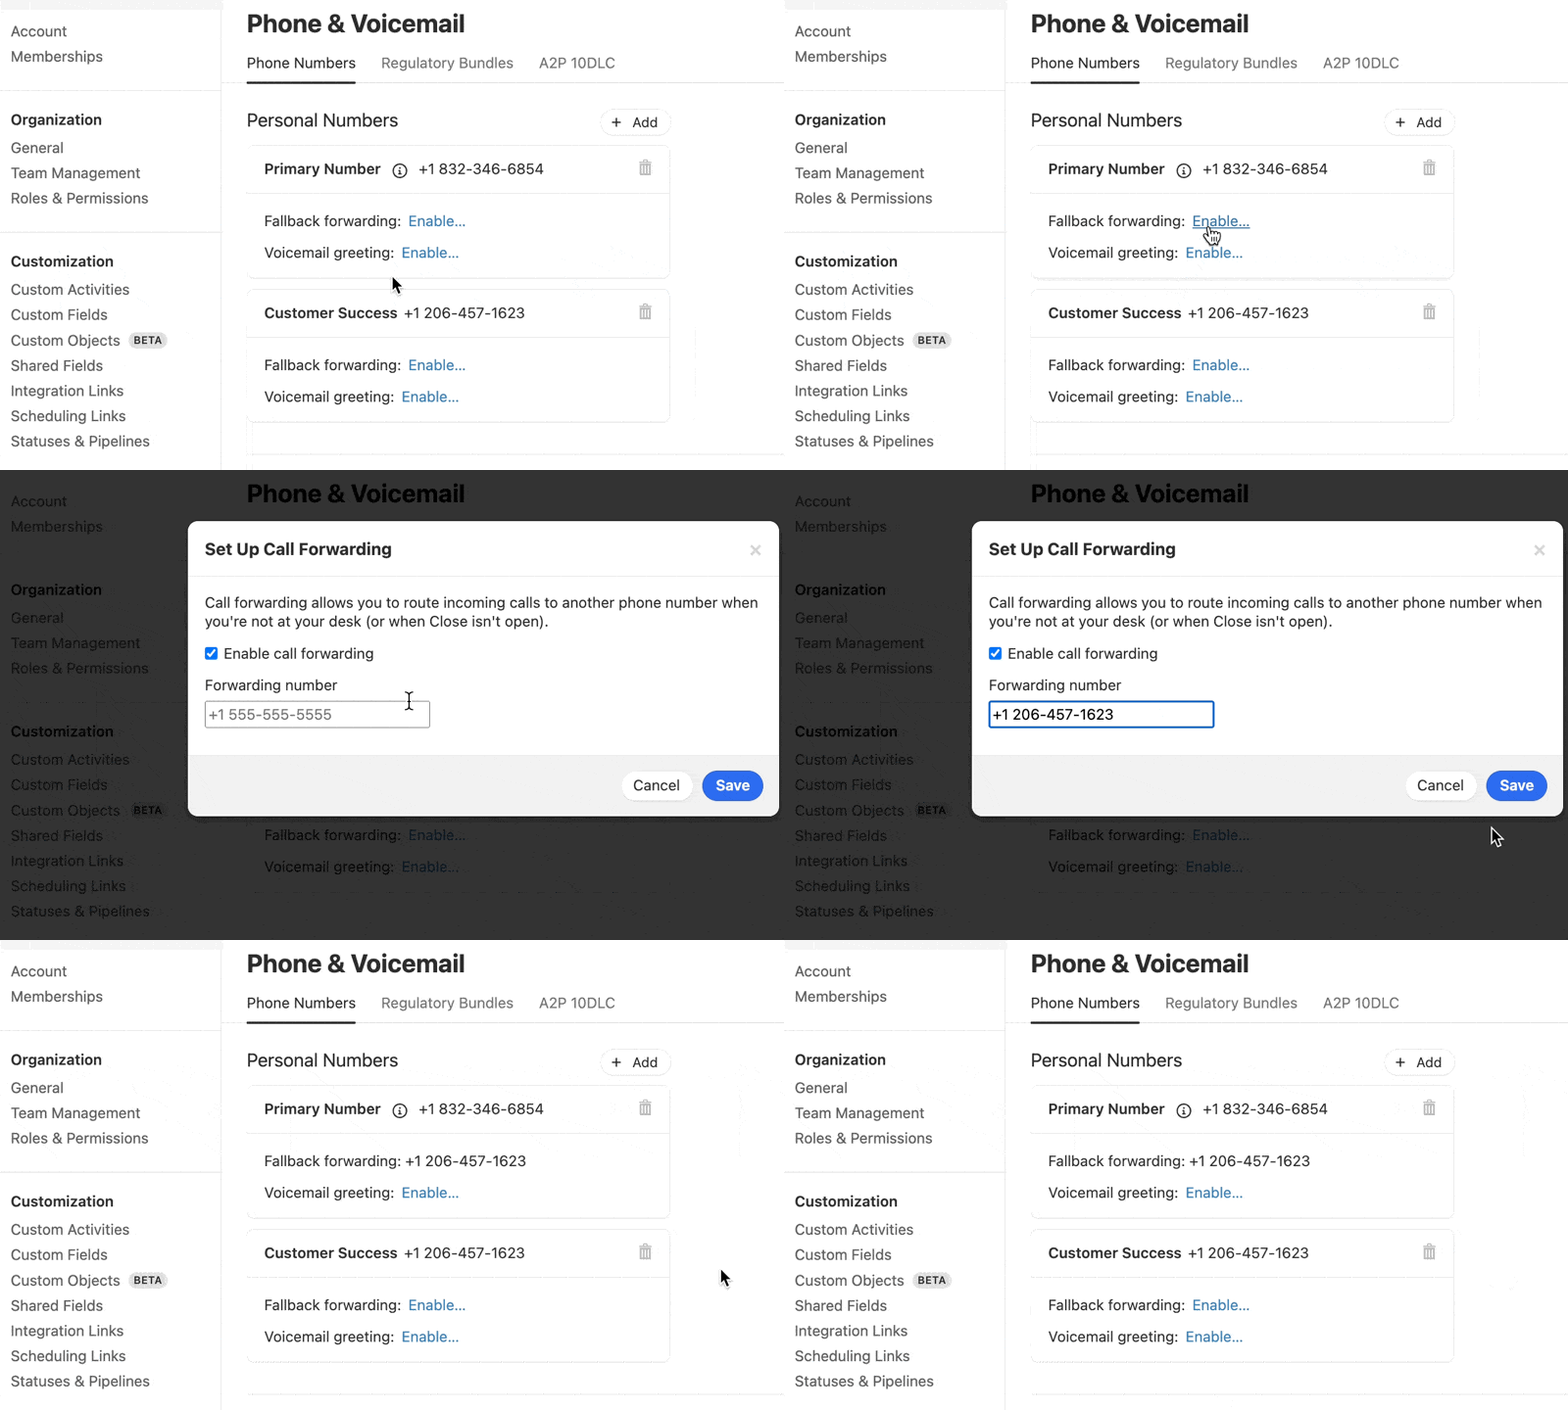
Call forwarding is available exclusively for Internal (provided by Close) and BYOC numbers. It’s not enabled for External-type numbers because you can’t get incoming calls in Close on those numbers to begin with.
If you are logged into Close at the time of the call or you have Receive Calls on this Device enabled in your Close mobile app, there will be a fixed ~25-second delay before the call is forwarded.