There are several ways to bring your Lead data into Close.
The first and most commonly used is Close's Lead Importer. Navigate to the Lead Importer by clicking your name in the upper right of Close, then choose Import data. Using the Lead Importer, you can import (and update) Leads from a CSV or XLSX/XLS (Excel format) file or perform a one-time data migration from an old CRM product/service.
Lead Importer
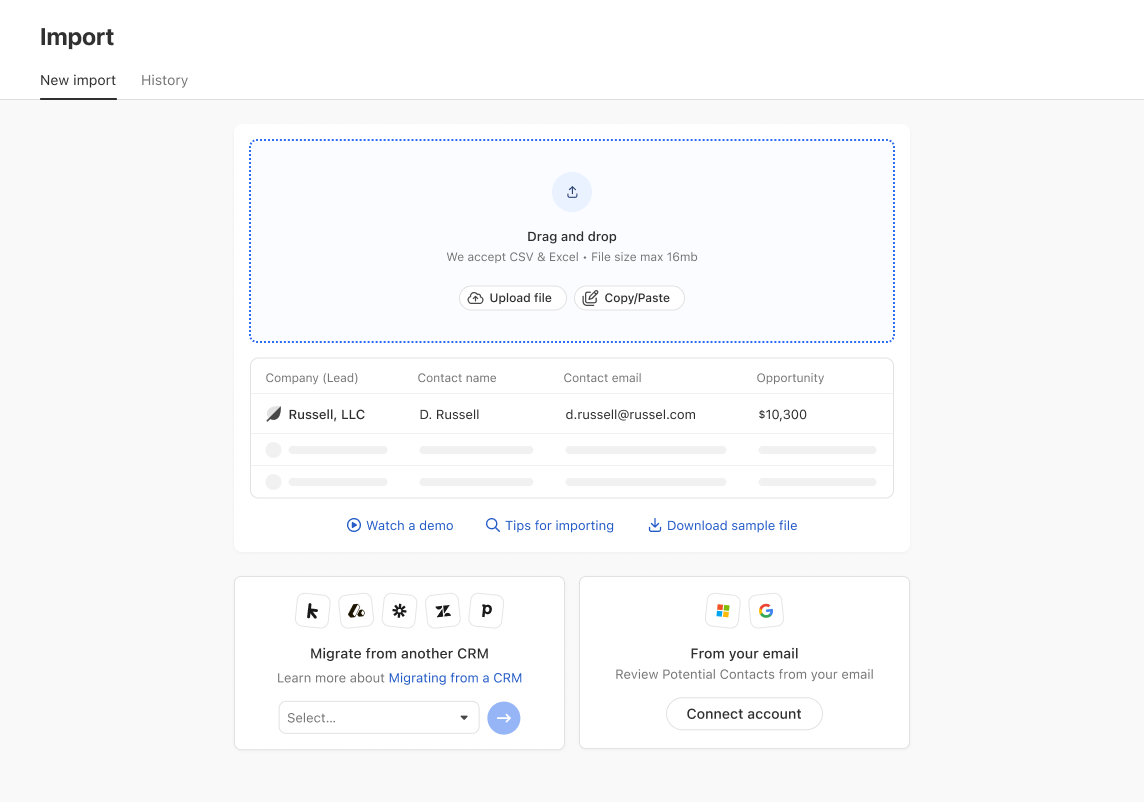
You can do the following to bring your Leads into Close from a file:
Upload via CSV by browsing that file on your computer
Dragging and dropping a file onto the Lead Importer’s landing page
Copy and paste directly from your spreadsheet
Formatting your File
Make sure your file is in either
.csvor.xlsx/.xlsExcel format (depending on which import option you choose).Ensure the first row in your spreadsheet is a header row (e.g., a row containing column names). Close will use those names to guess the appropriate field assignment automatically. You can always adjust the field assignment if needed.
To download an example
.csvfile, click here.Use
+country code prefix when importing phone numbers to ensure the correct dial code is added in. For example, instead of(833) 462-5673use+18334625673because+1is the dialing code for the US. If the country code is not specified, Close will fall back to the default country code set in your Settings > Account > Country field.There is a limit of 15MB per
.csvupload. Larger.csvfiles will need to be broken down and uploaded separately.You can’t currently import notes, calls, emails, SMS, and other non-lead data points through the Lead Importer. If this data resides in another CRM, consider using our CRM migration tool instead or email support@close.com for more help.
If you have a contact with multiple email addresses and/or phone numbers, use a semicolon
;to separate these values. (e.g.,busterbluth@bluthcompany.com; buster@bluthcompany.com)To update a multiple-choice custom field using the importer, place a semicolon
;between each "choice" in the same row. (e.g., If we had a multiple-choice custom field "Qualifications" for Tobias Funke:Analyst; Therapist).Use the yyyy-mm-dd (year-month-day) format for date-type custom fields; otherwise, ambiguous dates such as 04/08/2024 might get imported as either the 4th of August or the 8th of April. For example, if you want to import the date as 5th of February, 2024, make sure to enter it as 2024-02-05.
Assigning Fields
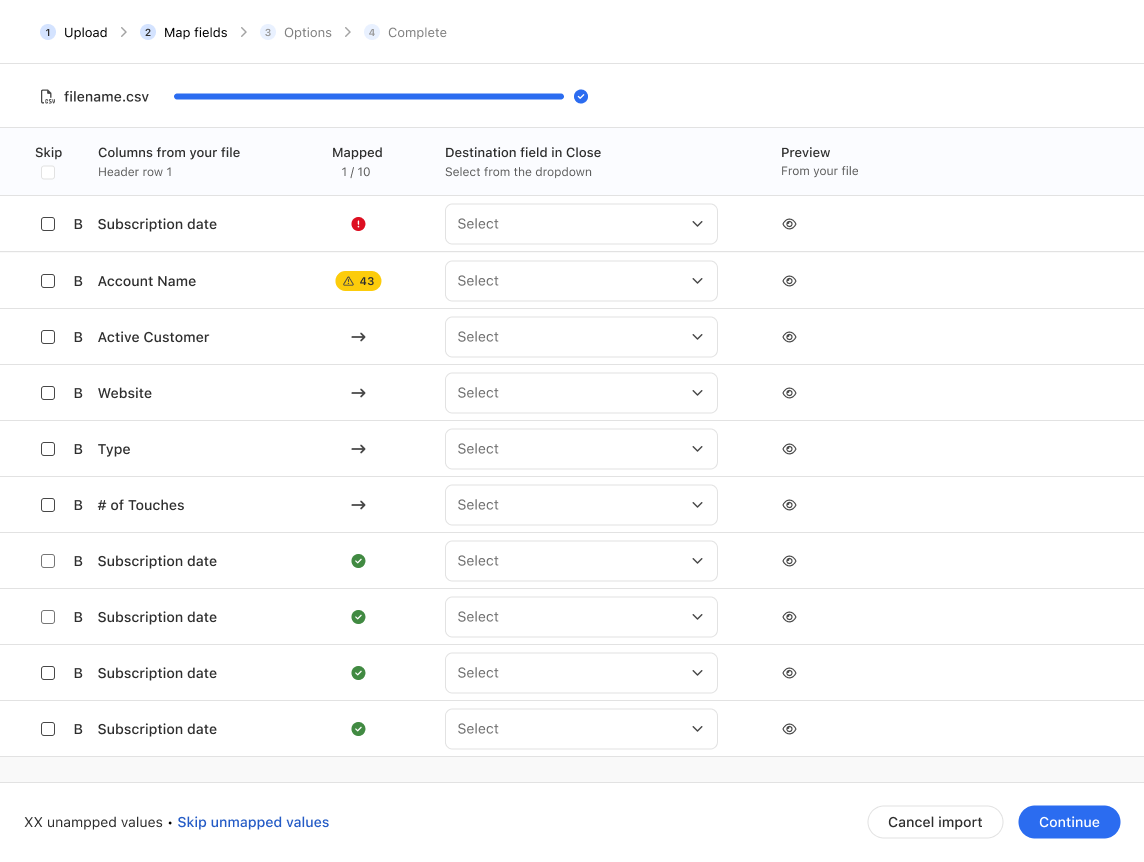
After you finish uploading your data, you must assign each column from your spreadsheet to a field in Close. In some cases, Close will recognize your column name and do the work for you. You'll also see a few preview rows from your spreadsheet so you can know what's in each column.
Custom Fields
If a column is a lead or contact custom field make sure to prepend the column name with custom. for Close to automatically assign the fields.
To assign the data from your spreadsheet to the right place in Close, use the dropdown under This column will be assigned to. The field will turn from blue to green once you've matched a spreadsheet column to a field in Close. If you don’t want to import a column from your spreadsheet, check the Skip option at the top right of the field box. Click Next to move on to the next page.
You also have the option to Skip All Unassigned Columns at the bottom of the screen.
When you assign fields, Close will automatically scan for errors and allow you to review and fix the errors directly in the importer. As an example, if you try to create new leads with a specific status like “Working” but that status isn’t an option isn’t a Status in your Close org yet, the importer will flag that as an error. When a field has an error, it will turn yellow. You can then click on Review to see and fix the rows with errors in that column.
Close Product Help: Creating Custom Fields from Columns
If you’re an Admin (learn more about Close's Roles & Permissions feature ) and Close couldn’t recognize some of the columns in your spreadsheet, they’ll show up as Custom Field suggestions.
If you choose to map a column to a Custom Field suggestion, Close will automatically create that new Custom Field when you start your import. These Custom Fields will be created as a “Text” type, but you can change that later in the Customizations settings. Learn more about Custom Fields.
Note: If you need to import a Lead Status or choices-type Custom Field, you will need to create these in Close before your import. Go to the Customizations section and make sure all the Statuses and Choices exist before proceeding with the import.
Grouping Contacts and Addresses
If you have contacts or addresses belonging to the same lead in multiple rows, you can group them together based on any column in your spreadsheet. Close automatically determines how many unique values each column contains and informs you how many leads all your rows would be grouped into. For example, if you have the following spreadsheet:
Company | Name | Title |
|---|---|---|
Bluth Company | Michael Bluth | michael@bluth.com |
Bluth Company | Gob Bluth | itsillusionsmichael@aol.com |
Bluth Company | Buster Bluth | buster@army.mil; buster@bluth.com |
And choose to group rows by “Company”:
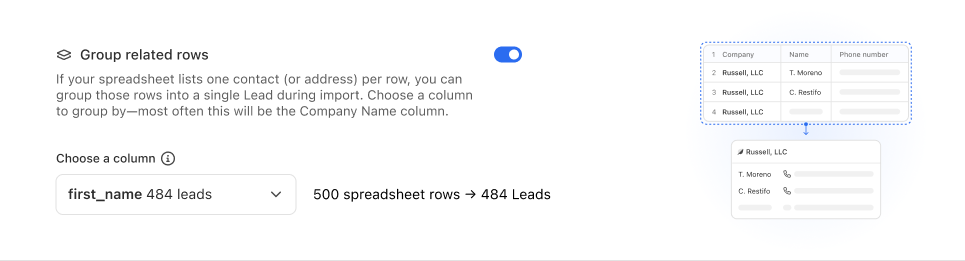
The end result will have each of your Contacts on appropriate Leads.
Close Pro Tip: Consider Your Data Organization When Importing
Are the Contacts/Addresses for each Lead all on the same row?
Then, choose '+ Add another Contact/Address' and decide which columns to map to.
Are the Contacts/Addresses pertaining to the same lead spread across multiple rows?
Then, group the rows together after you click 'Next'.
Note: Grouping options only contain columns that actually have some repeating values. If all of the values in a given column are unique, the grouping would have no effect on the end result. If all of the columns in your spreadsheet contain unique values, grouping options will not be available since the import outcome would not differ no matter which column you’d group by.
Remember: If your Grouped Contacts have different names but the same email or phone number, they will be merged into a single Contact by our importer. Ensure each Contact has a different email and phone number in their respective rows.
Duplicate Detection
The Lead Importer can check for existing leads, so you can prevent duplicates and update leads that are already in Close.
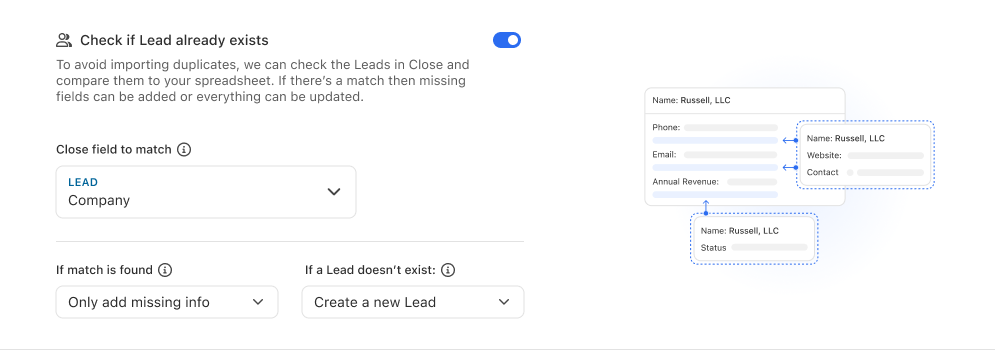
When you get to the “Options” step, you can check if Leads already exist by using one or multiple comparison fields. Comparison fields should be fields that have a unique value for each of your Leads (e.g. Company Name, lead ID, or a Custom Field containing your internal system’s customer ID). When the Importer runs, it will use the comparison field(s) to determine if each lead from your spreadsheet is a new lead or an existing lead. If an existing lead matches any of the selected fields, it will be considered a match.
From there, you can choose how you'd like the Importer to handle the leads that match based on the comparison field(s). You can:
Only add the missing information. (Information will only be added to blank fields.)
Replace the existing lead information entirely. (Note: this rewrites the lead data and cannot be undone .)
Skip the lead. (After the import, you'll get a spreadsheet with all your skipped leads for review.)
You can also select how you'd like the importer to handle non-matching leads. You can:
Create new leads. (Recommended if you want to import and update from the same spreadsheet.)
Skip new leads. (Recommended if you are trying to only update, rather than an import.)
Viewing Imported Leads
After you kick off an import, you can stick around to observe its progress or navigate away and see the status of the import later by going back to the bottom of the "Import Data" page and clicking on "View Summary" to view this imported list of leads.
Manual imports and imports from another CRM will not show on this page.
By default, this will only show your imports, but you can click on "View everyone's imports" to see imports performed by another user.
You can set up Roles & Permissions to limit your team’s ability to bulk edit, delete, or import Leads.
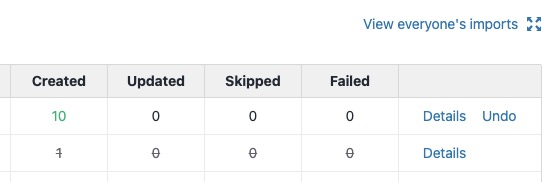
Click on "Details" to see your list of imported leads
When the import finishes, the summary page shows how many Leads were created, how many were skipped, and how many failed validation. You can then choose to:
Undo the import, deleting all of the Leads it created.
Download a CSV containing all of the rows from the original spreadsheet that were detected as duplicates and skipped.
Download a CSV containing all of the rows that failed validation (e.g. because it contained invalid phone numbers, emails, etc.)
Resolving Validation Errors
The CSV of Leads that failed validation contains all the columns that your original spreadsheet contained plus a Validation Errors column that explains which of the values are invalid and why. The CSVs of skipped and failed Leads are only available for 30 days from the time of the import.
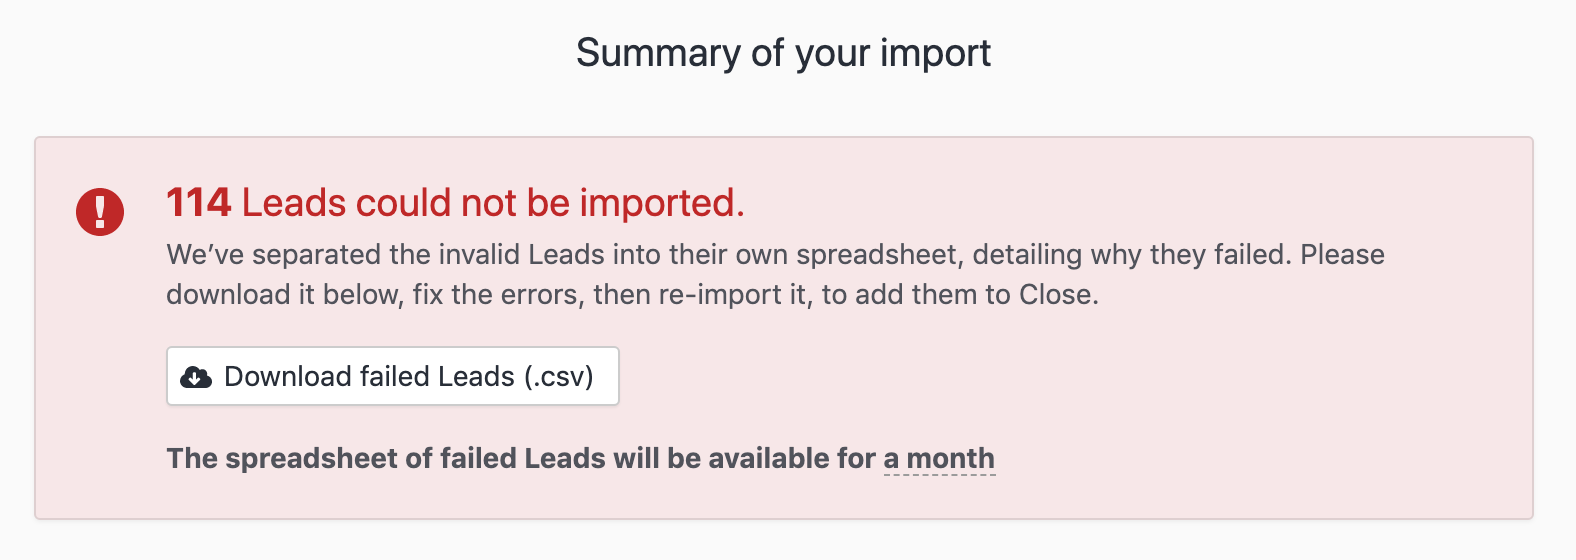
Download the CSV of failed Leads to see why they weren't able to be imported
If you are reverting an import, some leads might not have been reverted due to Lead changes after the initial import - see more here.
Reverting an Import
Mistakes happen. Sometimes, you'll perform an import that you'll want to revert.
There are a few ways to revert an import in Close, depending on how the import was performed:
Importing from a CRM:
If you would like to revert an import you created using our "Import from a CRM" feature, please email us at support@close.com.
Manually creating a Lead:
To delete a Lead you manually created, you can scroll to the bottom of that Lead's page and click on "Delete Lead".
Importing via CSV or Pasting from Excel:
Go to the
Import Datapage by clicking your name at the top left corner of the page.Open the
Historytab.Click on the
Undobutton to revert this import.
The History tab is useful for learning more about a given import, undoing it, viewing the Leads it created, or downloading a CSV file with the rows that failed to import due to invalid or duplicate data.
User permissions
Only users with the "Bulk Delete" permission can revert imports.
Lead was not reverted
If changes have been made to Leads since they were imported, they will not be reverted. That means if you imported a lead and then changed their name, sent an email, or performed any other activity on that lead - revert for that lead will be skipped.

Lead was not reverted error