You can import Opportunities from a file following the steps below.
Go to the Importer
You can do the following to bring your Leads into Close from a file:
Upload via CSV by browsing that file on your computer
Dragging and dropping a file onto the Lead Importer’s landing page
Copy and paste directly from your spreadsheet
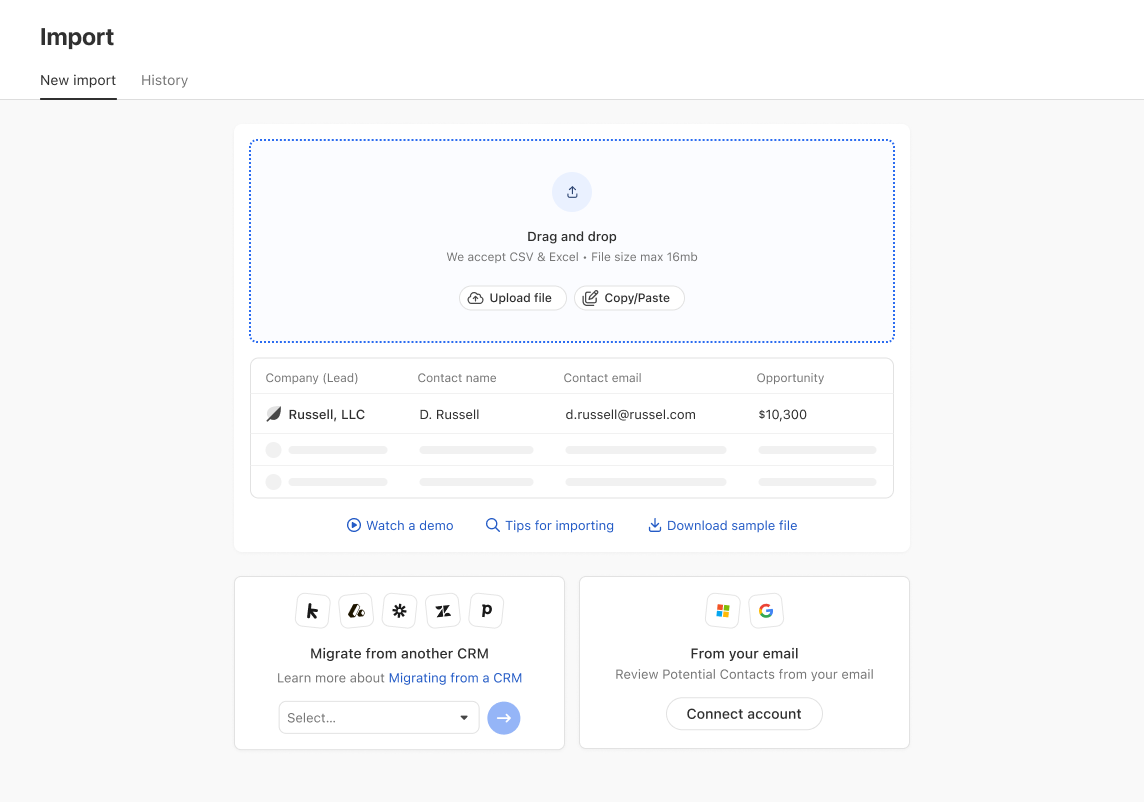
Format your import file
Make sure the first row in your spreadsheet is a header row (e.g., a row containing column names).
It has to contain one column that identifies the Lead, for example
Lead Name,EmailorPhone. This is how Close will identify the Lead to which the Opportunity belongs.It has to contain the Opportunity infromation in separate columns. You have to fill out at least one column to create a new Opportunity. The columns can be:
Status,Date Created,Date Won,Value,Value period,Confidence,NoteandUser
Make sure you have valid data in these fields:
Status: It should match any of the Opportunity statuses you have in your pipeline.Date Created: By default, if you don’t import this field, the Opportunity creation date will be the day of the import. You can import custom creation dates for reporting purposes.Date Won: This is the estimated close date of the Opportunity, or if it’s already in a “Won” status, it’s the close date. You can use this format to import dates:yyyy-mm-ddValue: This has to be a number.Value period: The options are:One-time,MonthlyorAnnua. If not imported, it will default to one time.Confidence: This is a percentage of how likely it is that the Opportunity will be won.Note: You can enter any note.User: The user you want the Oportunity to be assigned to. If not imported, the Opportunity, by default, will be assigned to the importing user. Use the user’s name or email address.
Assign Fields
After you finish uploading your data, you must assign each column from your spreadsheet to a field in Close. In some cases, Close will recognize your column name and do the work for you. You'll also see a few preview rows from your spreadsheet so you can know what's in each column.
To assign the data from your spreadsheet to the right place in Close, use the dropdown under This column will be assigned to. The field will turn from blue to green once you've matched a spreadsheet column to a field in Close. If you don’t want to import a column from your spreadsheet, check the Skip option at the top right of the field box. Click Next to move on to the next page.
You also have the option to Skip All Unassigned Columns at the bottom of the screen.
When you assign fields, Close will automatically scan for errors and allow you to review and fix the errors directly in the importer.
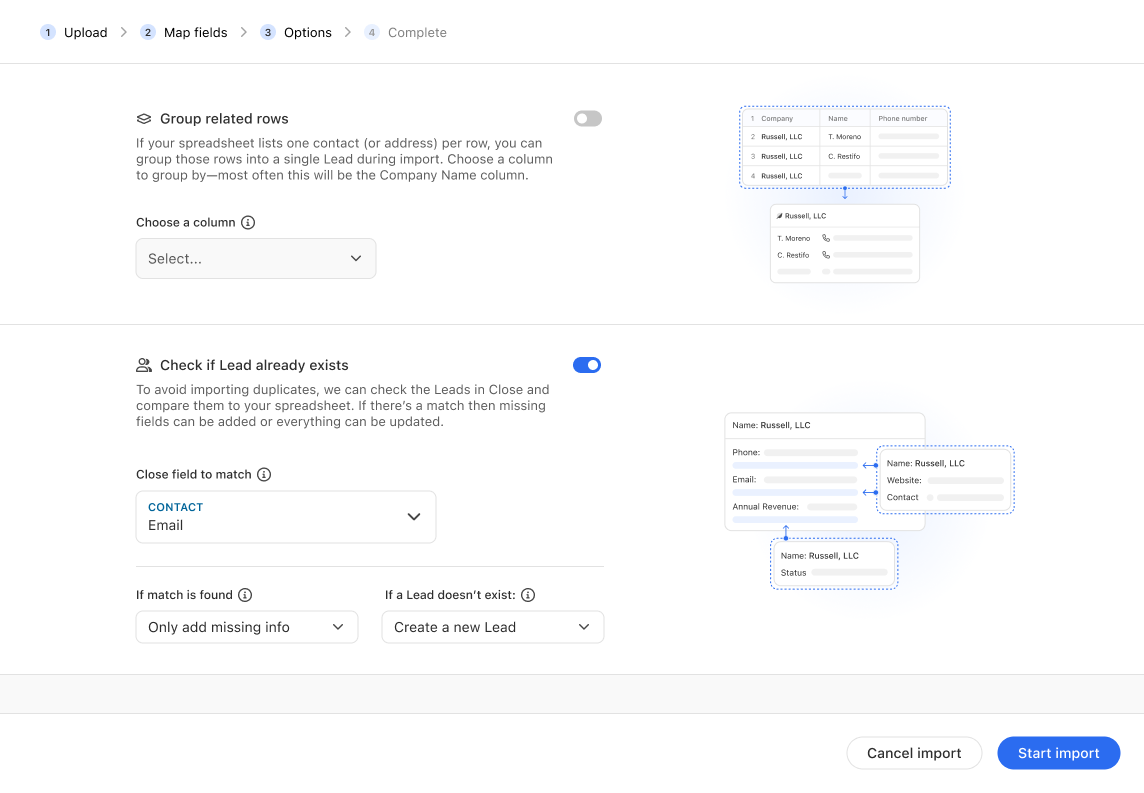
Assign Opportunities to an existing Lead
In your import file, you have added a column to identify the lead. Make sure to use that infromation to “Check if the Lead already exist.” This will ensure that the Opportuity will be created on the correct Lead.
If you only want to import Opportunities and nothing else, choose “skip the Lead” if it does not already exist.

Customize your import like this to import Opportunities