Close MCP Server
Model Context Protocol (MCP) servers provide a standardized interface that allows any compatible AI model or agent to access your Close data in a simple and secure way. Below are instructions for adding Close’s MCP server to commonly used clients.
Accessing Close’s Remote MCP Server
The MCP server URL is https://mcp.close.com/mcp and has “HTTP Streamable” and “OAuth 2.0 Dynamic Client Registration (DCR)” support. We recommend accessing the MCP server via OAuth 2.0 using a supported MCP client (ex: Claude, ChatGPT, Cursor, etc).
If you prefer to interact with the MCP server using a custom setup, create an OAuth application to authenticate using OAuth 2.0 or authenticate using an API key and include the following Headers in your request:
Close-API-Key:{{ Your Close API Key }}Close-Scope:{{ mcp.read, mcp.write_safe, or mcp.write_destructive }}
The Close-Scope header determines the scope and available tools. mcp.read is read-only, mcp.write_safe can read and write data, and mcp.write_destructive can read, write, and delete data in the Close organization.
For more information on which tools are available for each scope, click here.
ChatGPT
The official Close ChatGPT app is available here.
Claude
Close’s MCP server is an officially supported across the Claude ecosystem. Watch this video to learn more about connecting to Claude to Close and see some example use cases:
Claude (Web, Desktop) - Paid plans
Connectors requires a Claude paid plan
In order to access Claude’s Connectors library that includes Close, you must be on a paid plan.
- Navigate to Settings by clicking your name in the bottom left sidebar on web or desktop.
- In the Settings sidebar select Connectors, then Organization connectors.
- Find and select the Close connector, then click Connect.
- Grant access to your desired Close organization and scopes.
- Make sure to enable the tools in any new chats.
Claude (Desktop) - Free plan
In a few steps, you can access Close’s MCP server on the Claude desktop app on any plan:
- From the chat window, click the + button > Add Connectors (Manage Connectors > Browse Connectors if you already have existing connections) > Search and select “Close” in the “All” section.
- Click “Connect”, which will route you to Close’s OAuth page, where you can select the organization and permissions for the connection.
- Return to Claude and start using the connection in the chat.
Note: You can toggle the connection on and off in the same location (Chat window > + > Connectors). Make sure it is toggled on or you will not have access to the tools.
Claude Code
-
Open your terminal and run
CLOSE_API_KEY=YOUR_API_KEY, replacingYOUR_API_KEYwith your Close API Key. -
Run the following:
- If you want to set up MCP for multiple organizations, you can give this a more specific name like “close-your-org-name” instead of “close” so that you can distinguish the servers from one another.
- Optionally, change
mcp.readtomcp.write_safeormcp.write_destructiveto increase the scope.
-
Launch a Claude Code session with
claudeand type/mcpto verify Close MCP was set up.
See Claude Code MCP Docs for more information on using MCP servers with Claude Code.
Other MCP Clients
n8n
You can use n8n’s “AI Agent” node to set up a chatbot with read access to your Close Organization.
-
Create a new Workflow and add “Chat Trigger” as your first step.
-
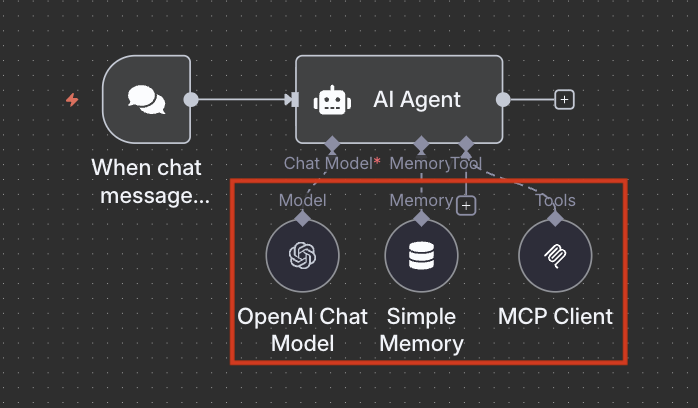
Add an “AI Agent” node as your second step:
-
The AI Agent node has three components:
- Chat Model — The LLM of your choice (n8n supports all of the major LLM providers)
- Memory — Memory allows a model to remember and reference past interactions with it. While it is not required, we recommend n8n’s “Simple Memory,” which requires no setup.
- Tool — This is where you will connect to Close’s MCP server.
-
Connect the Chat Model and Memory options of your choice, and then add the “MCP Client Tool” node under Tool.
-
-
For the MCP Client Tool node, use the following configuration:
-
Endpoint:
https://mcp.close.com/mcp -
Server Transport: HTTP Streamable
-
Authentication: Header Auth
Create a new Header Auth Credential in your n8n account with the following:- Name:
Close-API-Key - Value:
{{ Your Close API Key }}
- Name:
-
Tools to Include: All
-
-
Start chatting with your new AI Agent in the “Chat” window at the bottom left of the Workflow Editor:
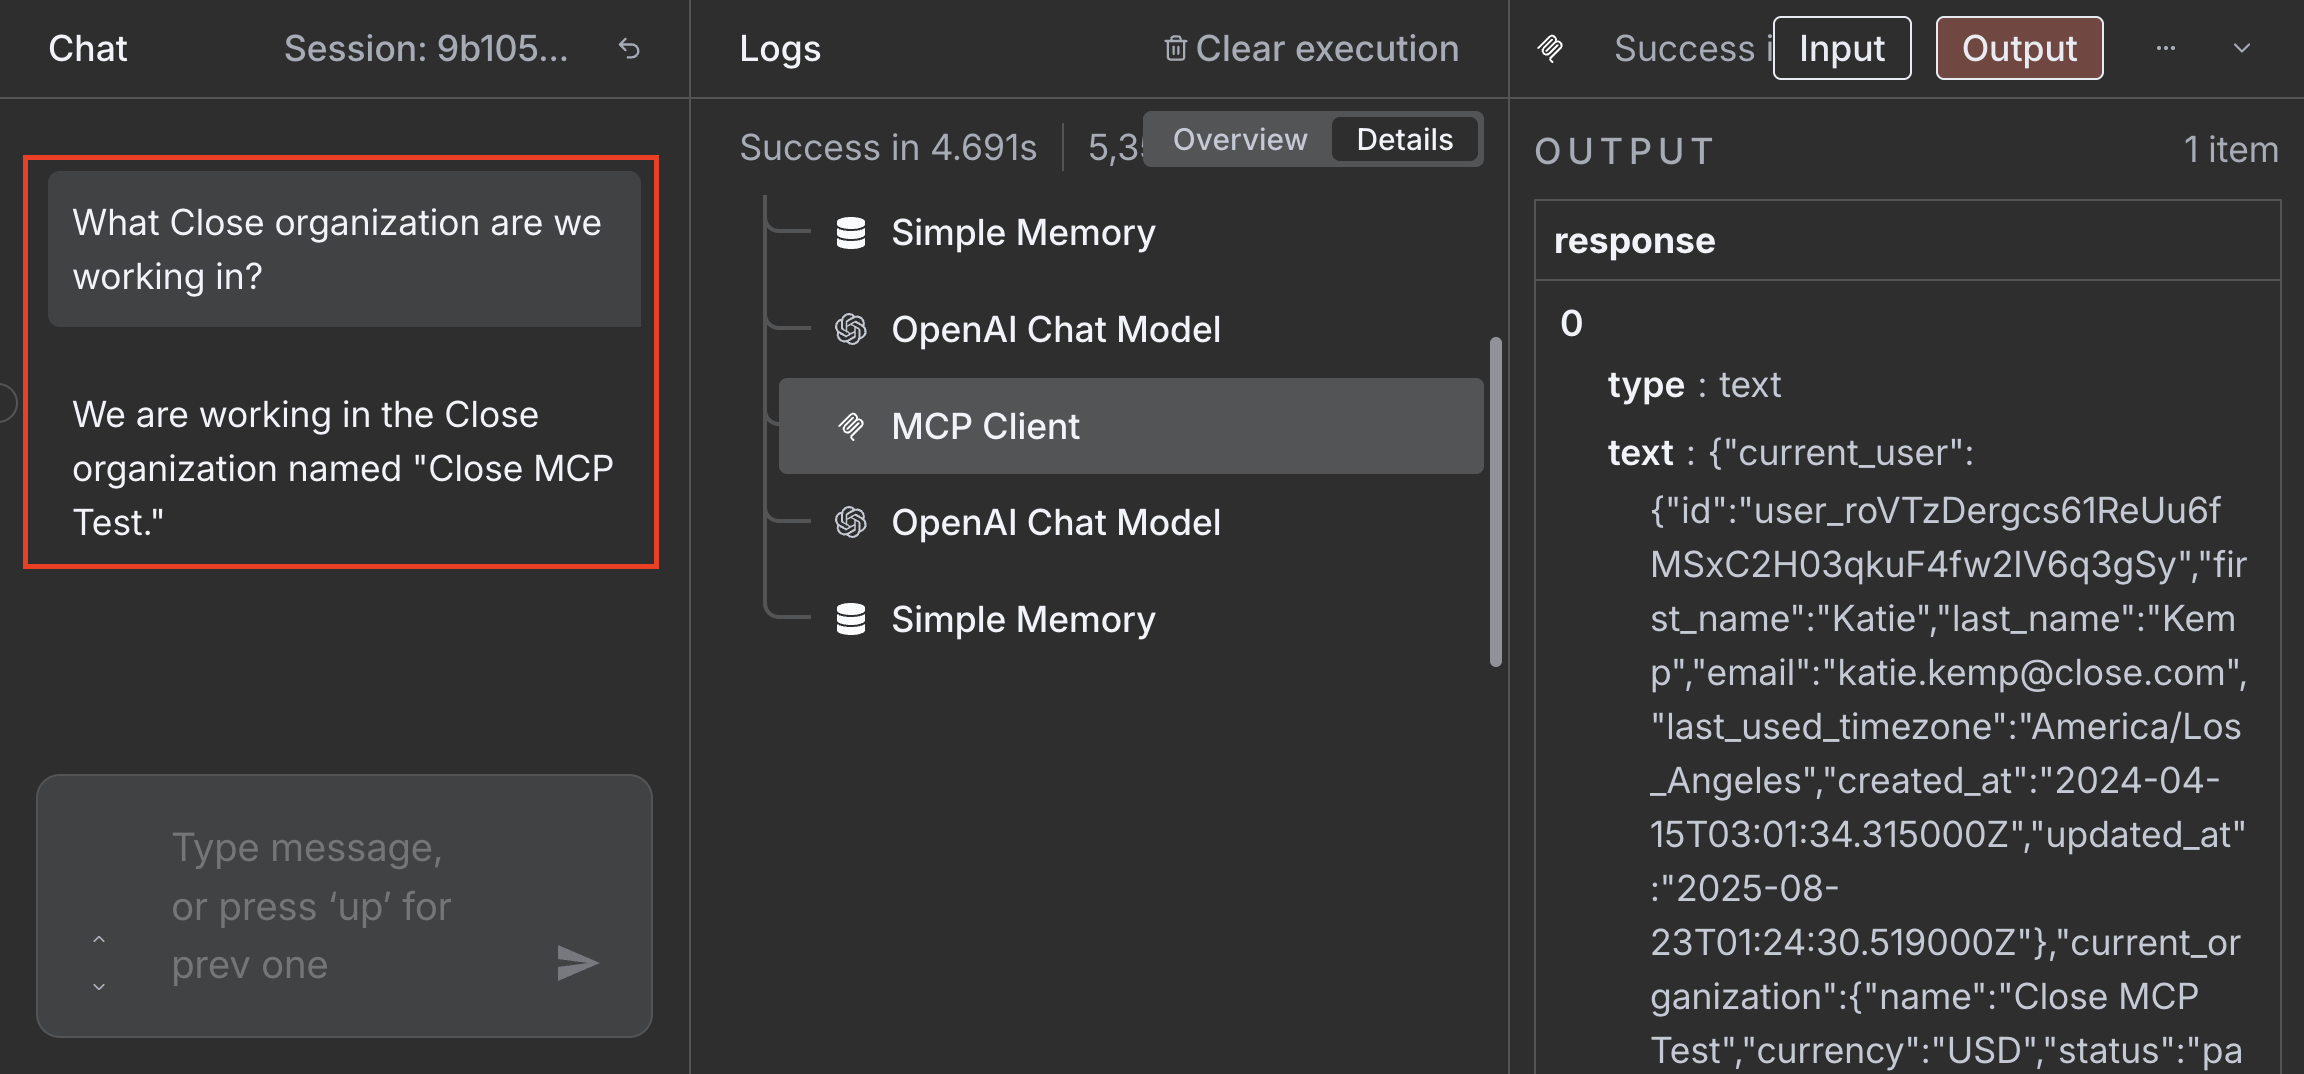
⚠️ Please note that n8n only supports the mcp.read scope at this time.
Cursor

-
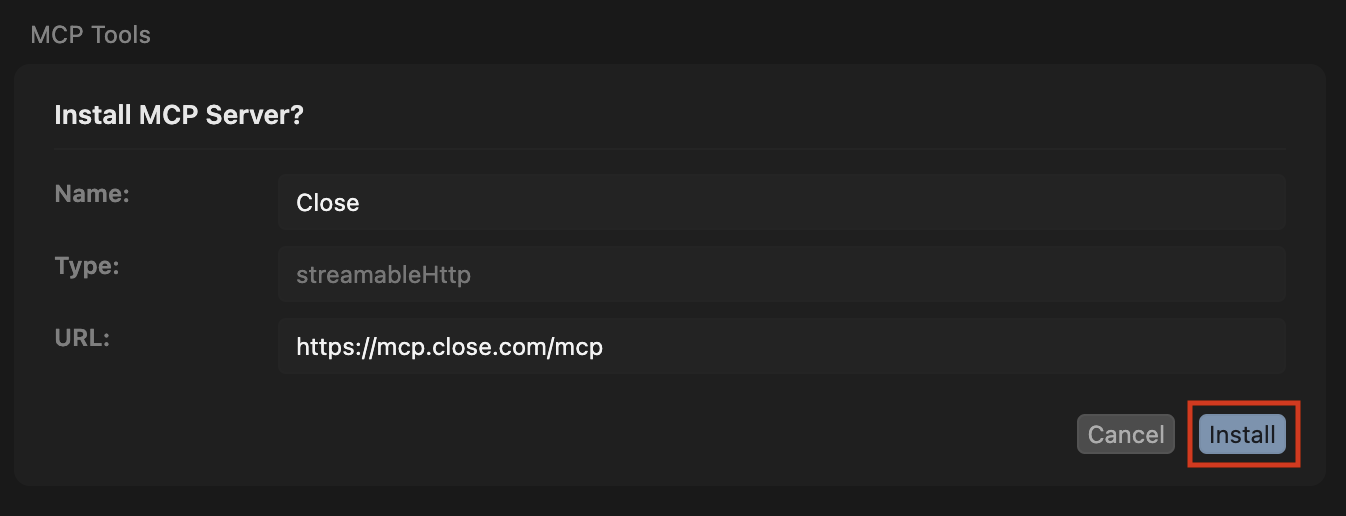
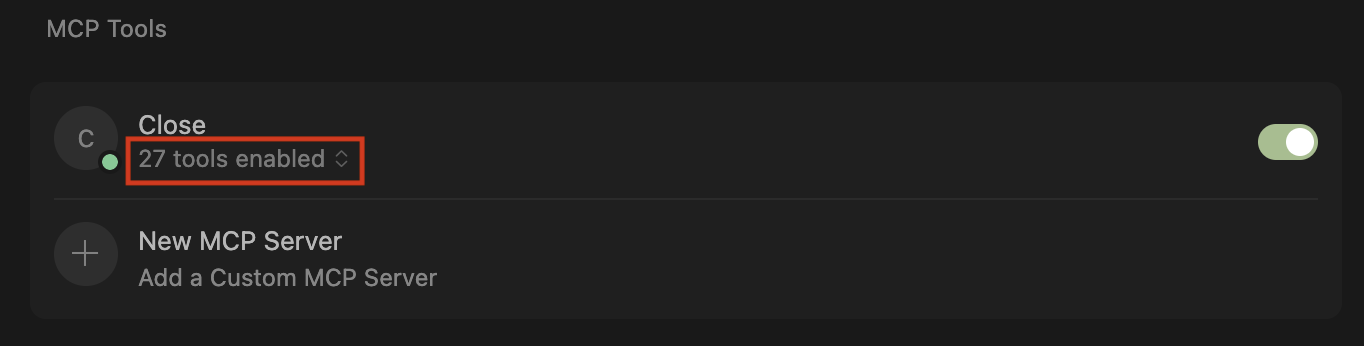
After clicking the “Add to Cursor” button above, you should see the Close MCP Server listed in MCP Tools in the Cursor desktop app. Click “Install”:
-
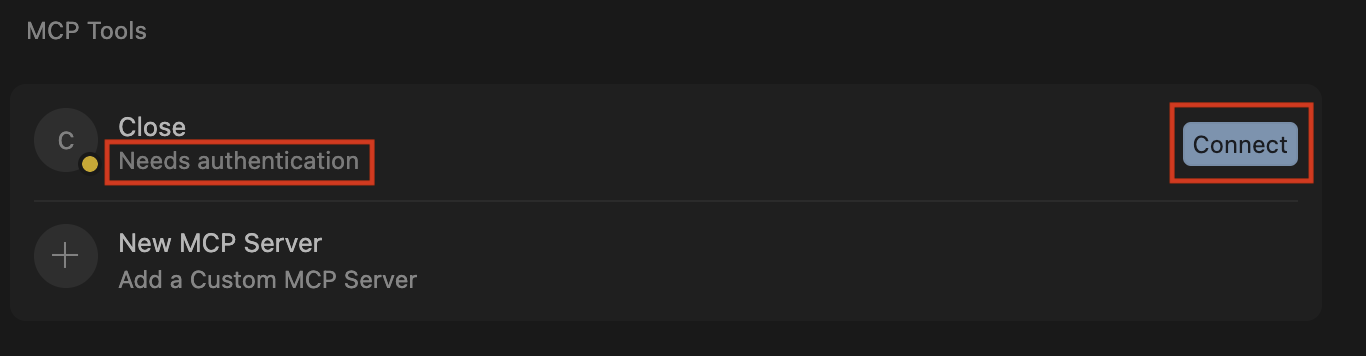
The connection will be in the “Needs authentication” status. Click “Connect” and allow the Cursor app to direct you to the Close OAuth Authentication Page:
-
Select the correct Close Organization and scope for your use case and click “Allow”:
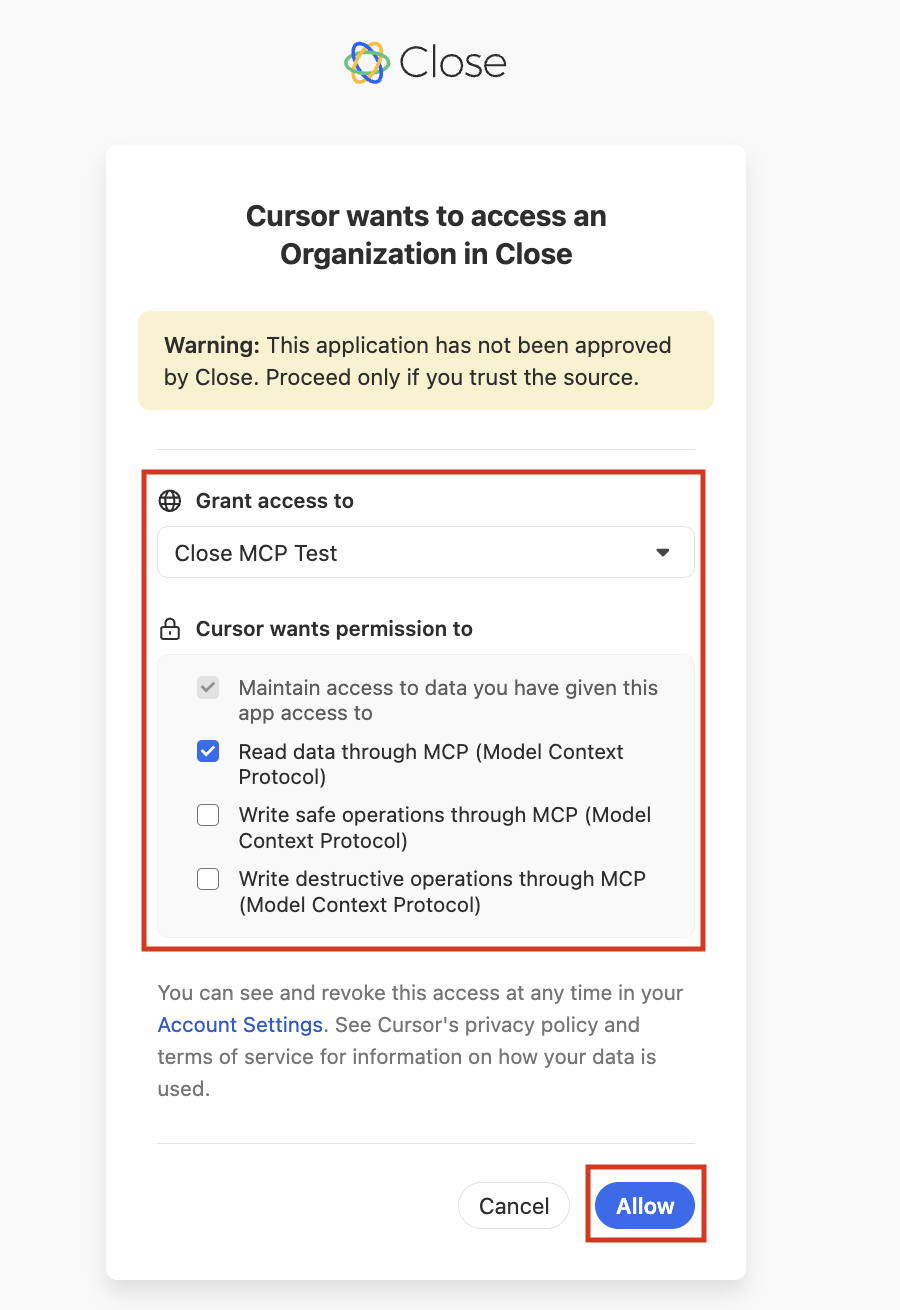
-
Return to the Cursor app. You should see that the connection is now “Loading Tools” or “Enabled”:
VSCode
Step 1
Add the following to your settings.json :
This will add a read only MCP server to your VSCode. You can also change Close-Scope to mcp.write_safe or mcp.write_destructive to increase the scope. Alternatively, you can add the snippet to your mcp.json file for workspace-level server access.
Step 2
Use the command palette (Mac: Cmd+Shift+P, Windows: Ctrl+Shift+P) to list the MCP servers, select close-remote-mcp, and click “Start Server.” Enter your Close API Key when prompted:

If the server is not in the list, use the command palette to “Reload Window.”
The console will confirm that the server is connected:

Step 3
Start using the server!
With Copilot: Open the sidebar (Mac: Cmd+Shift+I, Windows: Ctrl+Alt+I) and switch to agent mode. You can click the tool icon to list the available tools. Ask Chat what Close Organization you are working in and you should see that it uses the server you selected to run Org Info and return information
FAQs
Does Close MCP support SSE?
We currently don’t support SSE, but please email support@close.com with your specific use case and MCP client details if this is something your team requires.
What tools does the MCP server have access to?
For more information on which tools are available for each scope, click here.