Getting started
Create your Mailgun account
- Create an account with Mailgun. Mailgun offers 5,000 free emails per month for 3 months on their lowest
Flexplan. Beyond that, you'll need to pay for email sending from $0.80 / 1000 emails or upgrade to a higher plan. - Activate your Mailgun account. Open the Mailgun activation email you received in the email account you used for signup and follow the instructions provided.
Adding your email domain name to Mailgun
- In Mailgun, go to Sending > Domains > click the Add New Domain button – or click here.
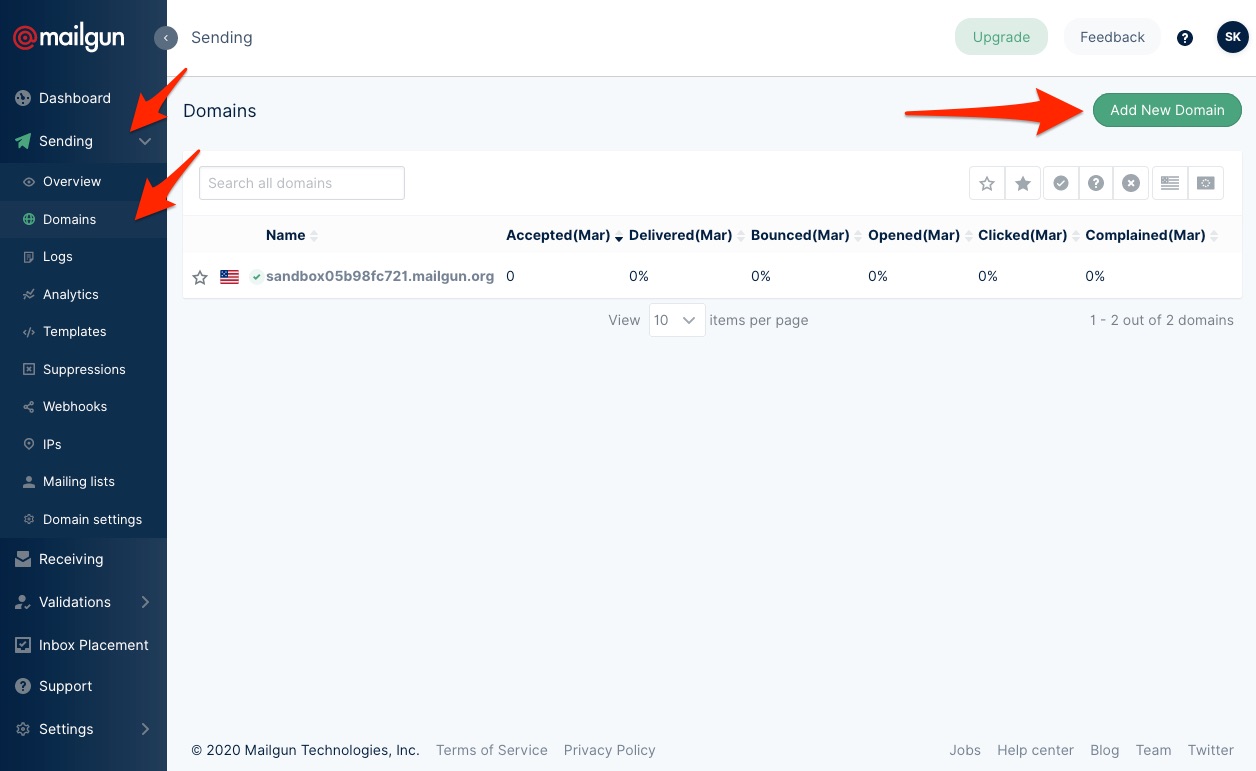 In Mailgun, go to Sending > Domains > click the Add New Domain button
- Add your domain name. If your email is
bob@mycompany.com, then your domain name is everything after the "@" symbol -mycompany.com. It's a good idea that you use a subdomain such asmailgun.mycompany.com- see more info here. You will still be able to send emails from your regularmycompany.comdomain. - We recommend checking the box
Create DKIM Authorityand selecting the option for2048DKIM key-size for increased security.
Some DNS providers may have an issue with 2048-bit DKIM keys, as they produce a TXT string longer than 255 characters (exceeding the maximum character limit for a DNS entry). In that case, reach out to their Support Team to see how to split one long TXT string into multiple smaller ones, or simply use 1024 DKIM key-size that will have fewer characters.
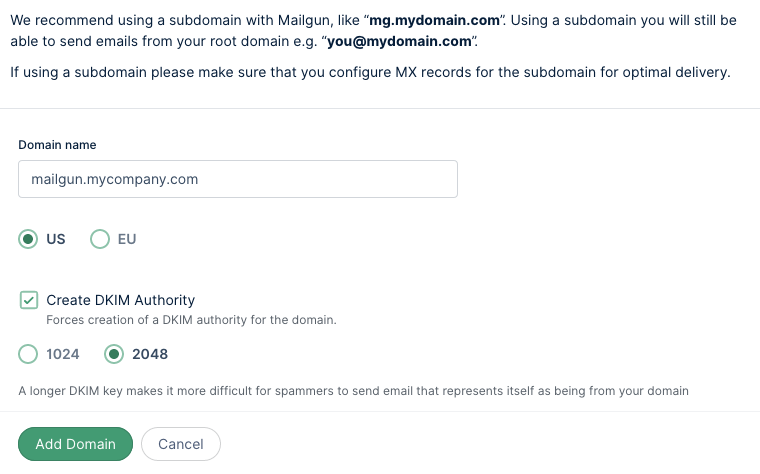 Add your domain name, select your nearest region, and select the appropriate DKIM key bit-size.
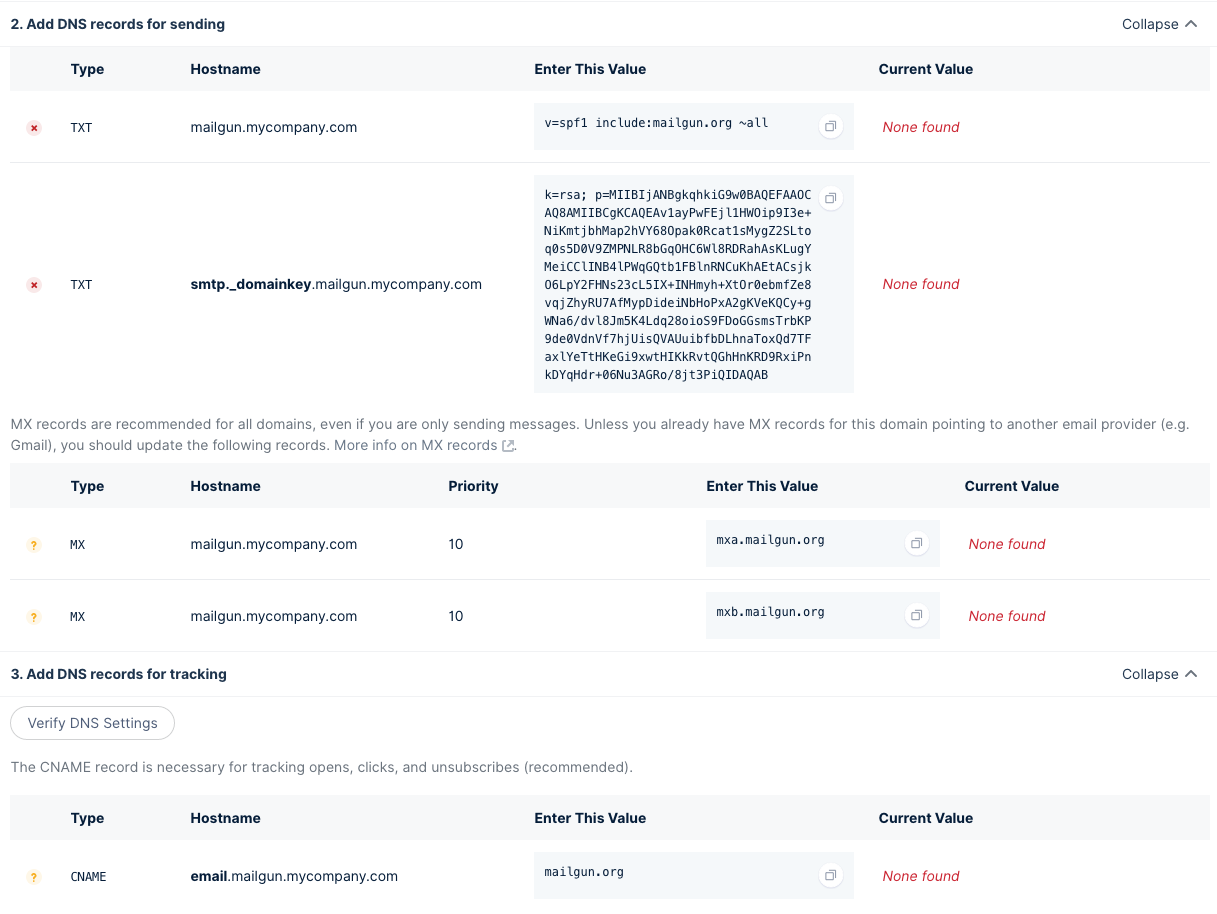
- On the following page, save the list of DNS records using the
Print/Savebutton toward the top right. Keep this tab open for easy copy-paste. Example:
Adding the DNS entries
Log into your domain registrar/host and navigate to the DNS settings
Pro Tip: Follow the links to see guidance on adding new DNS recordsRevisit the You'll Need Your Domain Host Credentials section and click on the various domain hosts listed for examples of modifying DNS entries.
Create the
TXT recordforSPF. If you don’t already have aTXT recordwith a SPF value listed, you can use what Mailgun provided. If you already have aTXT recordwith an SPF value, you’ll need to modify it to match this format:v=spf1 include:mailgun.org all include:YOURDOMAINEMAIL.com all- replacing the all-CAPs portion to represent your domain name. Do not forget to enter the rightHostname
field (if you added your domain as a subdomain in previous step).Create the "domainkey" DKIM TXT record Mailgun listed
If you already have MX records listed, do not add the Mailgun-provided MX records.
Add the CNAME record Mailgun provided.
Save your DNS changes.
Back in Mailgun, click the
Verify DNS Settingsbutton.
After you save your DNS records, it will take approximately 24-48 hours to propagate them globally.
Configuring Close to work with Mailgun's SMTP
- Once your DNS settings are verified (usually 24-48 hours later), log into your Mailgun account in your web browser
- Go to
Sending > Domains > Click your domain name
to use that domain name - Go to
Sending > Domain settings > SMTP credentials - Here, you'll see your current SMTP login details - keep this info handy for the following steps!
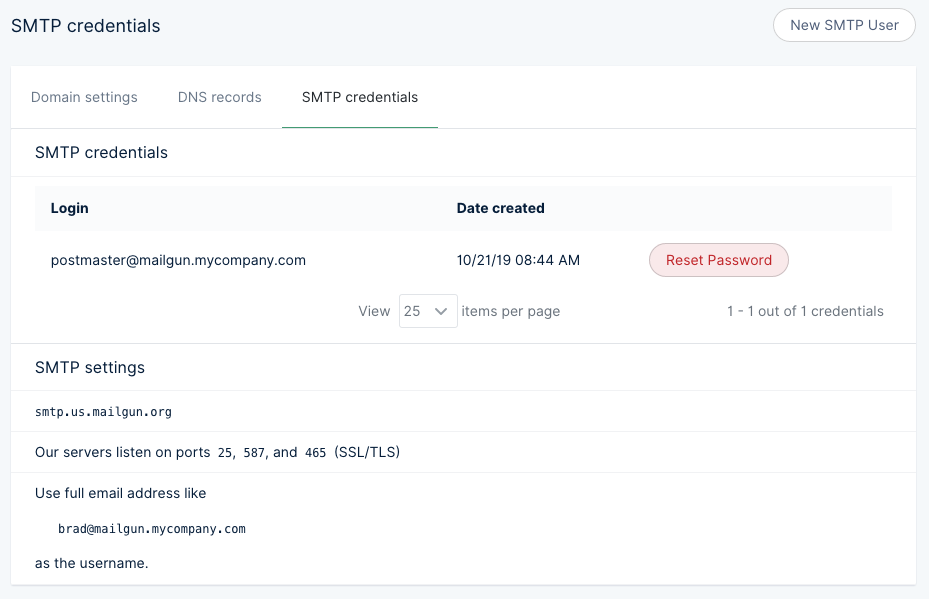 Example SMTP information
 - Open the Close app and navigate to
Settings > Accounts & Apps > + Add account > Custom Email, enter yourLoginemail, pressContinue, and on the screen below toggle offEnable email syncingoption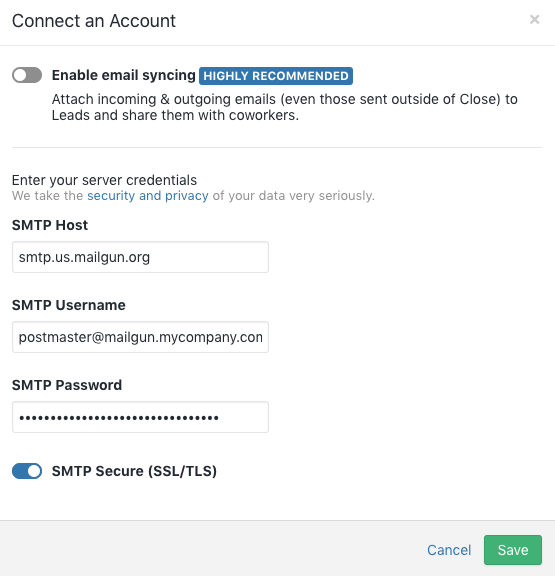 Click "Custom Configuration" and toggle off "Enable email syncing"
 - Enter your SMTP details you noted in step #4 above and then click
Save
Testing it out
You should have a Custom server in your Connected Accounts:
 Custom SMTP Server in Connected Accounts
Go to a lead and try to send a new email using your Mailgun custom server by changing the From field:
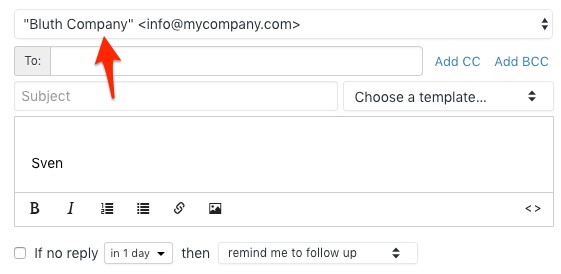 Changing From email address
If needed, you can change name/email from which you are sending by going to Close app > Settings > Accounts & Apps > Custom server > Add a From Address - just make sure to provide the correct domain. For example, if you've connected mailgun.mycompany.com then your email address alias must be something@mailgun.mycompany.com.
Adding Unsubscribe Links
Most countries have specific laws that specify how you may utilize bulk email. You're responsible to abide within the applicable regulations, but an honorable (and recommend!) first step is to enable the option to unsubscribe from future emails. This will also help with keeping your email domain off of globally-monitored black lists.
You can add %unsubscribe_url% to the bottom of any email templates you'd like to bulk message and Mailgun will rewrite the message to include an unsubscribe link and manage the process of not sending emails to people who have opted-out. More details at Tracking unsubscribes via Mailgun.
Bounces in Mailgun
For bounced replies, Mailgun automatically handles them and doesn’t send a copy to your inbox. Mailgun sends all bounced reply emails to a random bounce email address (e.g. bounce+5b6b50.9df4bb-user=domain.com@mycompany.com) on the authenticated domain that doesn’t actually exist. That way, Mailgun can track bounces and you don’t have to deal with noise in your inbox. On the Close end of things, we will ultimately only reflect what is shown in your Gmail inbox.
To get insight into the bounces, Mailgun provides an exportable list of all bounced email addresses that you can use to update your information in Close using our Importer. It's also possible to create an integration between Mailgun and Close to update the information automatically using our third-party integration, Zapier.
There are a few different ways you can automatically update the information in Close. You could change the lead's status, add a note to the lead, change a field within the contact, etc. We recommend using Zapier to create a Mailgun Trigger for New Bounce Event with a Close Search step of Find Lead, then a Close Action step of Update Lead and then changing the status of the Lead to something like "Bounce."
 Sample Zapier workflow to update Lead status when there is a new Mailgun bounce event
For questions on setup, you can reach out to support@close.com.