Mailgun is one of the dedicated email services Close supports for bulk sending. This article covers account setup, DNS configuration, and connecting Mailgun's SMTP server to Close.
For background on why you might need a dedicated email service, see Dedicated email servers. For the deliverability standards your bulk sending must meet, see Requirements for bulk email senders.
Create your Mailgun account
Sign up at mailgun.com. For current pricing and free-tier limits, see Mailgun's pricing page.
Activate your account by following the link in the activation email Mailgun sends after signup.
Add your sending domain to Mailgun
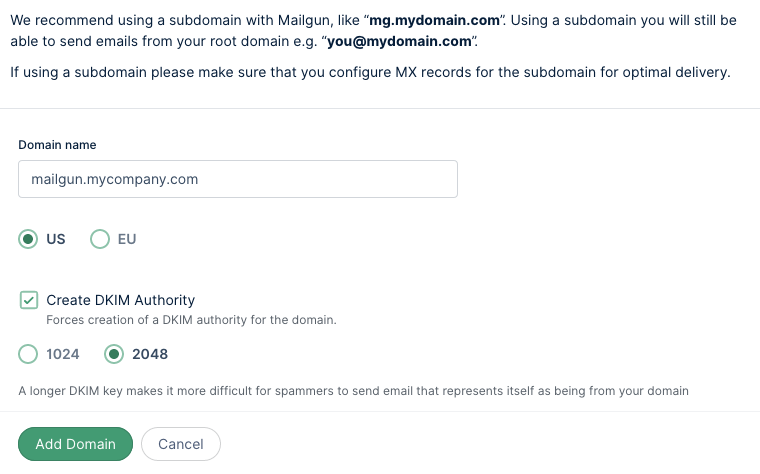
In Mailgun, go to Sending > Domains and click Add New Domain.
Your domain name is the part of your email address after the @. For bob@mycompany.com, the domain is mycompany.com. Mailgun recommends using a subdomain (such as mailgun.mycompany.com) for the sending domain. Your regular mycompany.com mail continues to work.
When prompted, check Create DKIM Authority and select 2048 for the DKIM key size. On the next page, save the list of DNS records Mailgun provides, as you'll add them to your domain's DNS in the next step.
DKIM Length
Some DNS providers can't handle the 255-character-per-string limit that a 2048-bit DKIM key generates. If yours errors, ask your DNS provider how to split the long TXT string into multiple shorter ones, or fall back to a 1024-bit DKIM key.
Add the DNS records to your domain
DNS setup requires administrative access to your domain host (GoDaddy, Namecheap, Cloudflare, etc.). Incorrect DNS changes can break your domain's email and web services; if you're not familiar with DNS administration, have your IT team make these changes.
From the records Mailgun provided:
SPF TXT record. If you don't already have an SPF record, use what Mailgun provided. If you have an existing SPF record, modify it to include Mailgun:
v=spf1 include:mailgun.org include:YOURDOMAIN.com ~all. Replace the all-caps portion with your domain. Set the right hostname if you set up Mailgun on a subdomain.DKIM TXT record. Add the
domainkeyTXT record Mailgun provided.CNAME record. Add the CNAME record Mailgun provided.
MX records. Skip these if you already have MX records configured for your domain. Adding Mailgun's MX records on top of existing ones will break inbound mail.
Save your DNS changes, then back in Mailgun click Verify DNS Settings.
DNS changes take 24-48 hours
Changes take 24 to 48 hours to propagate globally. If Mailgun reports the records as not yet visible, verify again the next day.
Configure Close to use Mailgun's SMT
Once Mailgun verifies your DNS:
In Mailgun, go to Sending › Domains and click your domain.
Go to Domain settings › SMTP credentials. Note the SMTP host, port, username, and password.
In Close, go to Settings › Accounts & Apps › + Add account › Custom Email.
Enter your login email and click Continue.
Toggle off Enable email syncing.
Click Custom Configuration and enter the SMTP credentials from Mailgun. Save.
After connecting
Send a test email from Close to confirm the connection works. Mail sent through Close now routes via Mailgun's SMTP and counts against your Mailgun plan's sending limits rather than your email provider's daily cap.
For deliverability best practices including monitoring sender reputation and warming up new sending domains, see Email deliverability.