This guide will show you how to create user custom fields and various ways to handle lead assignment in Close.
Lead Assignment Overview
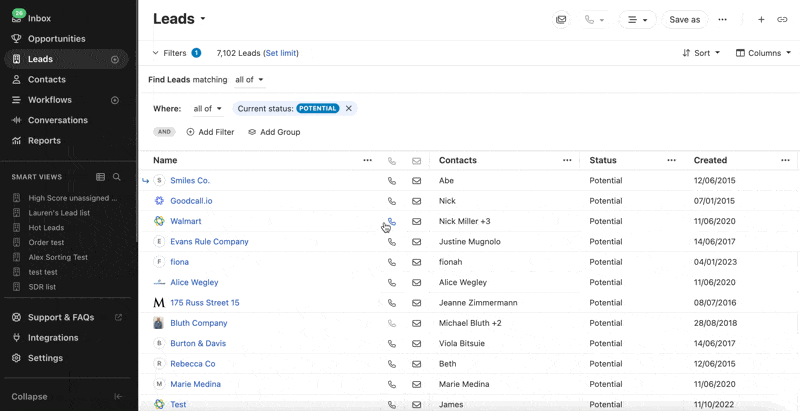
Lead assignment in Close is best handled through a custom field that is added to each lead with the team member that currently owns that lead.
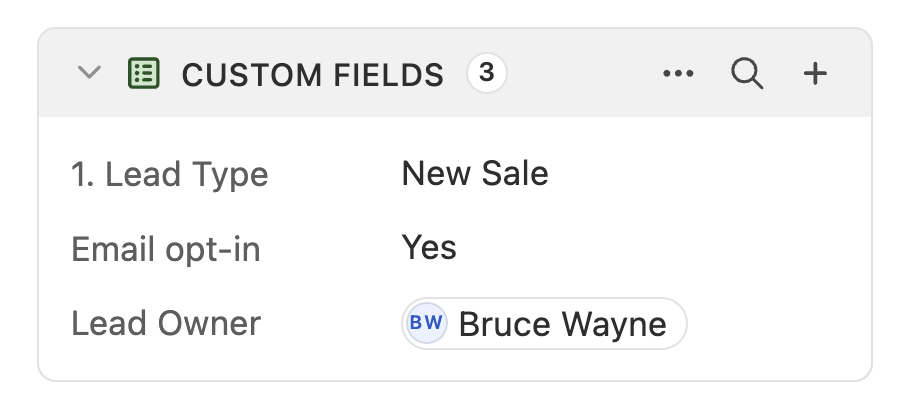
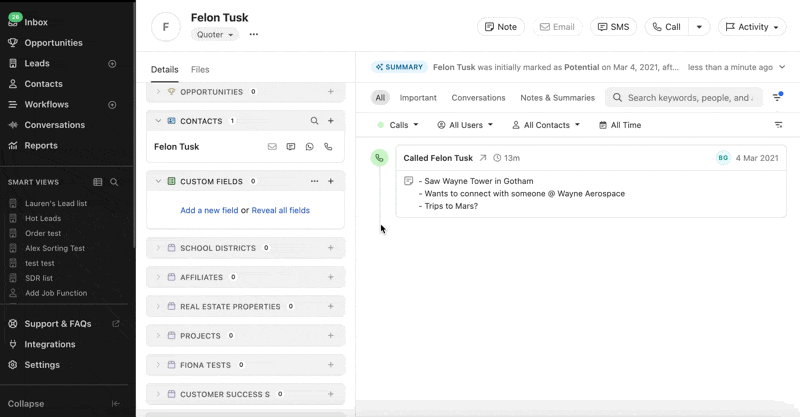
The Lead Owner custom field shows that Bruce is assigned to this lead.
Once leads are assigned in Close, your team will have a quick way to identify which member of your team owns that lead.
User Type custom field
In Close, you will want to create a User Type custom field, which will always dynamically populate a list of your active (and inactive) team members in Close.
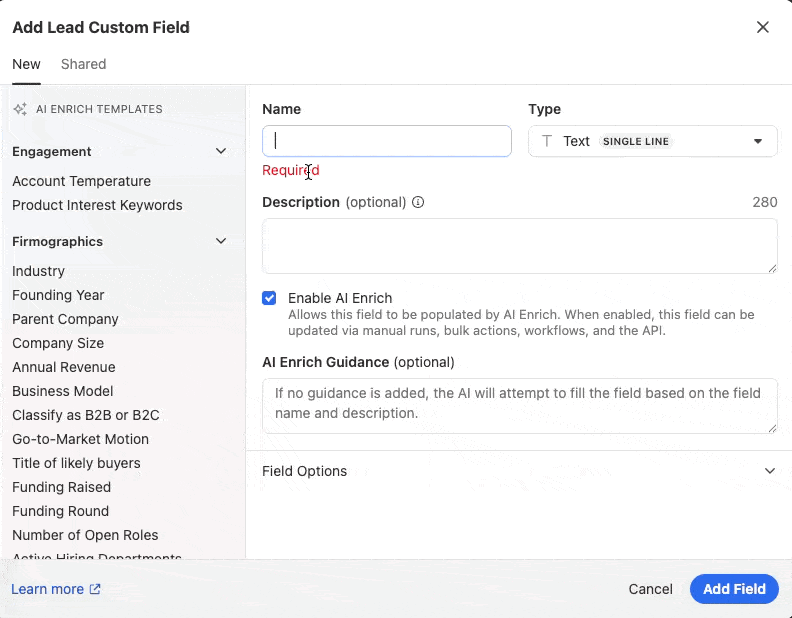
As a best practice, you’ll want to create multiple User Type custom fields if your team has multiple roles that interact with each lead.For example, your sales process may include SDR/BDRs, AEs, CSM, Support, etc. In those cases, having a field for each role will ensure you know who is/was assigned at each point in the lead's journey.
Also, you can restrict your User fields if you do not want to allow reps to transfer ownership of leads to other members and/or themselves without Admin approval.
Using “me” in Smart Views
Once you have leads assigned to members of your team, it’s much easier to create and share Smart Views for those team members to use on a daily basis.
Similar to other user searches in Close, you can use the “me” filter to dynamically display matching leads based on the user viewing the Smart View.
This means that you can create one Smart View for “New Leads to Call” and assign it everyone on your sales team, and each user will only see leads assigned to them in that view.
Lead Assignment Methods
Depending on your sales operations process, there are a few ways you may want to go about lead distribution today.
Manual Assignment
Best for: Teams working on a shared pool of leads or prospecting their own leads
If leads are either prospected by your reps or not assigned until contact is made, you’ll likely use manual assignment on each lead most often.
When the rep wants to claim a lead, they’ll simply add their name into the corresponding custom field on the lead in Close.
Automate Repetitive User Flows
Depending on your workflow, you may be able to automate the assignment of a lead to the correct user on the team based on who created the lead (for prospecting teams) or moved the lead into a particular status (for teams working a shared pool). For example, you could trigger a Zap to assign a lead to the rep that marked the lead as Interested after making a connection.
Bulk assignment
Best for: Reps or administrators uploading lists or redistributing leads.
For teams that regularly import lists of lead via our Bulk Importer, it’s best to use the importer or bulk editing methods to reassign leads.
One way to assign a lead to an individual through bulk importing would be to include a column with your lead owner custom field and corresponding user in the file you’re importing. This method is especially useful if your team is prospecting and importing their own leads.
Be sure to provide and exact match between the name in Close and the name in your file.
Assigning after file import
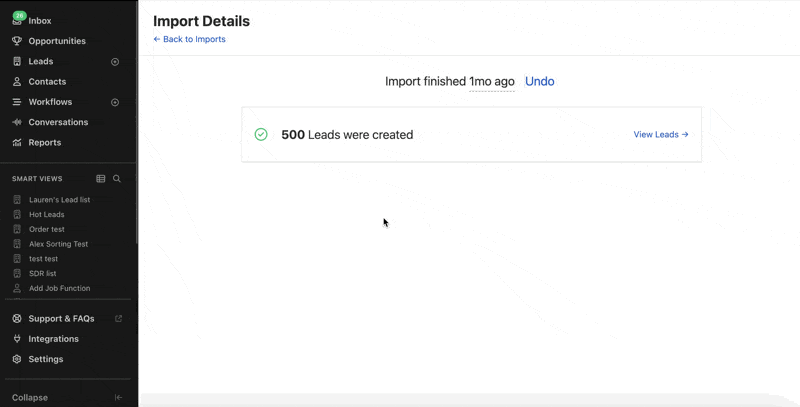
If you want to assign a recently imported list to a user or users in Close, you can view the leads from your recent import and assign via a bulk edit.
To view leads in an import, navigate to your imports and click View in Close. Once you have your list, click “edit” at the top of the leads page. Select the User custom field and add the name of your sales rep via the value drop down.
To split up a larger list between multiple sales people - build your search query and add the keyword ‘Slice’ to assist in distribution.
Slice will create non-overlapping portions of your list based on your input. For example, slice:1/4 will split a list into four groups, and slice:1/4 will not contain any leads that are in slice:2/4.
You can assign these slices to members of the team via bulk edits.
Using the 'Slice' Query
The number of Leads in each 'slice' may not be exactly equal because ‘Slice’ is more concerned about making sure the same lead never appears in different slices, even if the query after the slice keyword is different.
Search Queries:
Slice: 1/2
Limit: 25
Reassign leads from removed users
If you remove a user from your organization and they were assigned some leads via a User type custom field, the leads remain assigned to that user. You can find their leads using this search: "custom.Field Name":"Removed User Name”
Rule based assignment
Best for: Teams with established territory, specialty, or priority based lead assignment rules and inbound leads
Some teams may have a set of criteria on each lead that needs to be evaluated in order to determine who should receive the lead.
Here are some rule based examples:
Location/Timezone - for teams dealing with leads all over the country or world, you may want to distribute those leads based on the leads location.
Speciality - for teams that have multiple products or service offerings, only certain team members may be qualified to sell to specific leads
High value/priority - for teams that have varying deal sizes, you may want to ensure that your highest performing sales reps are matched up with your largest potential deal
In all of these cases (and more), you should be able to identify leads that fall into these buckets using Close search and Smart Views.
Your Data Structure is Important
If you’re unable to create the right query to use to identify your intended bucket, reach out to our team for help. We can usually help with the query structure or suggest different ways of bringing data into Close to help meet your sales process needs.
Once you have your rule based lists created and shared with the correct team members, you can use the manual or bulk methods described above to assign users to leads, or you can automate the lead assignment via Zapier as described below.
Round-robin assignment
Best for: Teams looking to automate the even distribution of leads to groups of users
In some cases, you’ll have inbound leads that either (a) can be assigned to anyone on the team or (b) you may have multiple team members that are eligible for the lead based on your rule based assignment methods.
Robin is a free round-robin lead assignment tool built specifically for Close. Learn how to get started in our Robin help guide.
Any questions?
Feel free to reach out to support@close.com for help.