Lead assignment in Close is a great way to establish ownership of Leads for your team to ensure that no Lead slips through the cracks. Sometimes, you'll have a defined set of criteria for Lead assignment. If you don't, randomly distributing Leads to Users is a quick and easy way to get up and running. Using a combination of Workflows and Zapier, you can automate Lead assignment and send them initial outreach from that User, freeing up your time to follow up with interested Leads.
How it works, and when to randomly assign
If you're unfamiliar with Lead assignment in Close, you'll want to check out our guide on assigning Leads to Users. If you are familiar with Lead assignment in Close, you'll know that our goal here is to assign an active User to a User-type Custom Field on the Lead.
This Zap will automate the following process you might handle manually today:
- A new Lead enters your system or moves into a particular status;
- You have a set group of Users that you want to reach out to, or be assigned to, this Lead;
- You select a User at random and update a Custom Field in Close.
We'll cover the following workflow:
- Create a new Workflow meant to randomly assign Users to new Leads utilizing the “Assign User” Workflow step;
- Create a Smart View that captures new Leads in Close;
- Using Zapier, create a Zap that triggers for these new Leads;
- Use the “Subscribe Contact to Workflow in Close” action in Zapier to enroll that Lead’s Contact into a Workflow.
This means that when a new Lead is created within Close, they will automatically be assigned to a random User and be sent a Workflow meant to help convert that Lead. Close will do the heavy lifting, and your team can follow up with your Leads organically.
One of the biggest concerns around Lead distribution is the idea of being fair when assigning Leads to team members. Here are some things we've learned in setting up similar workflows for our customers.
- If you look daily, there will be some variability in your distribution. However, over time this will even out.
- For teams mainly concerned about load management (number of Leads per User), you can quickly move Users between Groups to remove them from the available User pool. To do this, you'd simply duplicate your Groups and name them something like "Sales Reps - No Assignment".
Create a Workflow
The goal of this Workflow is to automatically assign new Leads to Users and begin initial outreach attempts. Head to Workflows on your left sidebar and create a new Workflow. Your first step should be Assign User, which will assign a User to that new Lead by way of adding their name to a Lead Owner (or similar) Custom Field.
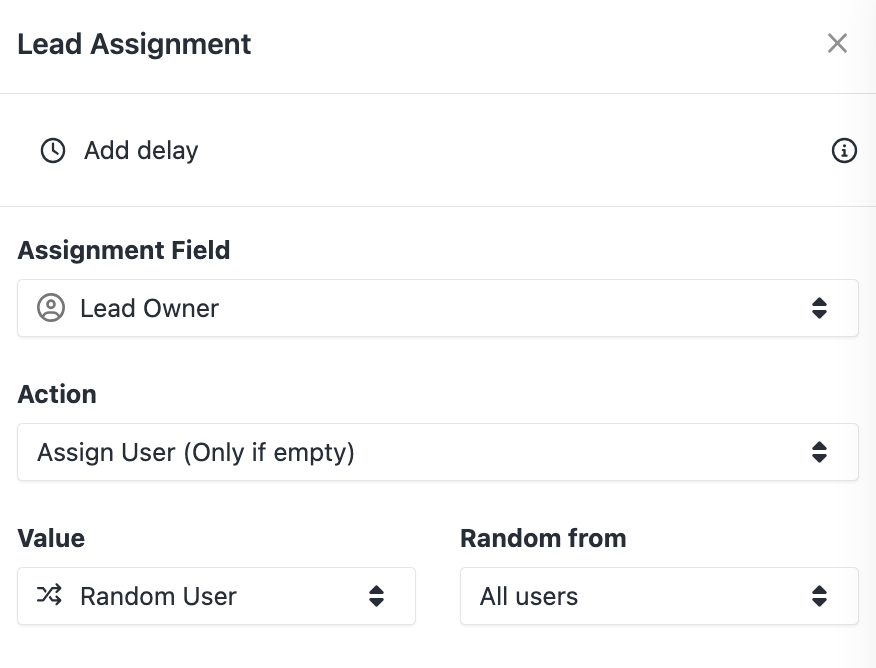
For this Workflow, for any new Leads that will be assigned to random Users, you'll want to set the Action field to Assign User (Only if empty). You can select All Users to be a part of this random Lead assignment, or if your plan allows, a specific Group.
From here, add Workflow steps meant to be the initial communication from your team to your potential customers. Here's an example of what that could look like:
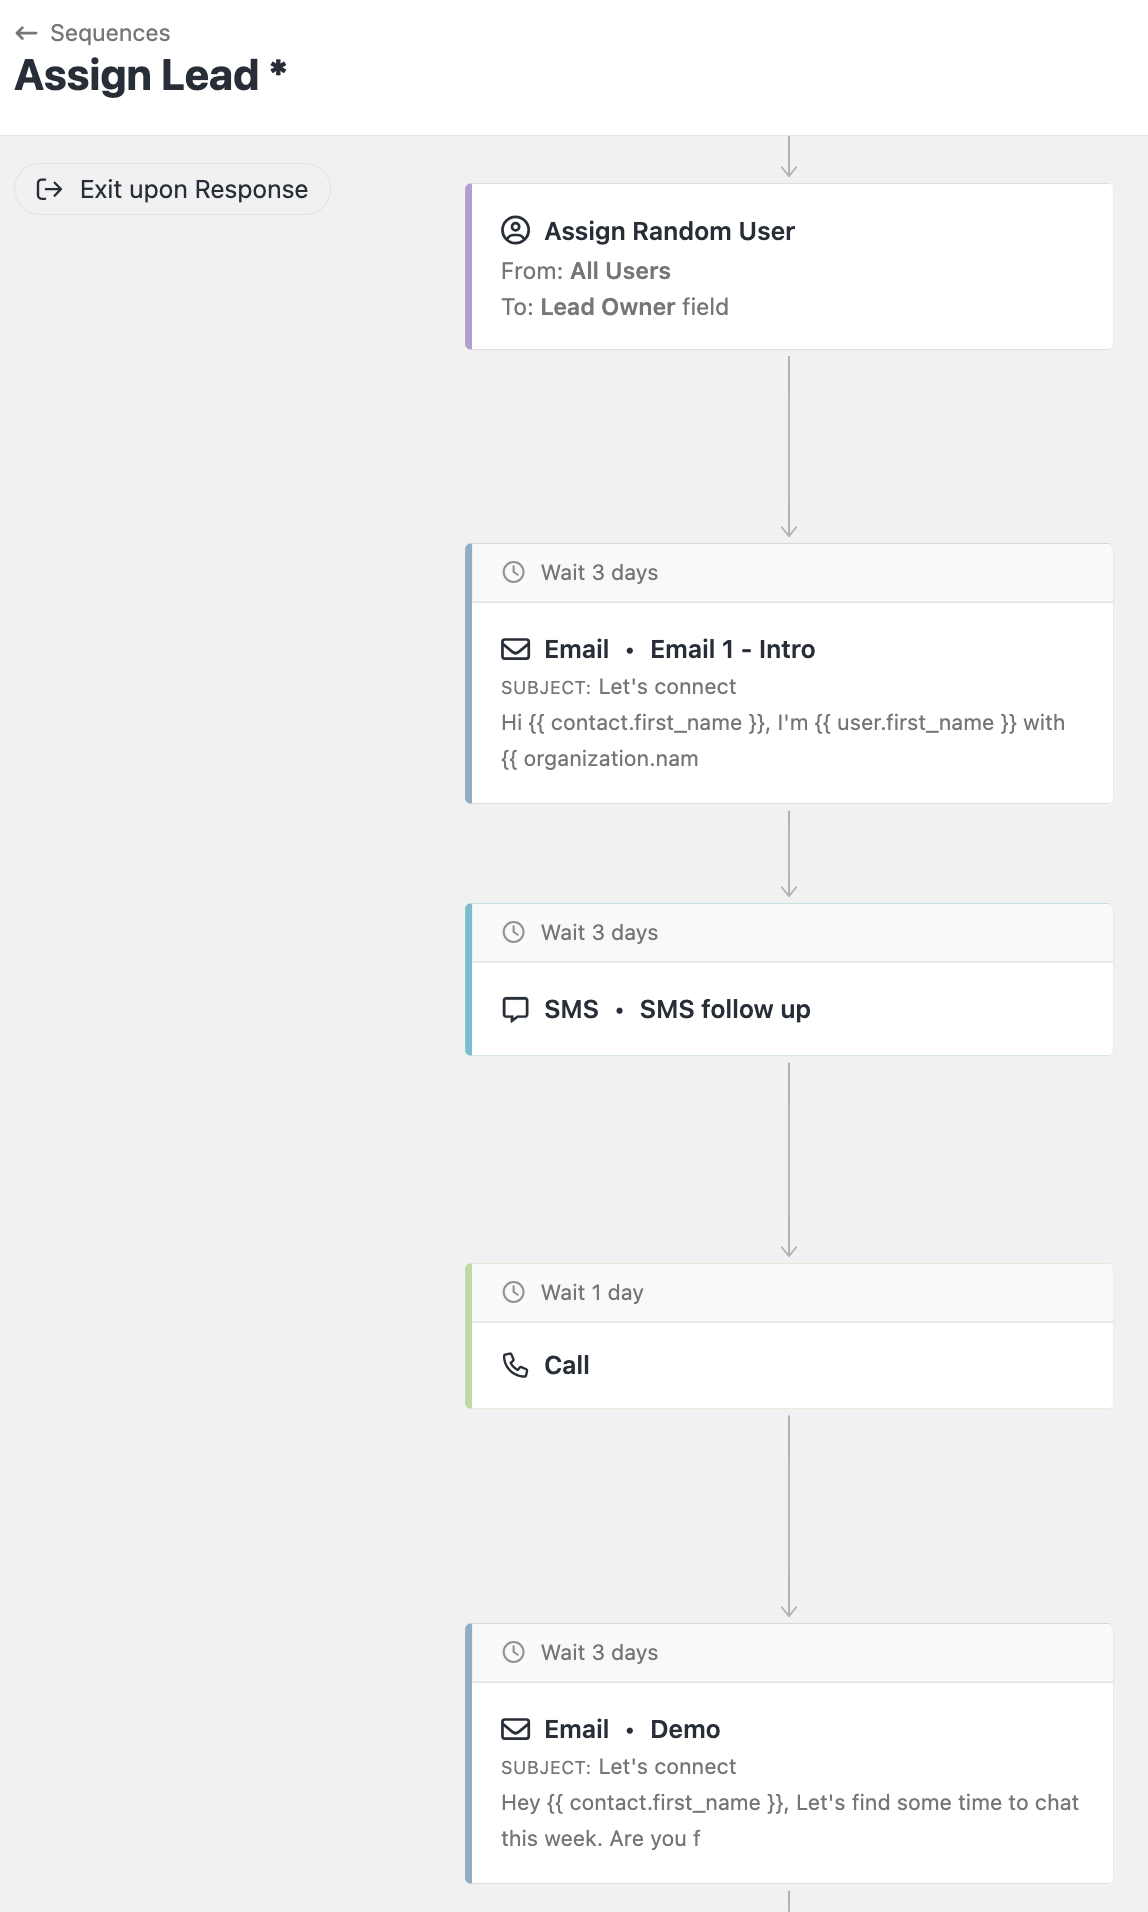
In practice, this Workflow will start off by randomly assigning a User to an enrolled Lead and kick off the communication attempts with that Lead, booking calls and scheduling Meetings in the background.
If you set up an email step, you have the option to select the email sender to be from the User assigned to that Lead using the Assigned User in Custom Field option:

This helps keep your team's communication outreach entirely from the Lead Owner of each user, forging new customer relationships and building upon those relationships.
Setting up your Groups
If you're a team with multiple job functions (BDR/SDR/AE) all working within Close, you'll likely want to set up a Group for each set of Users. Having Groups configured will allow you to select a random User from a more specific group of Users.
Create a Smart View filtering for new Leads
Set up a Smart View that looks for new Leads not yet assigned to a specific User. This example is looking for Leads who do not have the Lead Owner Custom Field present:
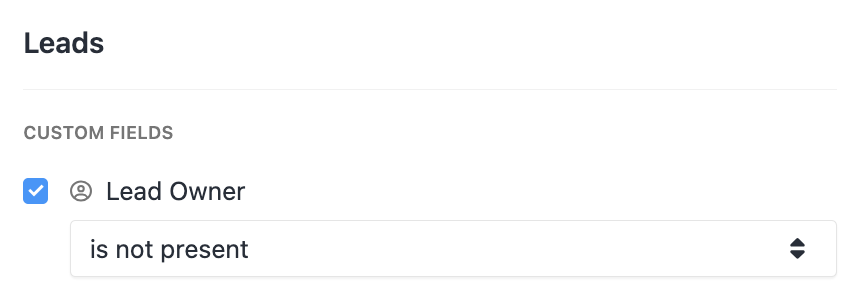
Your Smart View can be filtered further to show Leads with a specific status, or created from a specific Lead Source. This is ultimately up to your team's workflow. The leads found in this Smart View will be assigned to the Workflow you built earlier, so make sure you are filtering for Leads that should receive those Workflow steps.
Setting up the Zap
Below, we have a guide on setting up this Zap:

What you'll need
To set up this Zap, you'll need to have the following:
- A Zapier account
- Optional - a Business (legacy) or Enterprise plan with Close for Groups
Step 1 - Choose your trigger
The first decision you'll want to make in setting up this Zap is what is going to trigger the Lead assignment. For this example, we're using New Lead in Search Query / Smart View in Close:

We're using our Smart View that is looking for new Leads not assigned to a specific User to trigger the rest of the Zap.
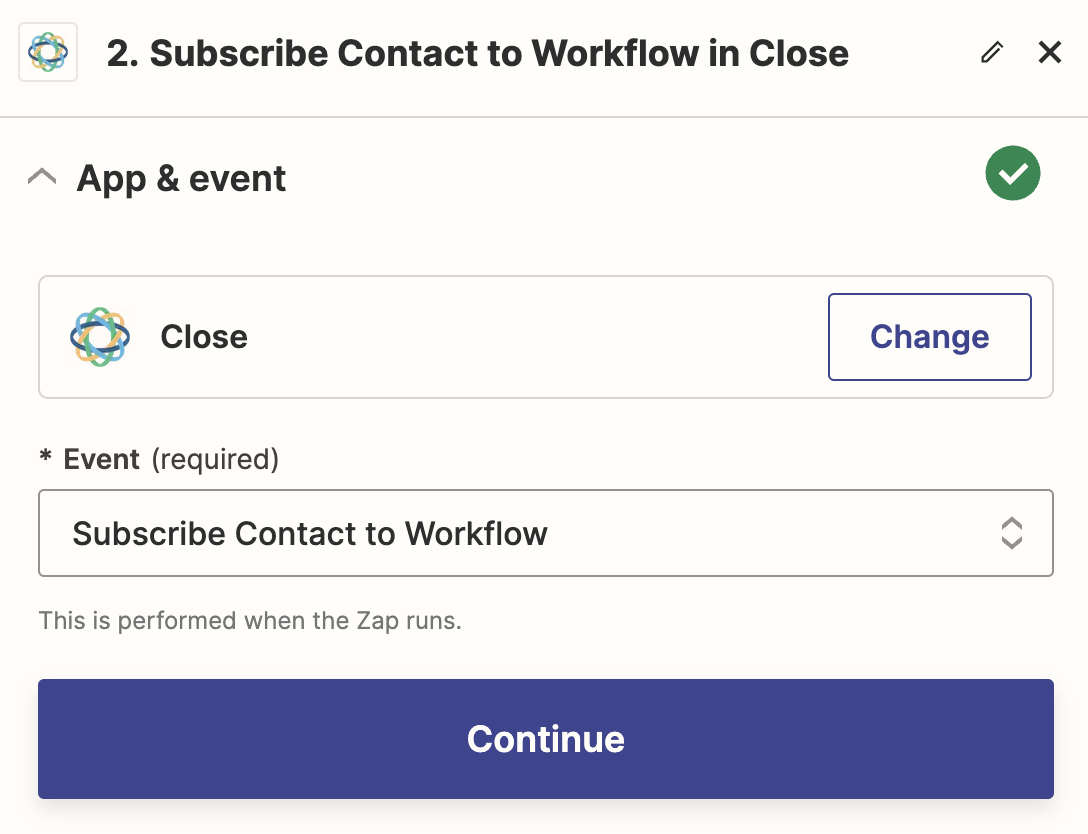
Step 2 - Enroll your Leads into the Workflow
The core of this Zap takes place in this action step. You'll use the action Subscribe Contact to Workflow in Close:
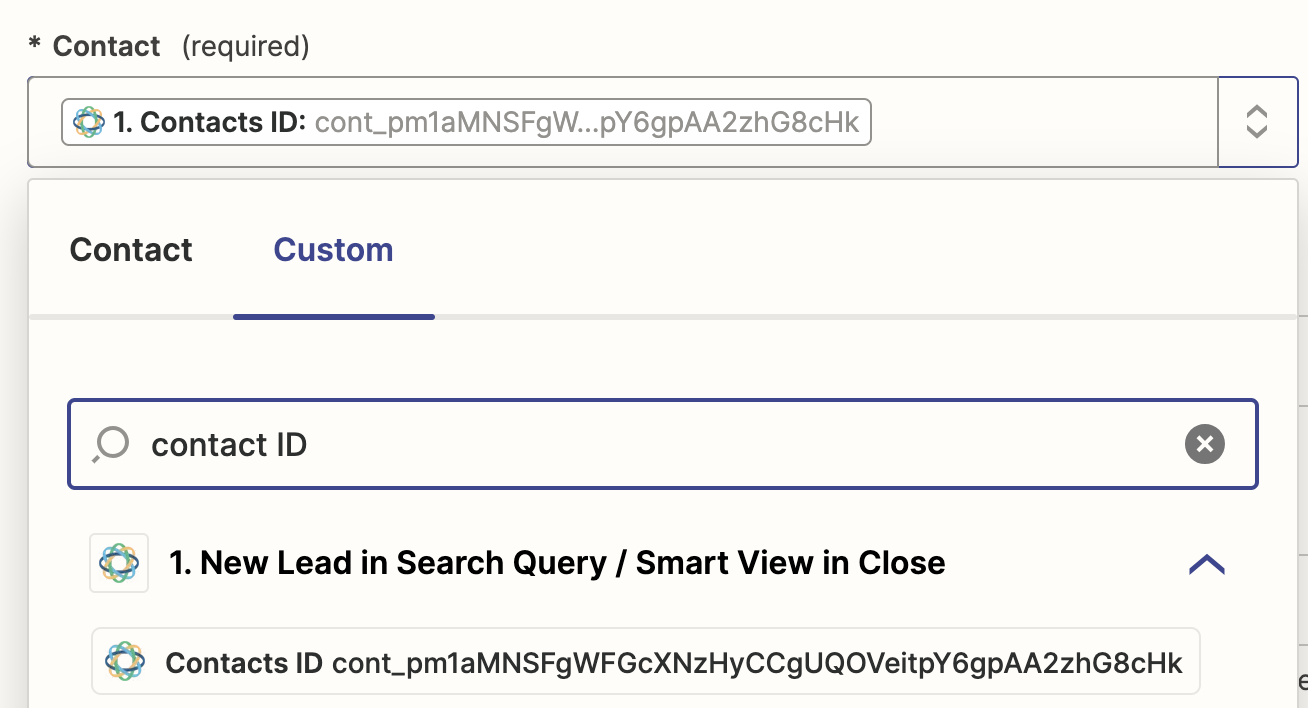
Next, you want to find the Contact that was created on the new Lead. Map your required Contact field to the Contact ID, found under the Custom tab:
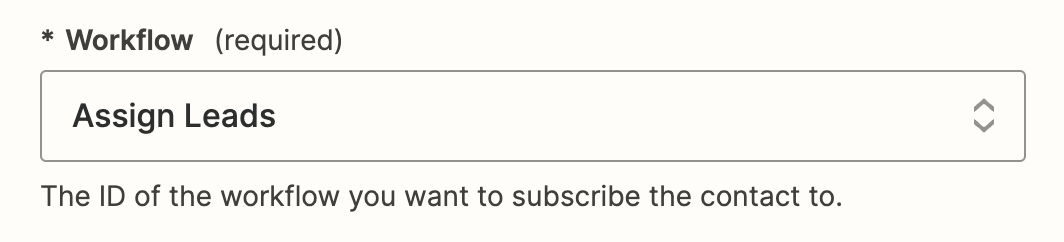
Then select the Workflow you want to be sent to these Leads in the Workflow field:
You can leave the remaining fields (Send emails from, Assign calls to, Send SMS from) blank, as the Workflow you created earlier will do this for you directly within Close.
Test your Zap to make sure all fields are working as necessary, then turn it on - and you're done!