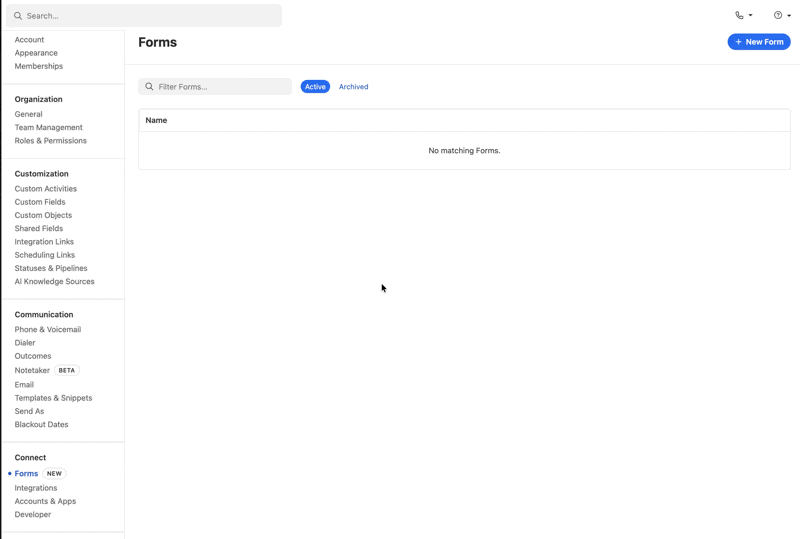
Forms
Forms feature lets you create and deploy web forms that capture data and send it directly into your CRM without needing any external tools or manual data entry. Forms can create new Leads, update existing records, and trigger automation right when a visitor submits a response.
Forms are ideal for capturing inbound inquiries, contact requests, landing page submissions, demo requests, newsletter signups, and more — all straight into Close.
Each Form you build generates an HTML embed code you can place on your site. When someone submits the form, Close creates or updates CRM records based on your field mappings.
Creating a New Form
- Go to Settings > Connect > Forms in Close.
- Click + New Form.
- Give your form a Name. This label is for internal reference.
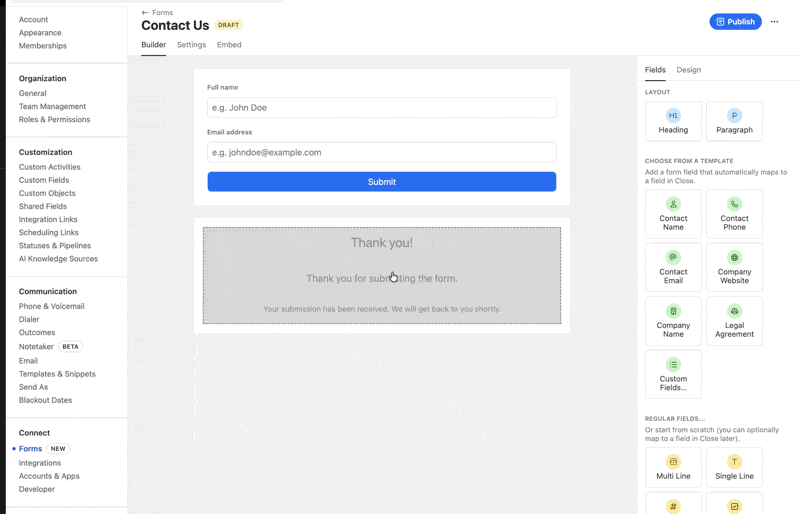
- When you create the form, we pre-populate it with two common fields, which are name and email address. You can proceed to build the form.
Designing and Adding Fields to Your Form
The Fields tab is where you build and customise the content of your webform. Access it by clicking the “Fields” option in the right sidebar while in the form builder. You can add text, email, phone, drop-downs, checkboxes, and other input types as needed.
Layout Options - Choose how you want to structure your form with two layout types:
- Heading - Add section titles to organise your form into clear segments
- Paragraph - Insert descriptive text or instructions to guide respondents
Choose from a Template - Select from pre-built field templates that automatically map to fields in Close . Common templates include:
- Contact Name
- Contact Phone
- Contact Email
- Company Website
- Company Name
- Legal Agreement
- Custom Fields - Matches the custom fields in Close
- A2P 10DLC Transactional and Promotional consent checkboxes with placeholders for your company name and your links to Terms of Service and Privacy Policy.
Regular Fields - Build your form from scratch with standard field types. You can match them to fields in Close later.
- Multi Line - For longer text responses
- Single Line - For short text entries
Simply click on any template or field type to add it to your form. Fields can be reordered by dragging and dropping them into your preferred sequence.
Design tab
The Design tab allows you to customise the visual appearance of your webform to match your brand or preferences. Access it by clicking the “Design” option in the right sidebar while building your form.
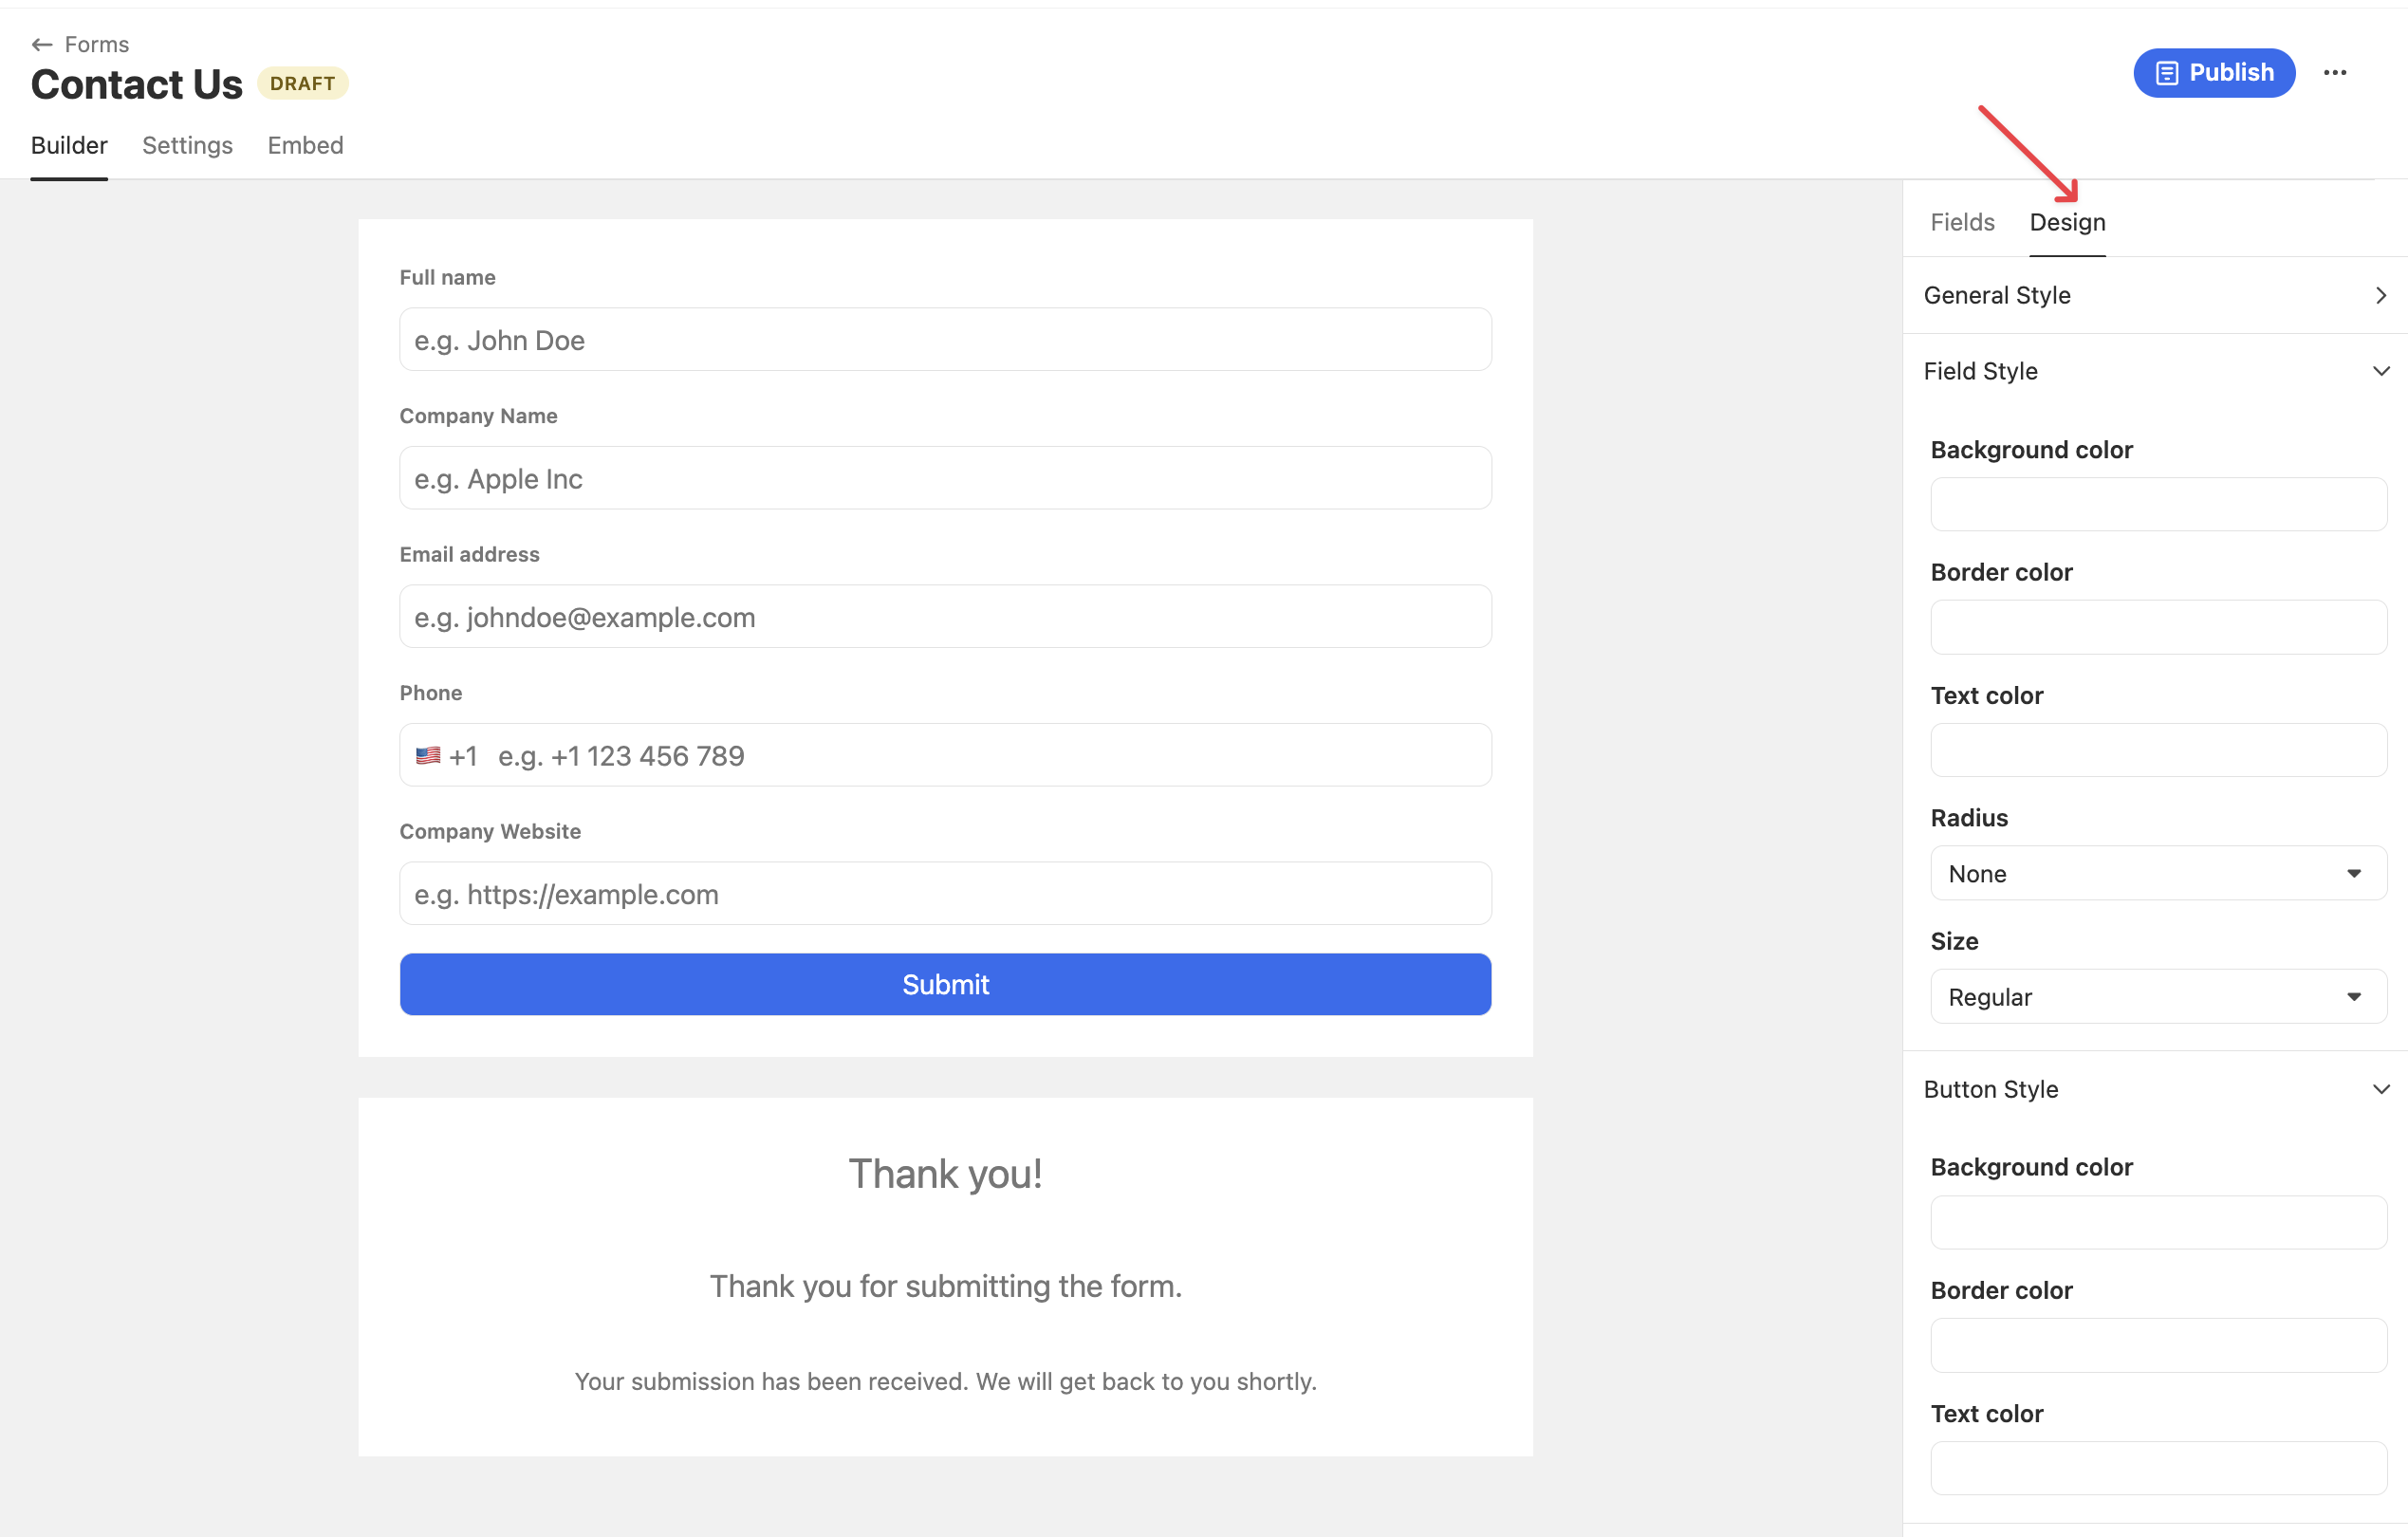
In the Design tab, you can customise:
Field Style - Adjust the appearance of your form fields, including background colour, border colour, text colour, corner radius (rounded or sharp edges), and field size.
Button Style - Customise your submit button’s look with options for background colour, border colour, and text colour to make it stand out or blend with your design.
All colour options accept hex codes (such as #4169E1) for precise colour matching with your brand guidelines. Changes you make in the Design tab apply in real-time to the form preview, allowing you to see exactly how your form will look to respondents before publishing.
Track URL Parameters
URL parameter tracking allows you to capture marketing and campaign data from the links people use to access your webform. This is particularly useful for understanding which marketing channels, campaigns, or sources are driving form submissions.
When enabled, the form automatically captures URL parameters (such as utm_campaign, utm_medium, utm_source) and saves them with each submission.
Setting Up Parameter Tracking:
- Head over to the Settings Tab and Check the “Track URL Parameters” box to enable this feature
- Enter the Parameter key - the name of the URL parameter you want to track (for example, utm_campaign, utm_source, or any custom parameter)
- Optionally, map the parameter to a Close Field - this allows the captured data to automatically populate a specific field in your CRM
- Click Add parameter to track additional URL parameters
You can track multiple parameters simultaneously, making it easy to capture comprehensive campaign attribution data with every form submission.
Email Notifications for Form Submissions
Stay informed about new form submissions by setting up email notifications. When enabled, you’ll receive an automatic email alert each time someone submits your webform.
To configure email notifications, head over to Settings tab and simply enter the email address (or multiple addresses) where you’d like to receive submission alerts.
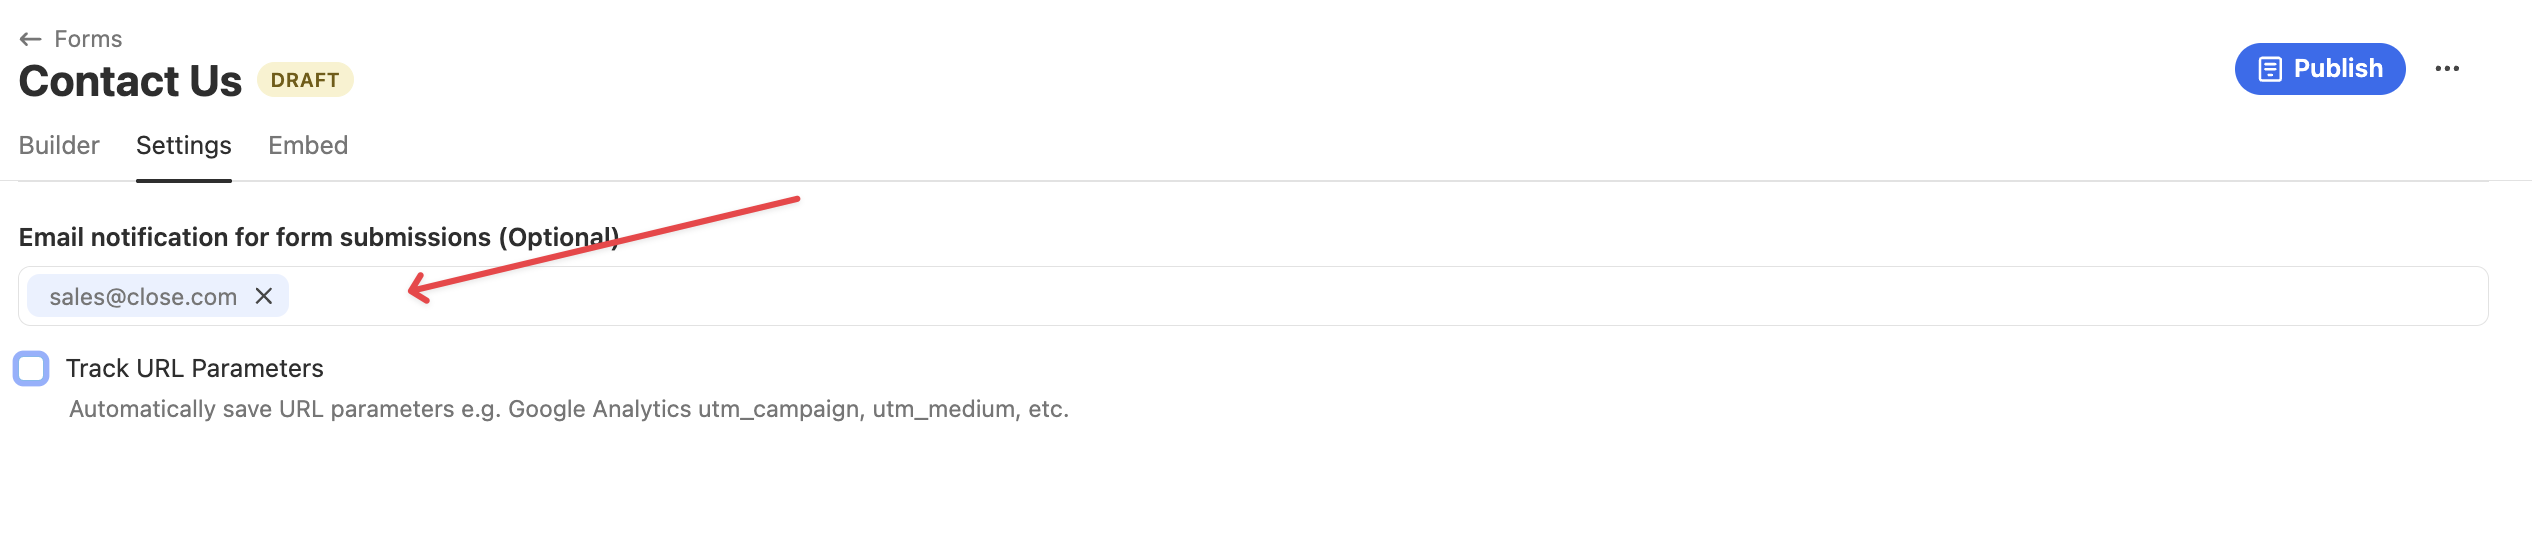
This feature is optional but highly recommended if you need to respond quickly to new leads or inquiries.
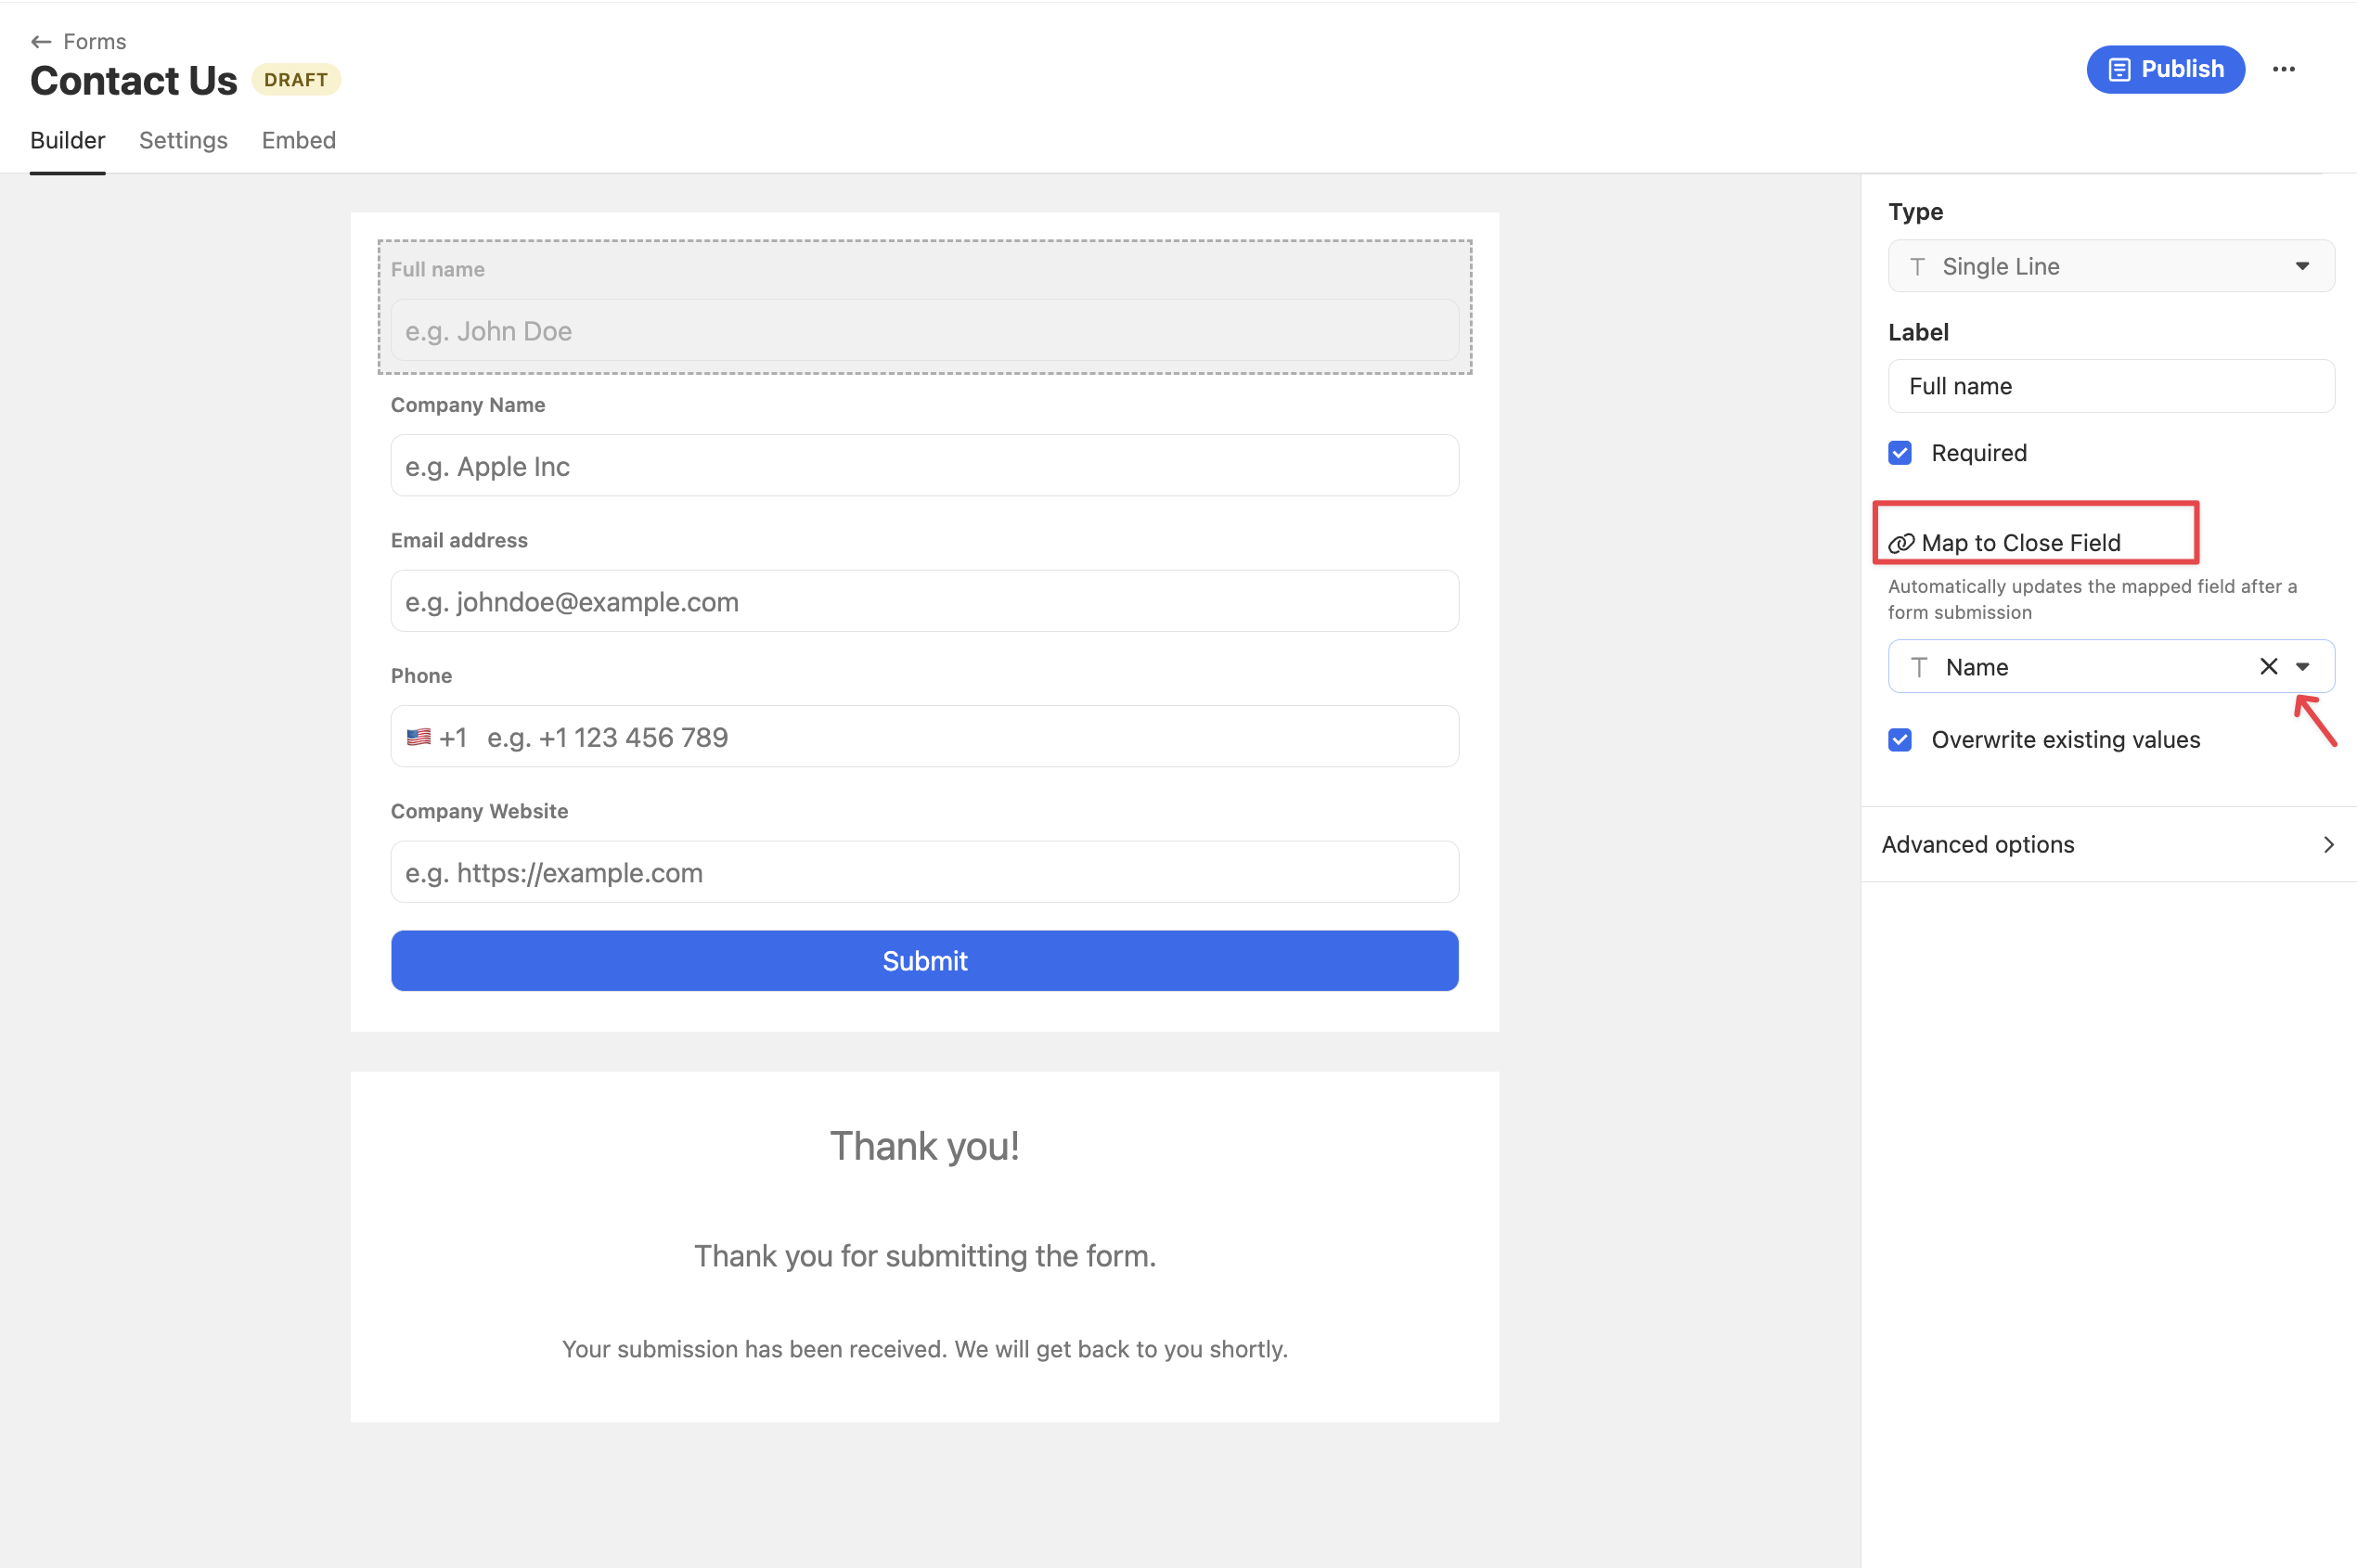
Deleting Fields in your Form
If you want to delete a form field, select it and then click on the trash bin icon as shown here:
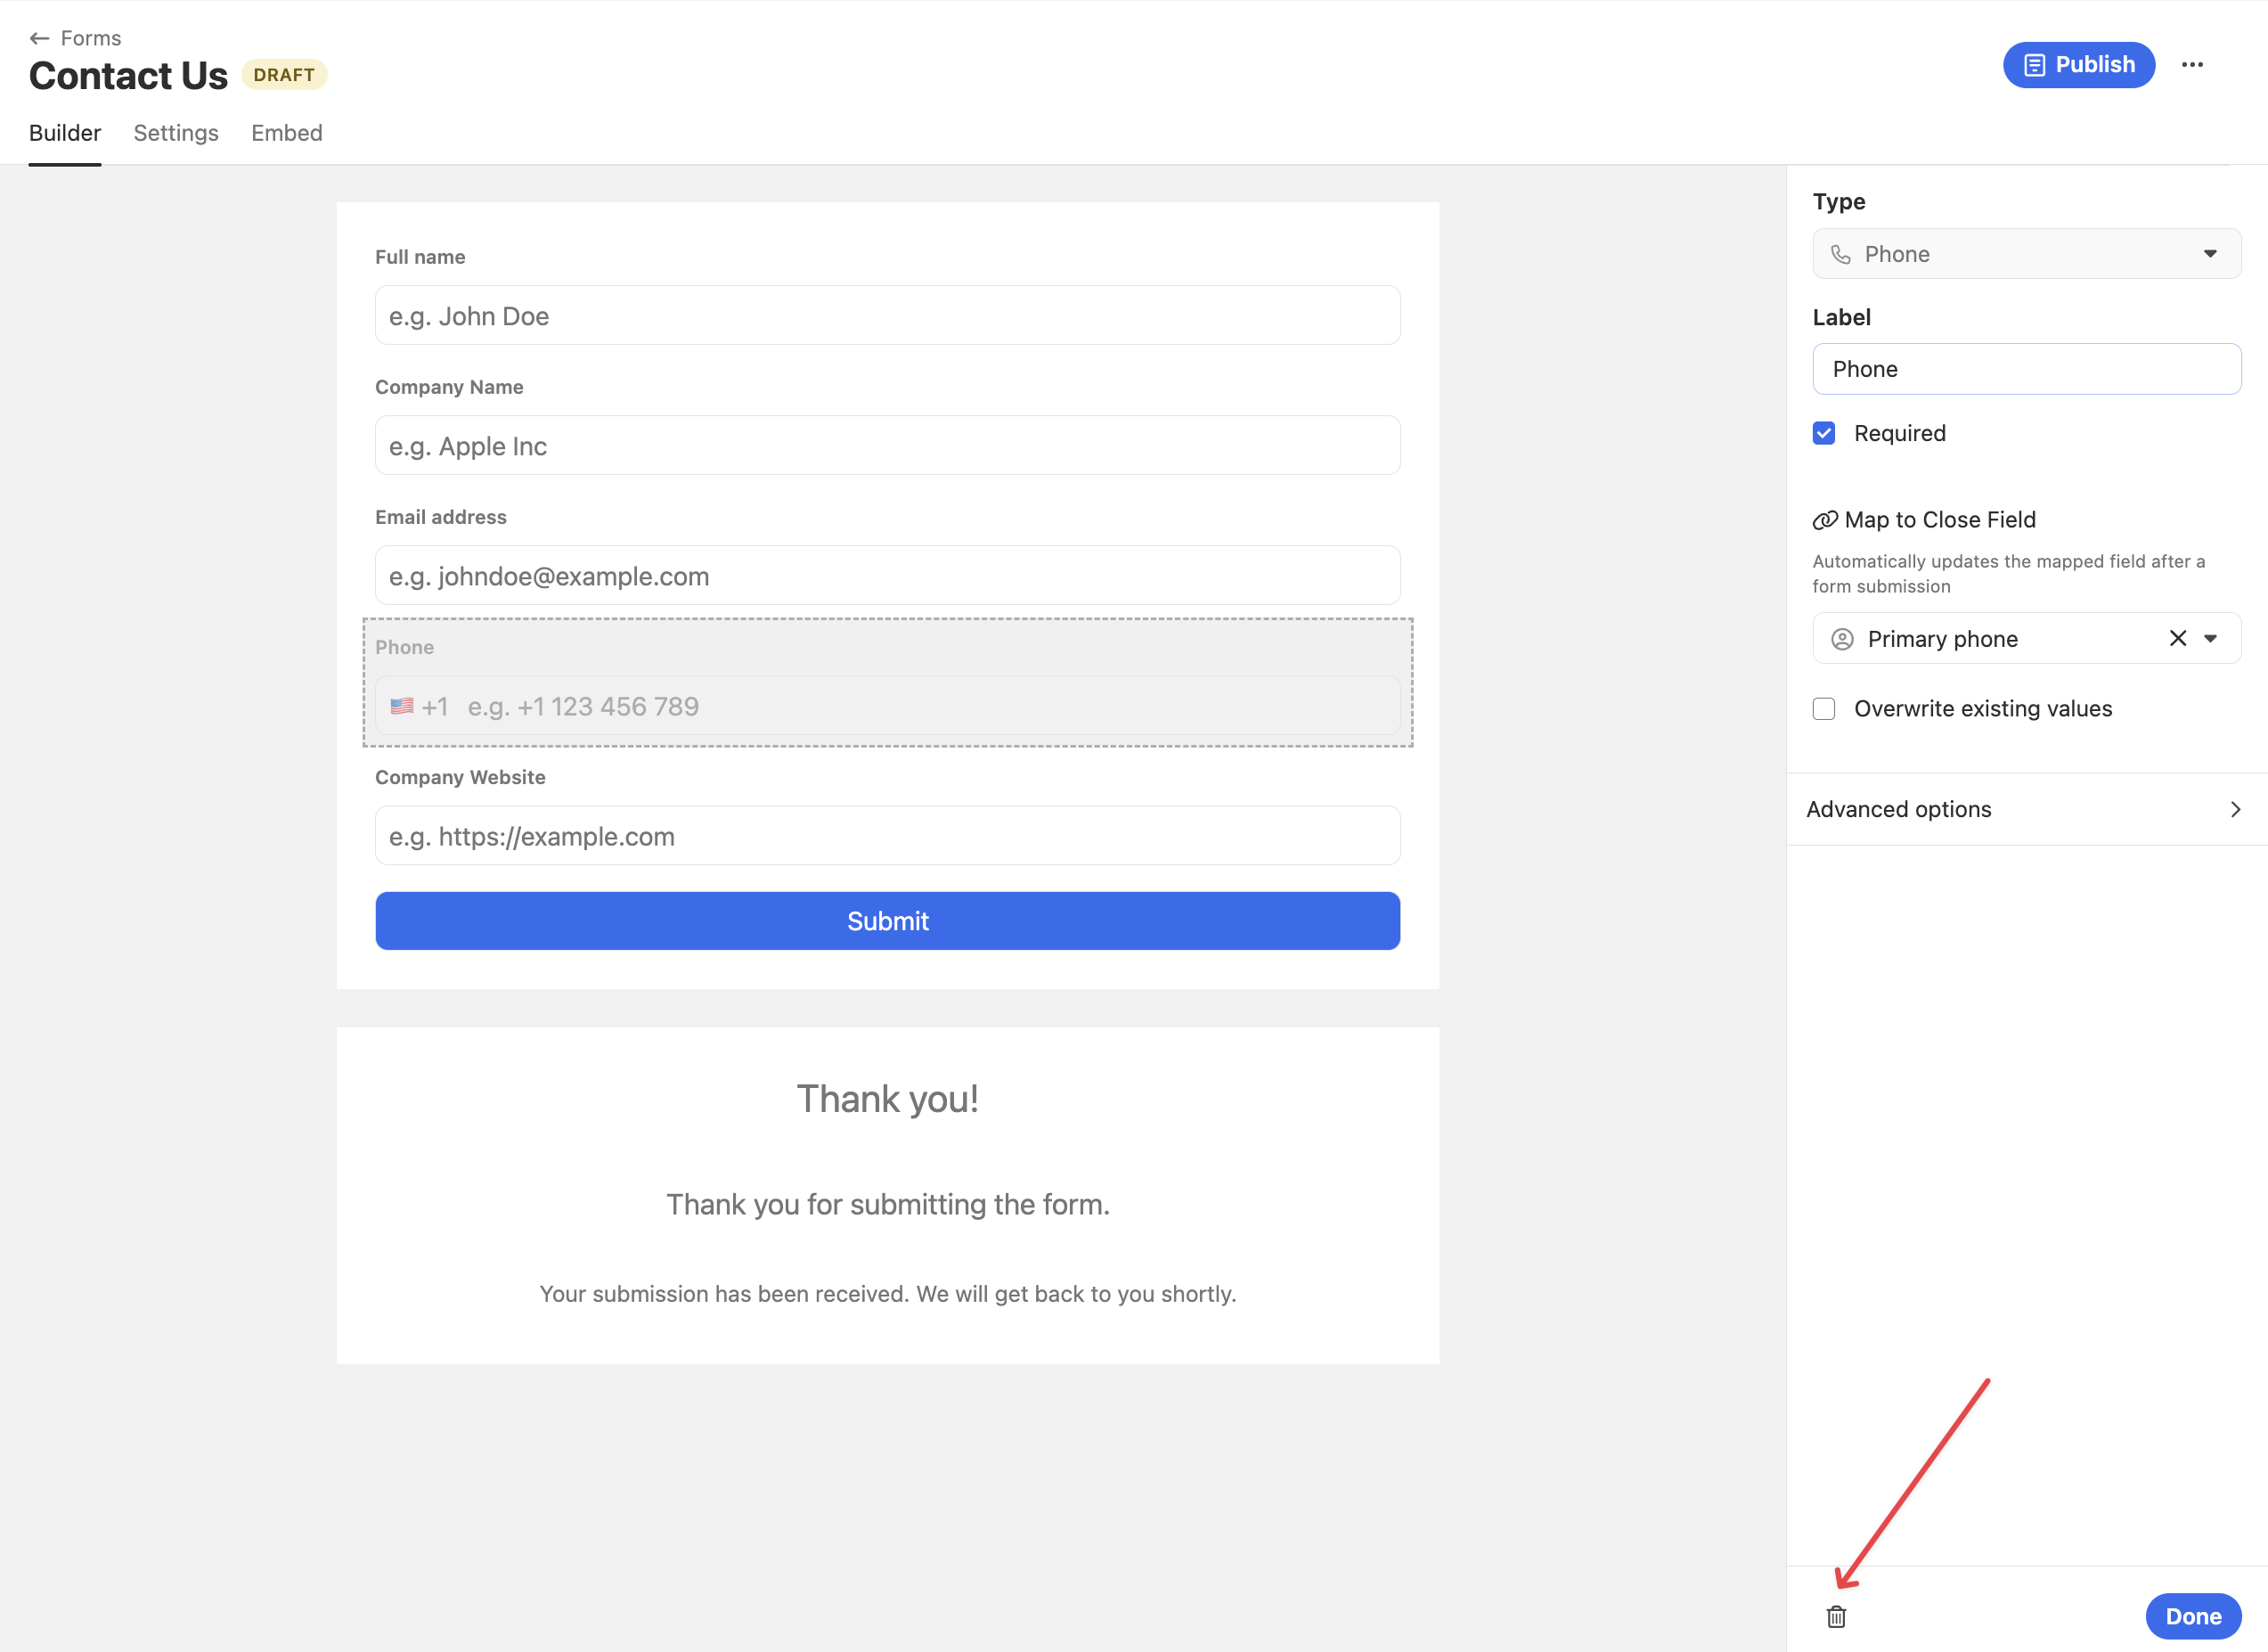
Field Mapping
For each field, choose where it should map in Close e.g., Lead Name, Email, Company, or a specific Custom Field. When you map a form field to a CRM field, Close will populate that field on the Lead or Contact when the form is submitted.
Use Custom Fields for tracking source data, campaign tags, channel identifiers, or anything outside standard CRM attributes.
Deploying Your Form
Once your form design and field mappings are complete:
- Click Publish in the form builder.
- Copy the provided Embed code. Paste it into the webpage where you want the form displayed. Fonts inherit from the hosting page / system fonts.
- Or, copy the link under Share Link to share the Form via email or SMS.
Anyone visiting that page can now fill out the form, and submissions will flow directly to Close.
Sharing your Form via Direct Link
Every Close Form now includes a shareable link that lets anyone access and fill out your form directly, no website embed required.
This is especially useful for:
- Sending a form to potential leads after a meeting or call.
- Including a form link in follow-up emails or messages.
To find your form’s share link
- Open your form under Settings > Forms > Share
- Scroll to the Share Link section.
- Click the copy icon next to the URL to copy it to your clipboard.
- Paste the link anywhere you’d like to share it ; emails, messages, or anywhere else.
Anyone who clicks the link will be taken directly to your form in their browser, and all submissions will flow into Close exactly as they would from an embedded form.
Viewing & Searching Form Submissions
All webform submissions are automatically saved and can be viewed in Close. To access your form submissions:
-
On the Lead activity feed
- Each submission logs a Web Form / Form Submission activity on the Lead.
- You can filter the lead’s activity feed to show Form Submissions.
-
On the Activities tab on the left side bar
- Choose the Form from the drop-down
- You can then view all leads generated through your webform. You also can filter the list.
This makes it easy to see how many people filled out a form and what data they submitted.
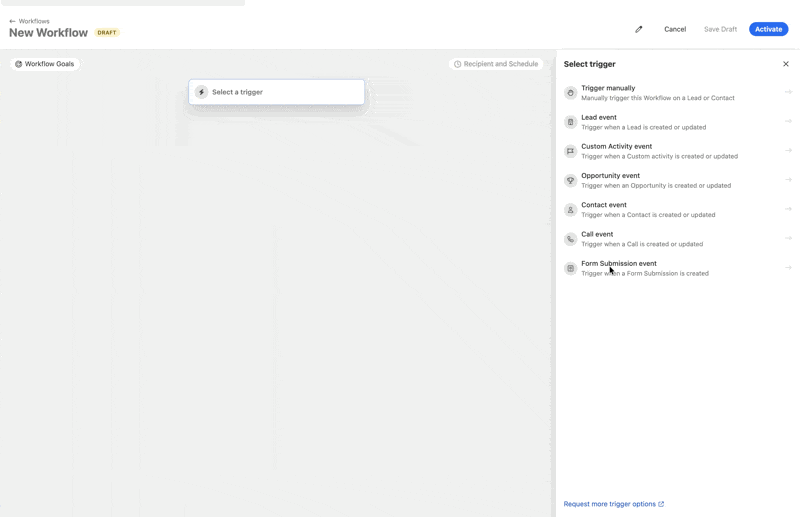
Triggering Workflows from Forms
Workflows allow you to automate actions when someone submits your webform, such as sending follow-up emails, assigning leads to team members, updating lead status, or other automated actions occur.
-
Navigate to Workflows in the left sidebar of your Close account
-
Click New Workflow to create a new automation
-
Click Select a trigger to choose what will start the workflow
-
From the trigger options panel, select Form Submission event
This trigger activates the workflow whenever a form submission is created
-
Select your Form and the filter that will trigger the workflow.
-
Configure your workflow by adding actions that should occur after a form is submitted (such as sending emails, creating tasks, or updating fields)
-
Set your workflow goals and recipient/schedule settings as needed
-
Click Save Draft to save your progress, or Activate to enable the workflow immediately
Current Limitations
Email Validation and Verification - Forms include basic spam prevention but do not have built-in email validation capabilities, including:
- No third-party email validation or pre-verification tool integrations at this time
- No business email only restrictions (cannot block free email domains like Gmail, Yahoo, etc.)
- No third-party email verification service integrations
- No automatic typo detection or correction for email addresses
The form will accept any properly formatted email address without additional verification.
Meeting and Call Scheduling - Native meeting or call scheduling functionality is not supported within the forms at this time.
External Form Capture - There is no option yet to capture submissions from external forms via a JavaScript snippet. Forms must be built using the native Close form builder to properly integrate with your CRM.