Close has three standard object types: Leads, Contacts, and Opportunities. While these are very versatile, you may need to record data that doesn't fit into these premade categories. This is where Custom Objects come in.
Custom Objects allow you to store data in a flexible and structured way. Common examples we can use here would be real estate properties, subscription packages, insurance policies, and physical products.
In our samples below, we'll use a Real Estate Property as an example.
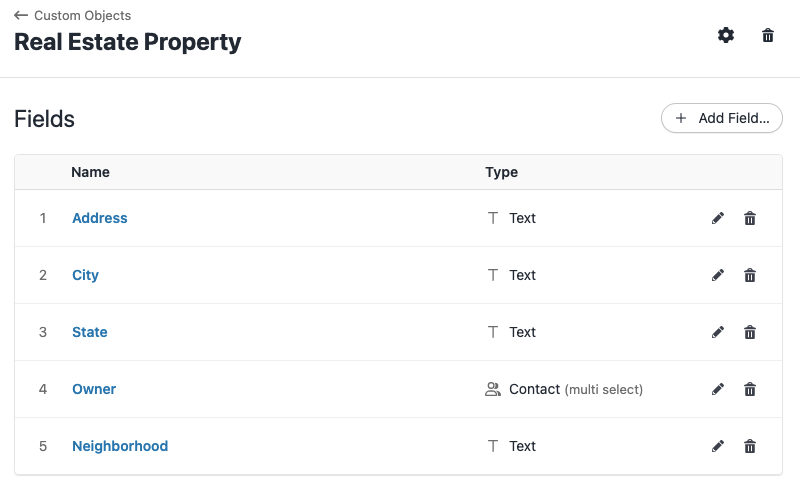
Custom Objects behave similarly to other object types in Close; that is, they are always tied to a specific lead. You can create new instances, edit, delete and search/filter for them.
Custom Objects are available for members on our Scale or Enterprise (legacy) plan. You may need to upgrade your plan to access this feature.
Creating a Custom Object
Similarly to Custom Activities, before creating an instance of a custom object on a lead page, we have to define its structure by using a Custom Object Type. Common examples of types are:
- Affiliates/Partners
- Real Estate Property
- Store Locations
- School District
To create a new Custom Object Type, go to Settings > Custom Objects > + New Custom Object, give it a name, and click Save.
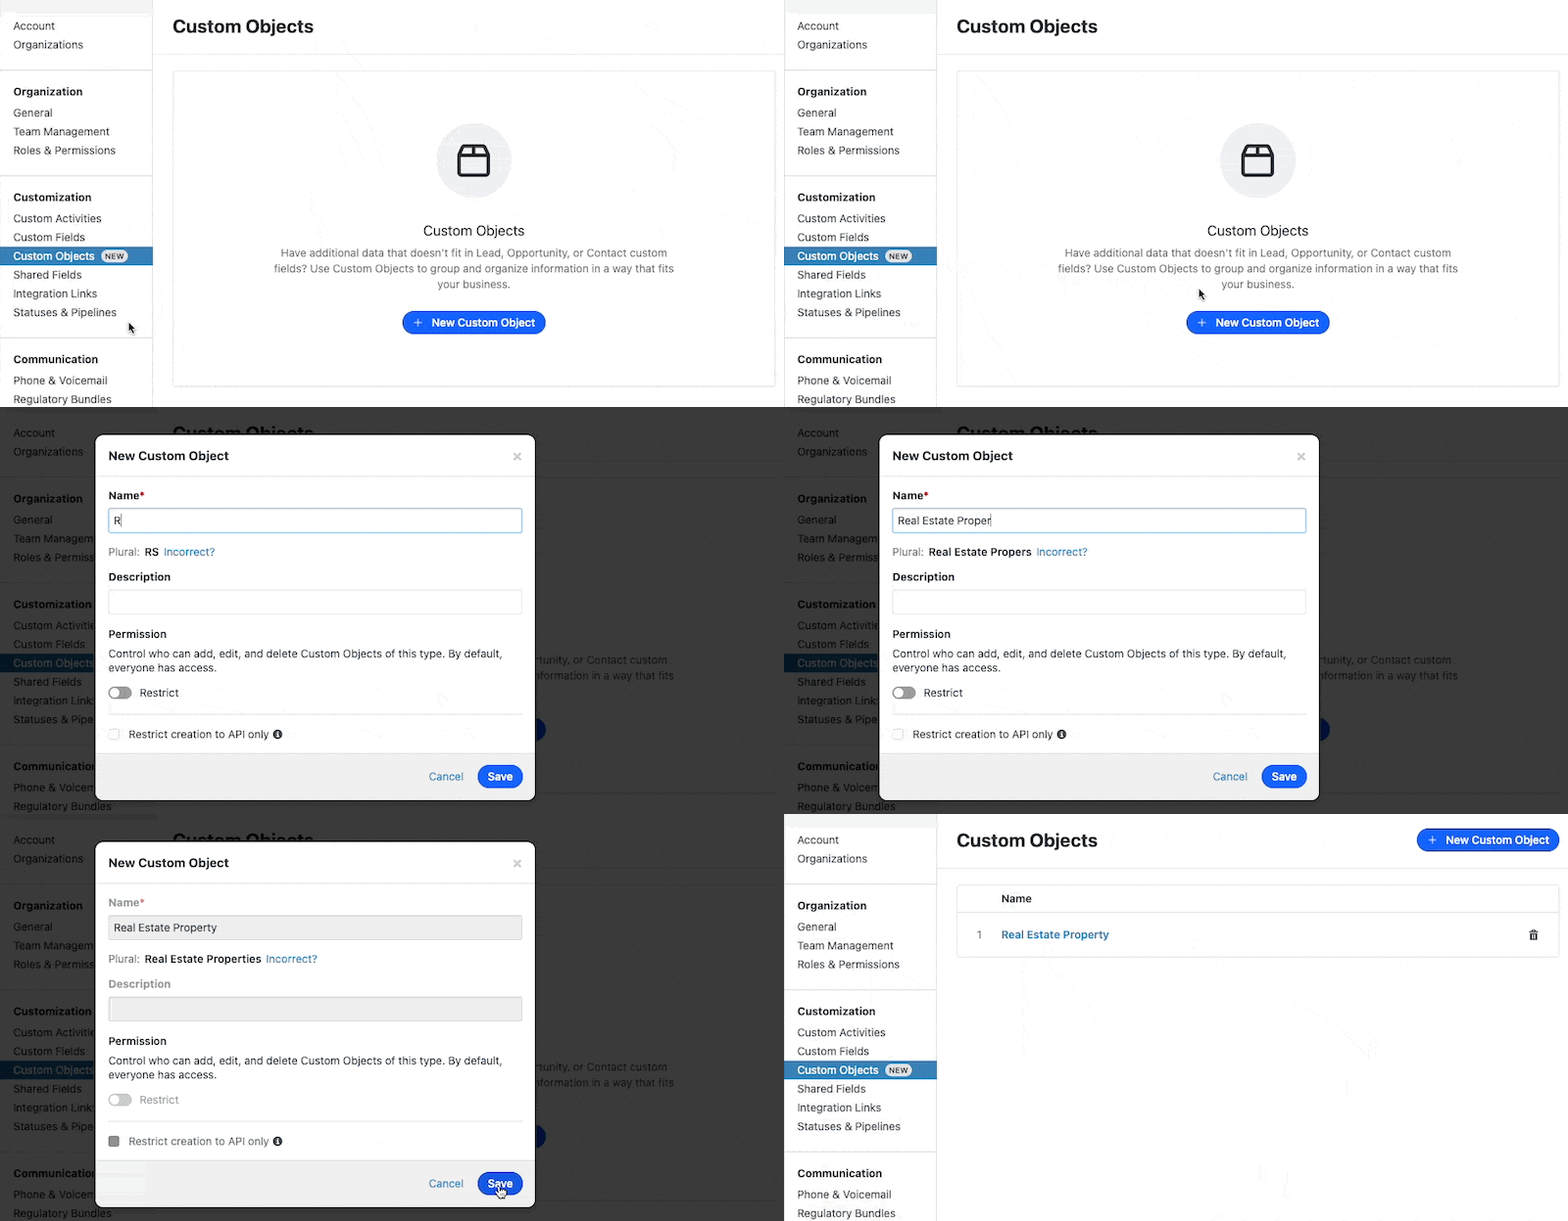
You can enable Restrict Editing that will prevent other users from adding/editing/deleting instances of this type - for example, you'd want to restrict the Real Estate Property object to Realtors only. To control who can add/edit/delete custom activity types - make sure that the user has Manage Customizations permission enabled on a Roles & Permissions page.
If you are using the custom object exclusively through an integration (API or Zapier), you can enable Restrict creation to API only, so that Close users can't create one from the app user interface. Notice that once created, objects can still be edited and deleted manually.
Each Custom Object Type created will be displayed in the Lead page view. You can find them on the left pane beneath your standard Lead Custom Fields.
Custom Object Fields
Once you create your new Custom Object Type, you can start to add some fields to this object type. Each field is just like a Custom Field you can use on Leads and Contacts - it can be Number, Text, Date & Time, etc. We'll create several ones for our Real Estate Property object type:
TextAddressTextCityTextStateContact (multi select)OwnerTextNeighborhood
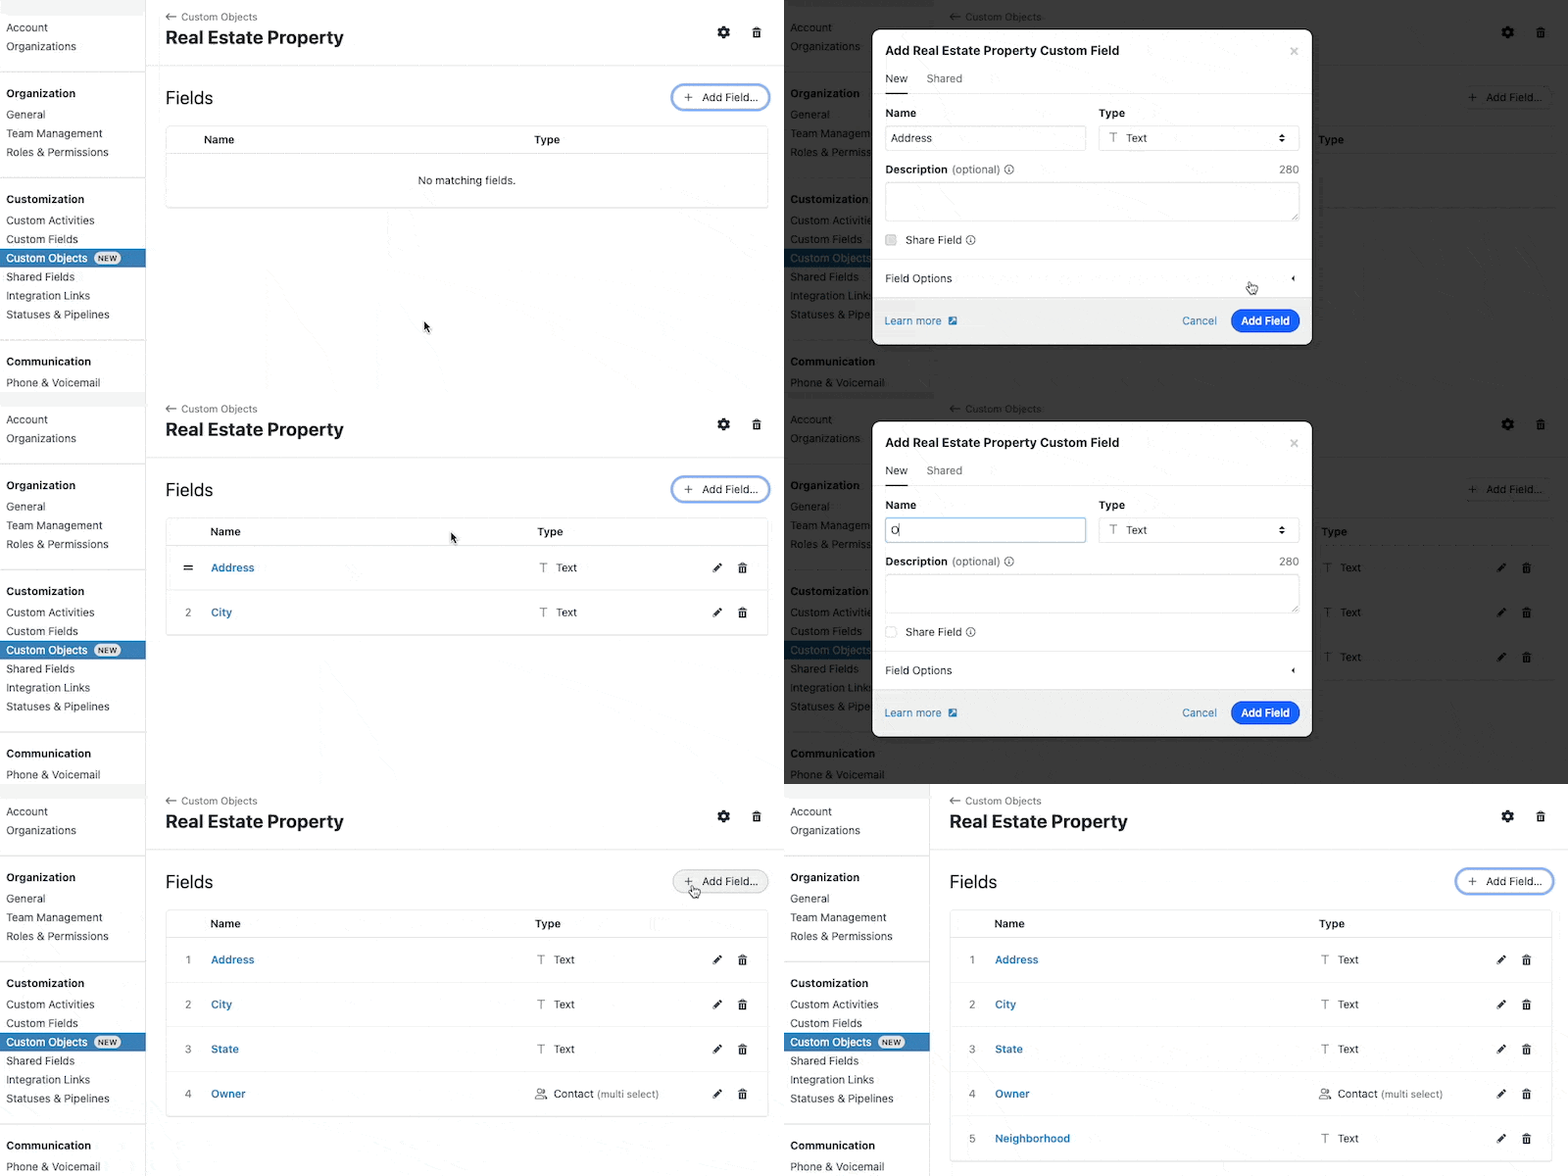
You can have a maximum of 50 fields per Custom Object Type, independent of your billing plan.
You can also mark any field as Required - that way users won't be able to create an instance of this type without filling out this field.
When you have your fields (structure) the way you want them - you can go ahead and start creating actual Custom Object instances.
Creating a Custom Object Instance
Custom Objects are created through the Lead page view, just like any other lead property. Go to the Lead page and scroll down on the left pane until you find the Custom Object Types below the regular Lead Custom Fields. Look for the correct Custom Object and click on the "+" sign to add a new instance. Fill in all the details and click Save. Congratulations - you've just added your first custom object!
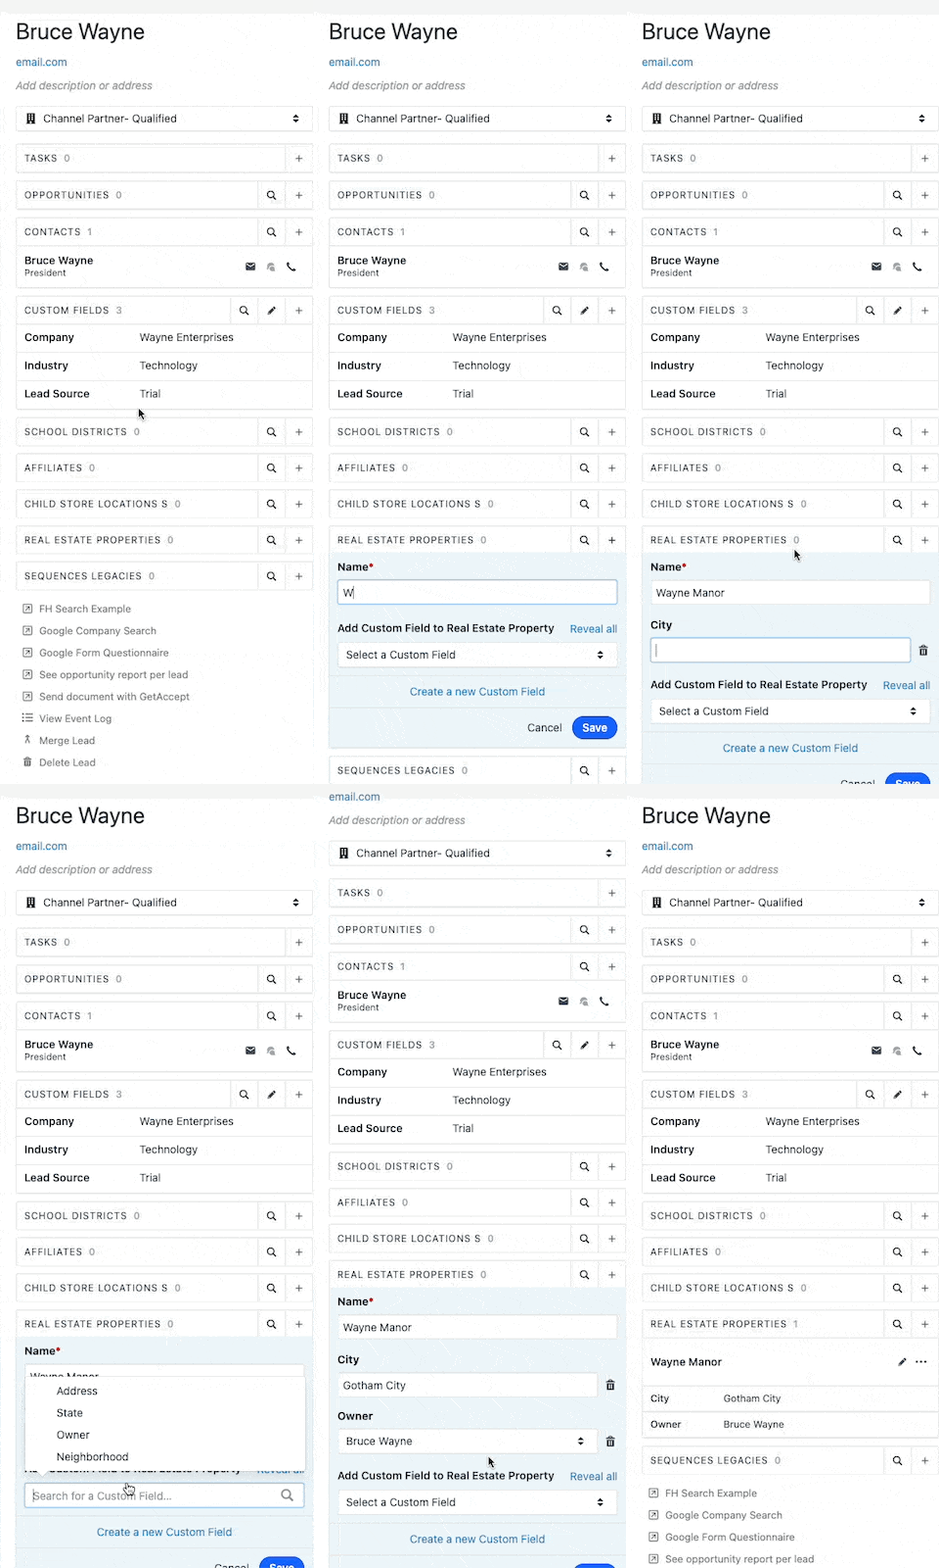
When creating Custom Object instances, you'll be limited to a maximum of 100 instances per Lead for all Custom Object Types combined, regardless of plan.
Searching and Filtering Custom Objects
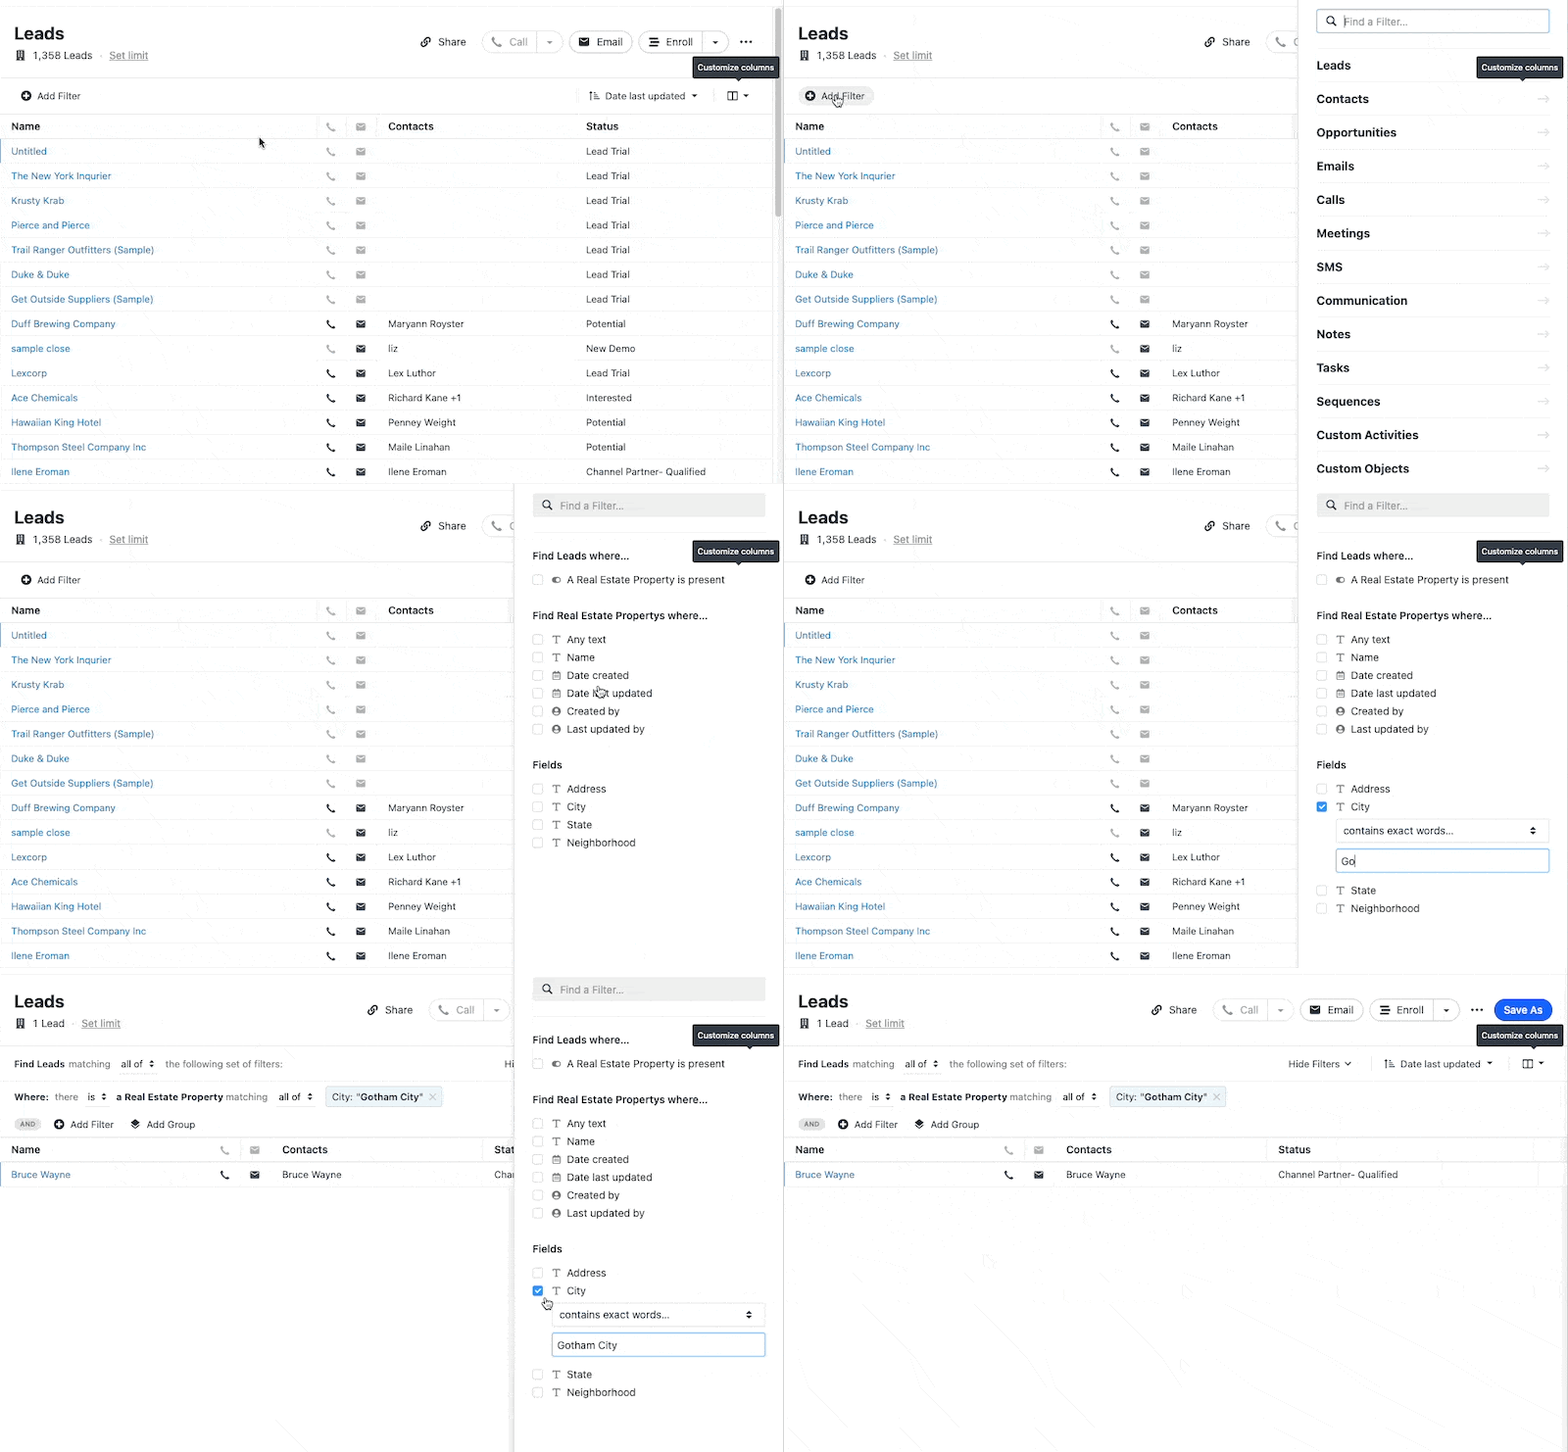
Each Custom Object Type will be visible within the Add filter search sidebar on the general Leads page. You can search & filter by:
- If an instance is present
- any text within the object instance
- name
- date created
- date last updated
- created by
- last updated by
- any field within the custom object
Custom Objects References
Specific Custom Objects can be referenced on Custom Fields, Opportunities, Custom Activities, or by other Custom Objects, which allows you to quickly tie deals and activities to a specific product/service/location, etc. You can also back-trace all the instances where a specific Custom Object was referenced by enabling a flag under the Custom Object Type.
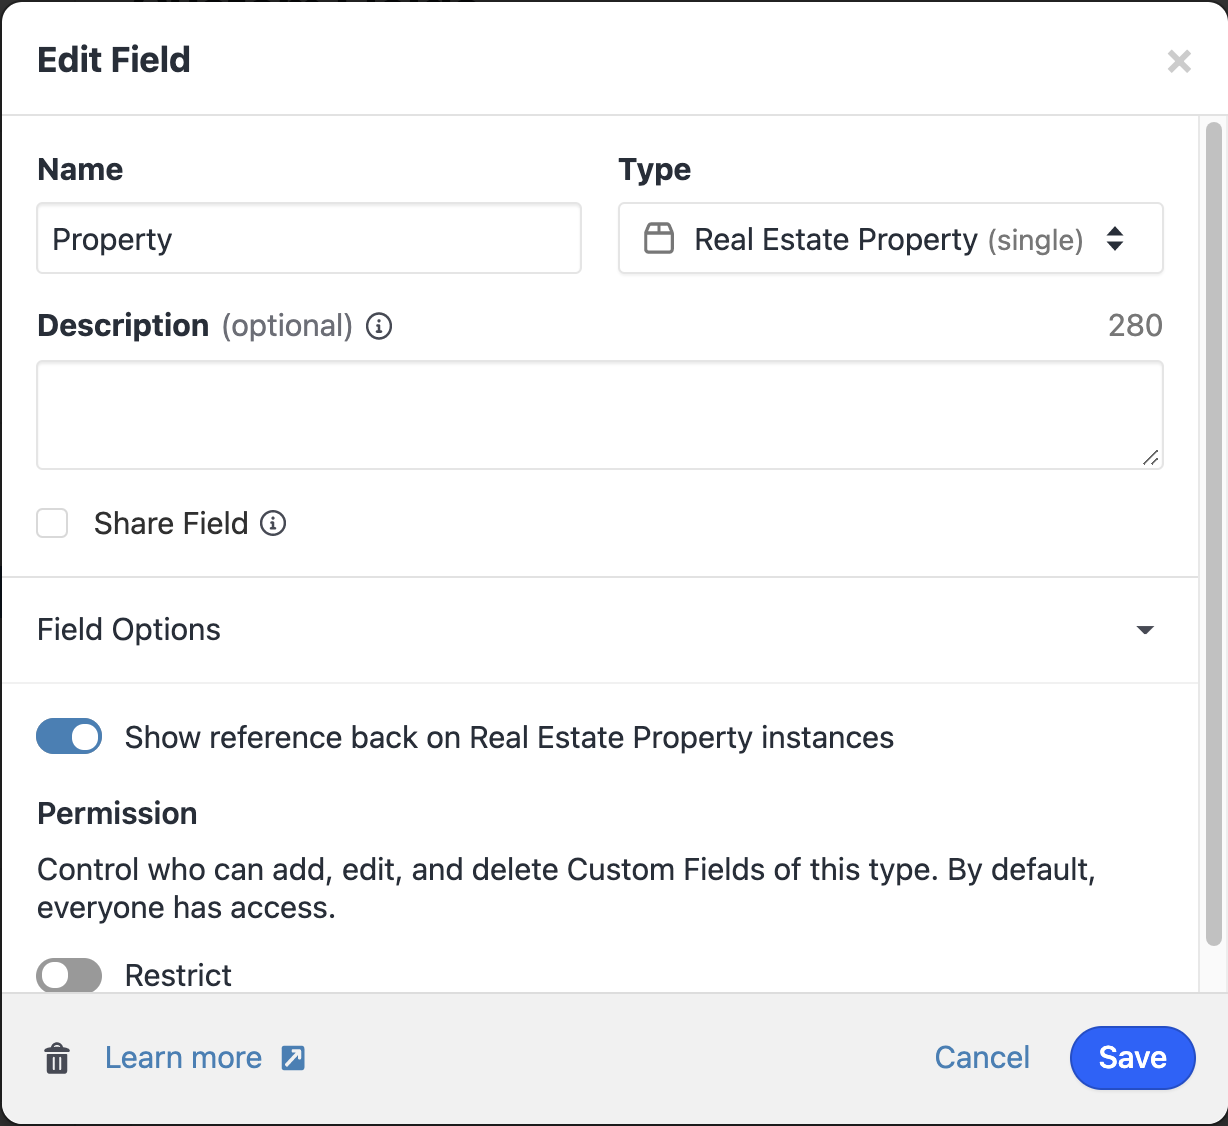
You'll need to enable a Custom Field on both the opportunities and custom activities to reference a particular Custom Object Type:
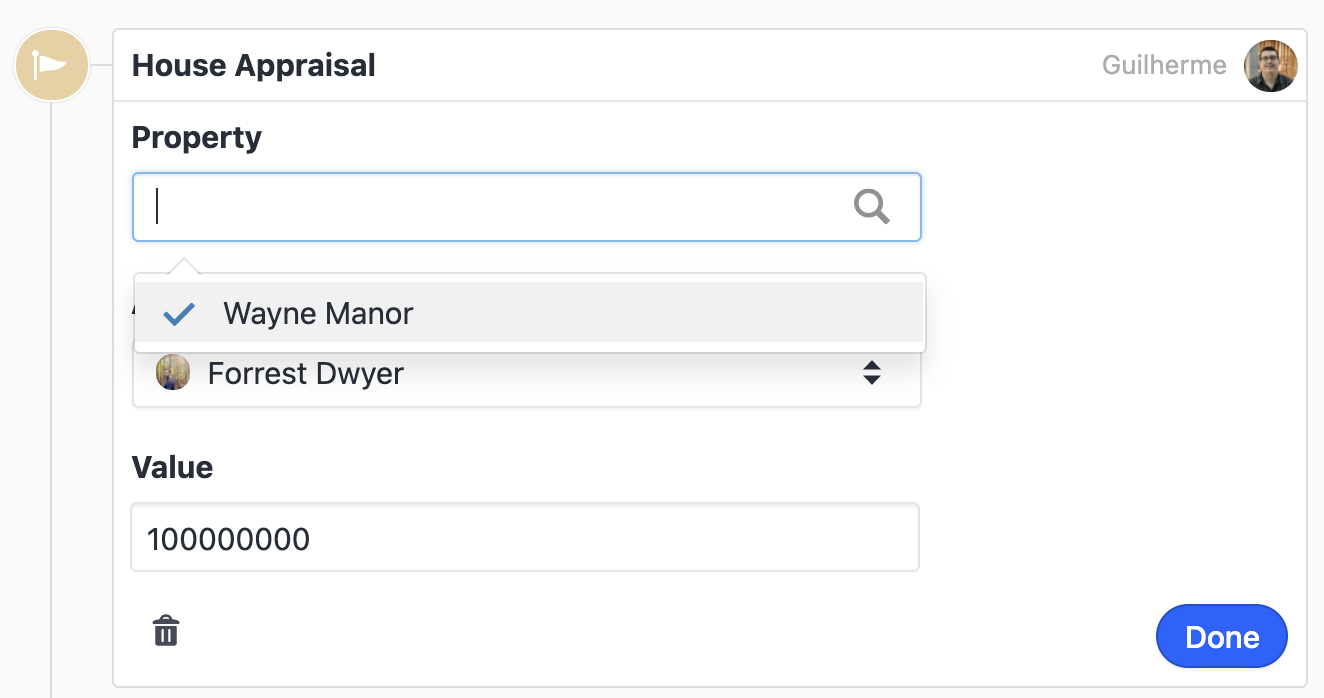
Once the Custom Field type is created, you'll be able to reference a specific Custom Object by using a simple drop-down menu:
Once you have a few instances of Custom Objects being referenced in Custom Activities/Opportunities, you can use the Custom Object itself to search for all instances that this Custom Object appears on.
These back-references are visible once you click on the Custom Object itself to expand the view:
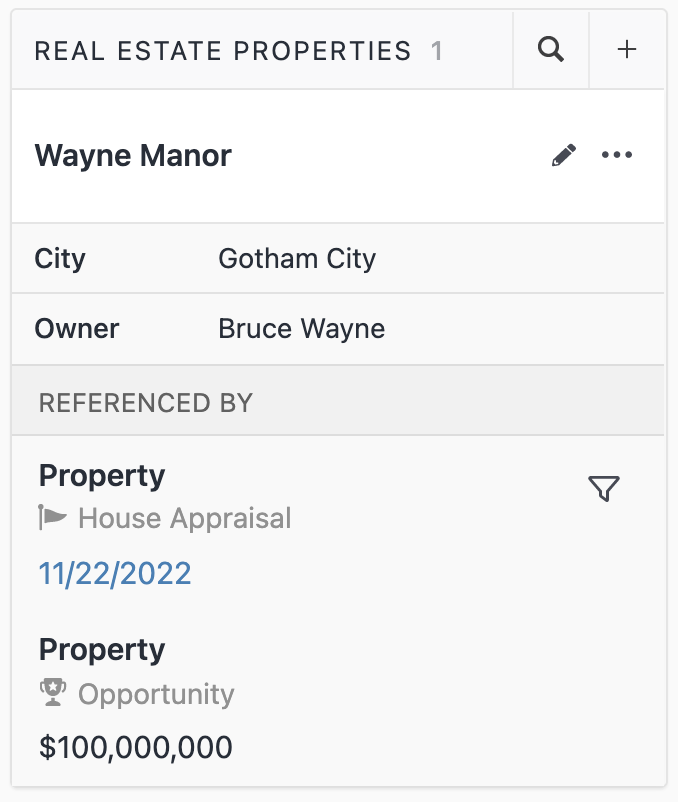
The Custom Activity instances are referenced by date, and clicking on any of these instances will redirect the activity view to that particular one.
You can also filter all Custom Activities that reference a specific Custom Object by clicking on the triangle icon on the top-right of the "Referenced by" field.
When merging Leads, Custom Objects that are on your Leads will be considered duplicate information. If the Custom Object on your source Lead (the Lead you are merging) matches the Custom Object on your destination Lead (the Lead you are merging to), then the Custom Object on the source Lead will be deleted.
Contact and Custom Object Reference fields will be ignored and not evaluated.