Keep your users happy and your data clean with these simple Zaps
Often times you may have a set of requirements for making specific changes to leads in Close. For example, you may require certain information be collected before changing a leads status or creating an opportunity. This guide will show you how you can enforce those requirements within Close using Zapier.
What you'll need
- A Zapier account allowing for multi-step Zaps
- A Close account
Step 1: Setting up your fields and Zapier trigger
The first thing you'll want to do is set up your custom fields if you haven't already.
In this example, let's say we have four fields we need filled out before a lead can be considered Qualified.
- Team Size (how big is the team?)
- Needs (does our product meet their needs?)
- Buying Process (who is the decision maker?)
- Competition (who are we competing against?)
Once we have the fields configured, we can set up a zap that ensures all of these fields are filled out when the lead enters Qualified status.
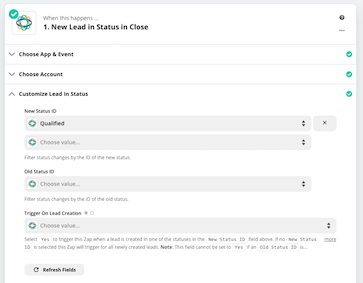 Zapier trigger for lead entering Qualified status.
Is it possible for your lead to skip over Qualified entirely? If so, you may want to adjust your zap to account for the various possibilities. If you need help setting this up, reach out to support@close.com.
Step 2: Determine if the requirements are met
When this zap triggers, the data returned will also contain any custom field information on the lead. We'll check this data to make sure all of our required fields are filled out. To do this, you'll create a Find Lead step, and insert a custom query. Your custom query should only return the lead if the required fields are not filled out on the lead.
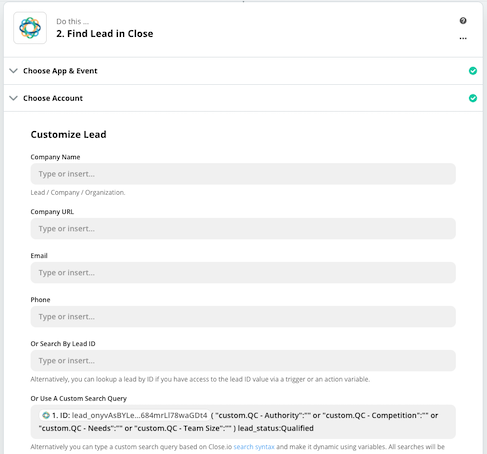 Custom query to determine if the change should be reverted.
This step is essentially acting as a filter, with the query stating that the Lead ID from the trigger does not have the required fields in order for the change to be approved.
Feel free to reach out to support@close.com if you're unsure about how to structure your query to identify your invalid changes.
Step 3: Creating an alert or reverting the change if needed
Now that you know this particular change is undesirable, you'll want to decide what to do next. While you're options are limitless, here are some suggestions that work well based on your goals. Keep in mind that you can choose to do some of all of the things listed below. Each additional step you'd like to take will just add another action to your zap.
Revert the change
If you wish to revert the changes, triggers for lead or opportunity statuses changes, along with custom field updates should all contain the previous data along with the new information.
All you need to do to revert the change is update the record again with to restore the old data to the lead/opportunity/contact.
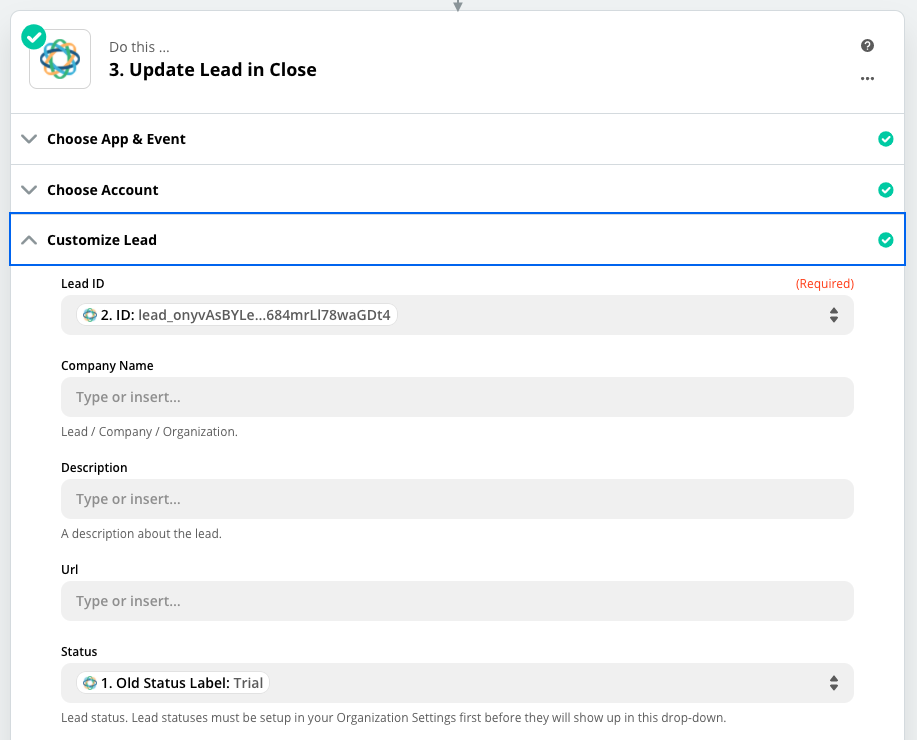
If you use the Lead ID returned in the trigger, the reversion, note, and task will trigger every time a lead enters your desired status. You'll need to use the Lead ID from Step 2 to apply the filters correctly.
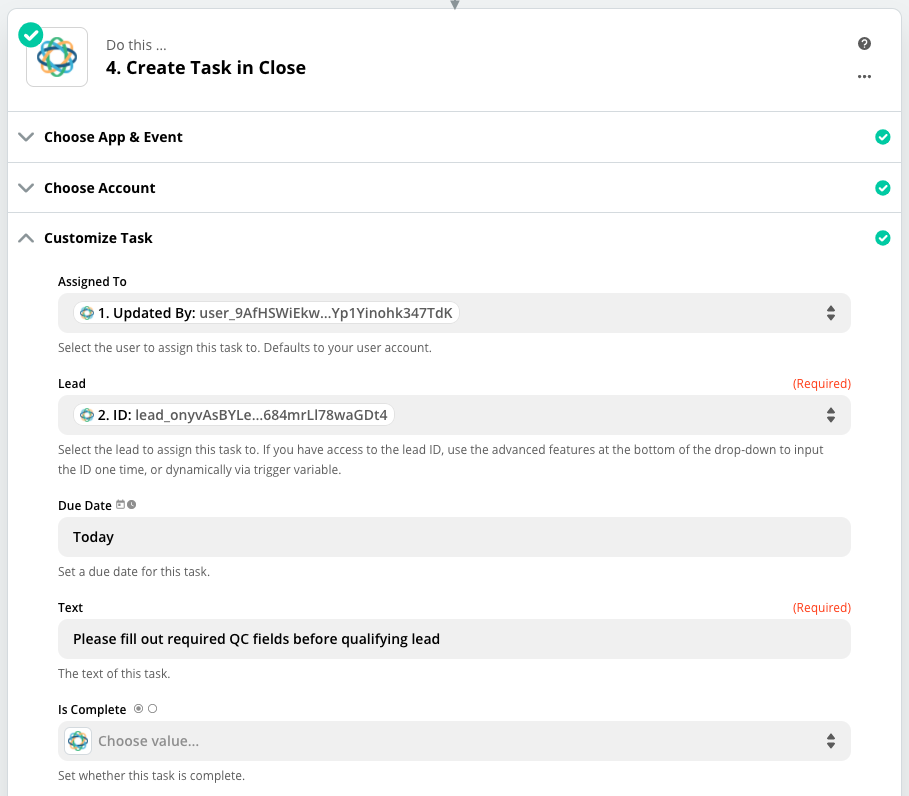
Create a task
You'll want to alert the user that the change they made was invalid, and that they'll need to resubmit the change after filling in your required fields.
Tasks are the best ways to create these alerts, as the task will become an inbox item for them to handle.
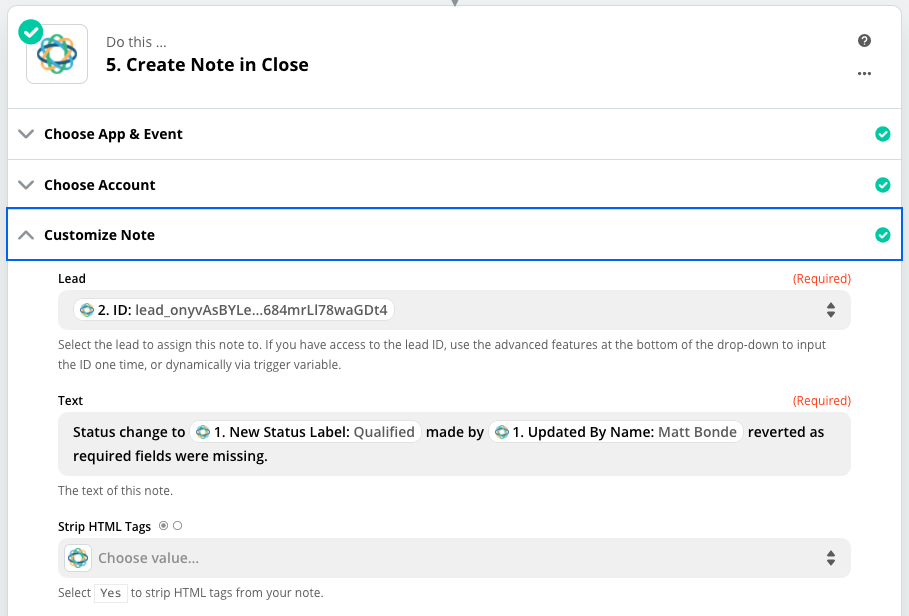
Record the occurrence
It's also possible that you may want to record all of the occurrences on the lead in the form of a note. If so, simply use the Create Note action and configure the note you'd like to appear on the lead.
Once this is all set up, you're done!
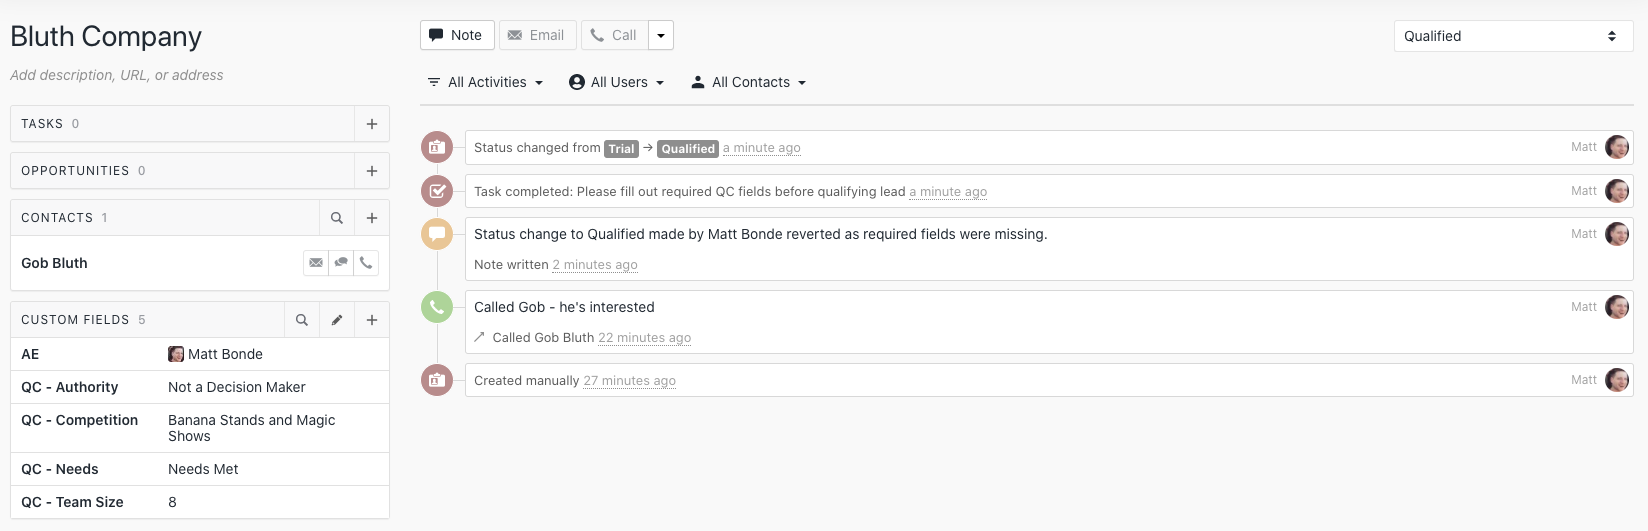
Below you can see an example where all of the required fields weren't completed, and the task for the user to resubmit changes.
 Changes are reverted when required fields are missing.
After the missing fields are filled out, the status change is accepted.
 Changes are accepted when requirements are met.
Give this Zap a try and reach out to support@close.com if you need any assistance!