Integrating Close with Dripify
Dripify is a LinkedIn automation and prospecting platform that helps users find and engage with their target audience on LinkedIn. It allows users to create a sales funnel with automated LinkedIn actions and conditions, such as sending connection requests, messages, and endorsements, as well as following and liking prospects' profiles.
Dripify also includes advanced analytics and a smart inbox to help users manage their campaigns and respond to leads. The platform also includes safety measures to prevent accounts from being flagged for excessive activity and allows users to segment their leads and reuse them in different campaigns.
If you use Close to manage your customer relationships, you can integrate the two platforms to maximize your efficiency and improve your marketing results.
In this article, we will walk you through the process of integrating your Dripify campaigns with Close using Zapier.
Step 1: Set up your Dripify account
If you don't already have a Dripify account, you will need to create one before you can integrate it with Close. To sign up for Dripify, visit their website and follow the on-screen instructions to create your account.
Step 2: Integrate Dripify with Close using Zapier
Integrating Dripify with Close using Zapier and webhooks allows you to automate certain tasks and streamline your workflow. With this integration, you can trigger actions in Close based on events that occur in Dripify.
To set up this integration, you will need a Zapier account and access to both your Dripify and Close accounts.
For those unfamiliar with Zapier, it is an automation tool that allows you to connect different apps you use every day to automate tasks. For example, you can use Zapier to automatically push data from your help desk to a CRM platform or send tasks from Evernote to project management tools like Asana or Trello.
Now, with Dripify, you can also push actions you do on LinkedIn to Zapier and then forward them to your preferred tools like Close.
Let's use an example to show you how it works in practice:
-
Create a quick campaign in Dripify and add leads. Build a sequence and name your campaign.
-
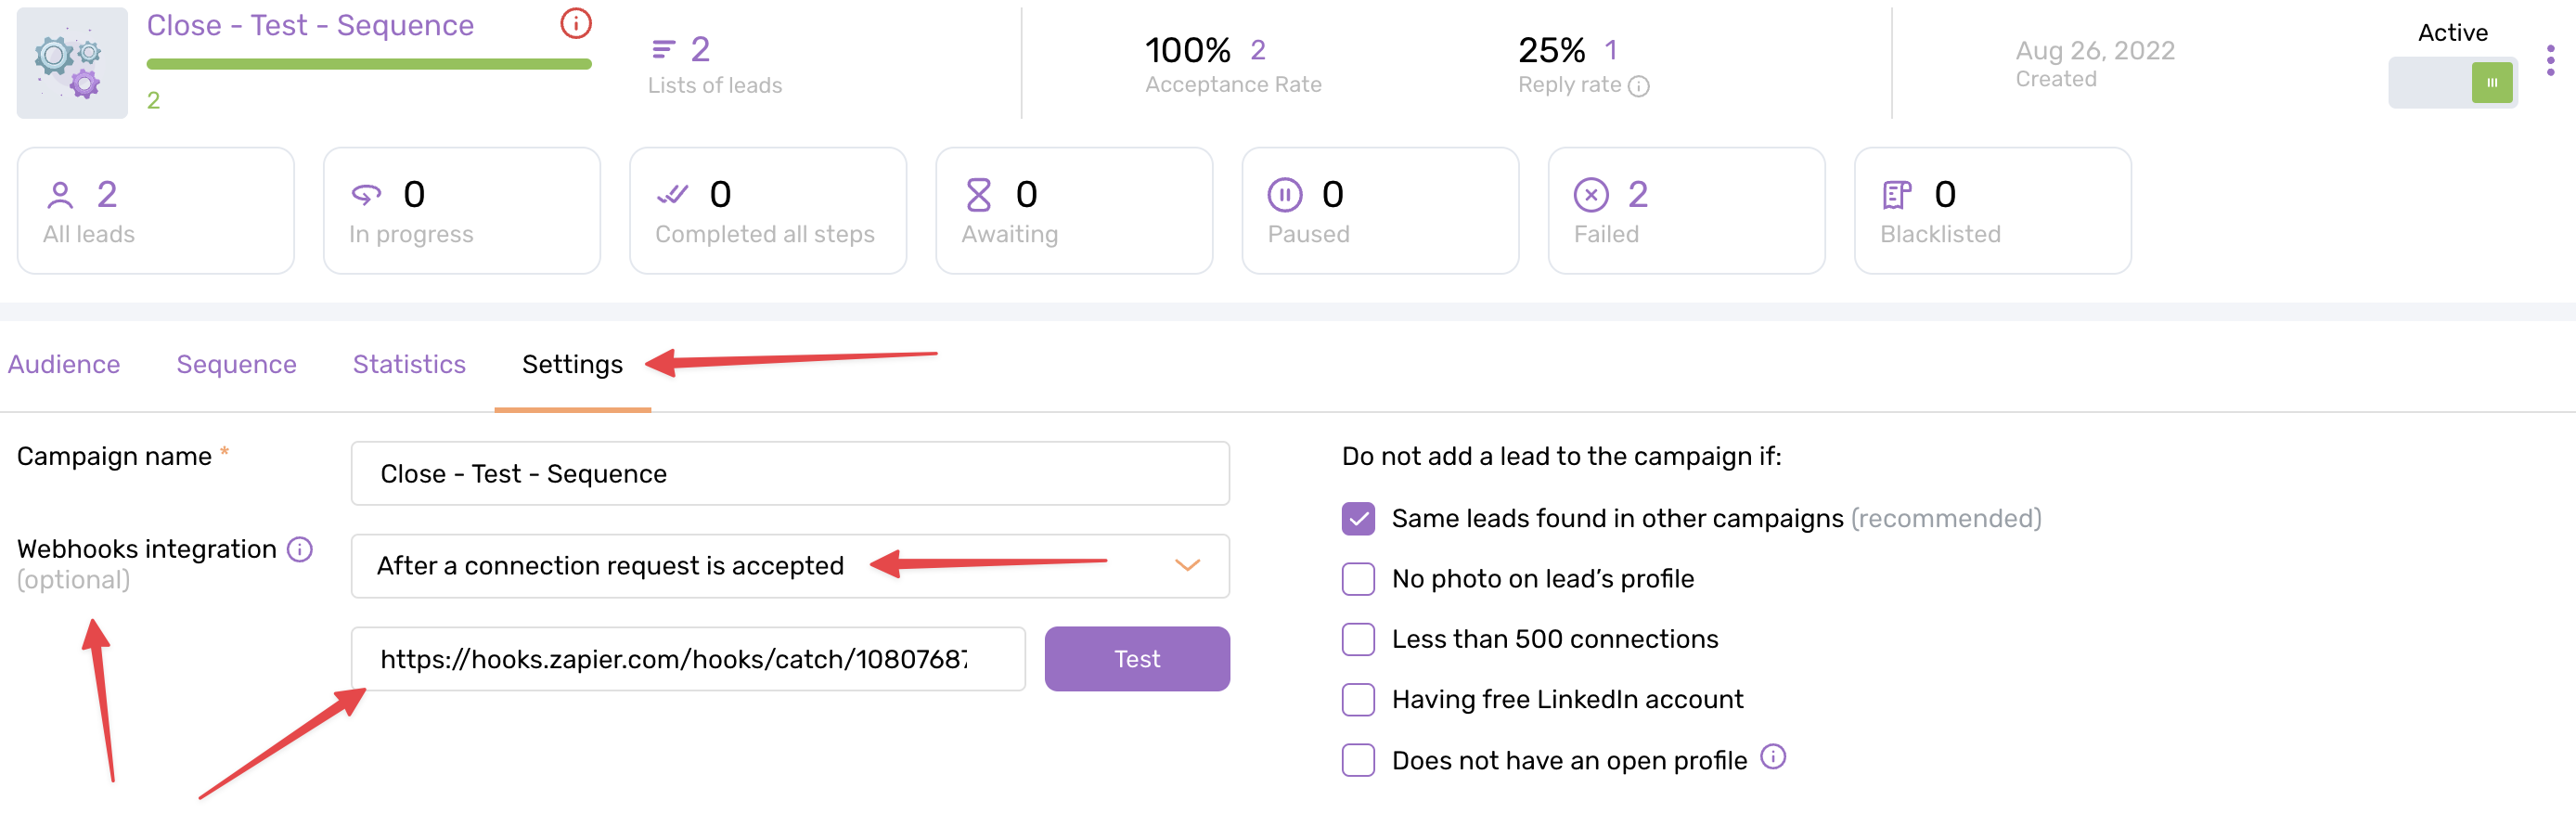
In the campaign settings, you can set up Zapier integration. Let's say we want to push leads data to Close. Most users prefer to push data after a connection request is accepted, as this gives you more data to forward, including the lead's email address.
-
Select the preferred event, such as "after a connection request is accepted."
-
Go to Zapier.com and log into your account or sign up if you're new to Zapier. Press "Make a Zap" and search for Webhooks by Zapier. This is a standard app that gathers data, and we'll need to use it every time we make a Zap.
-
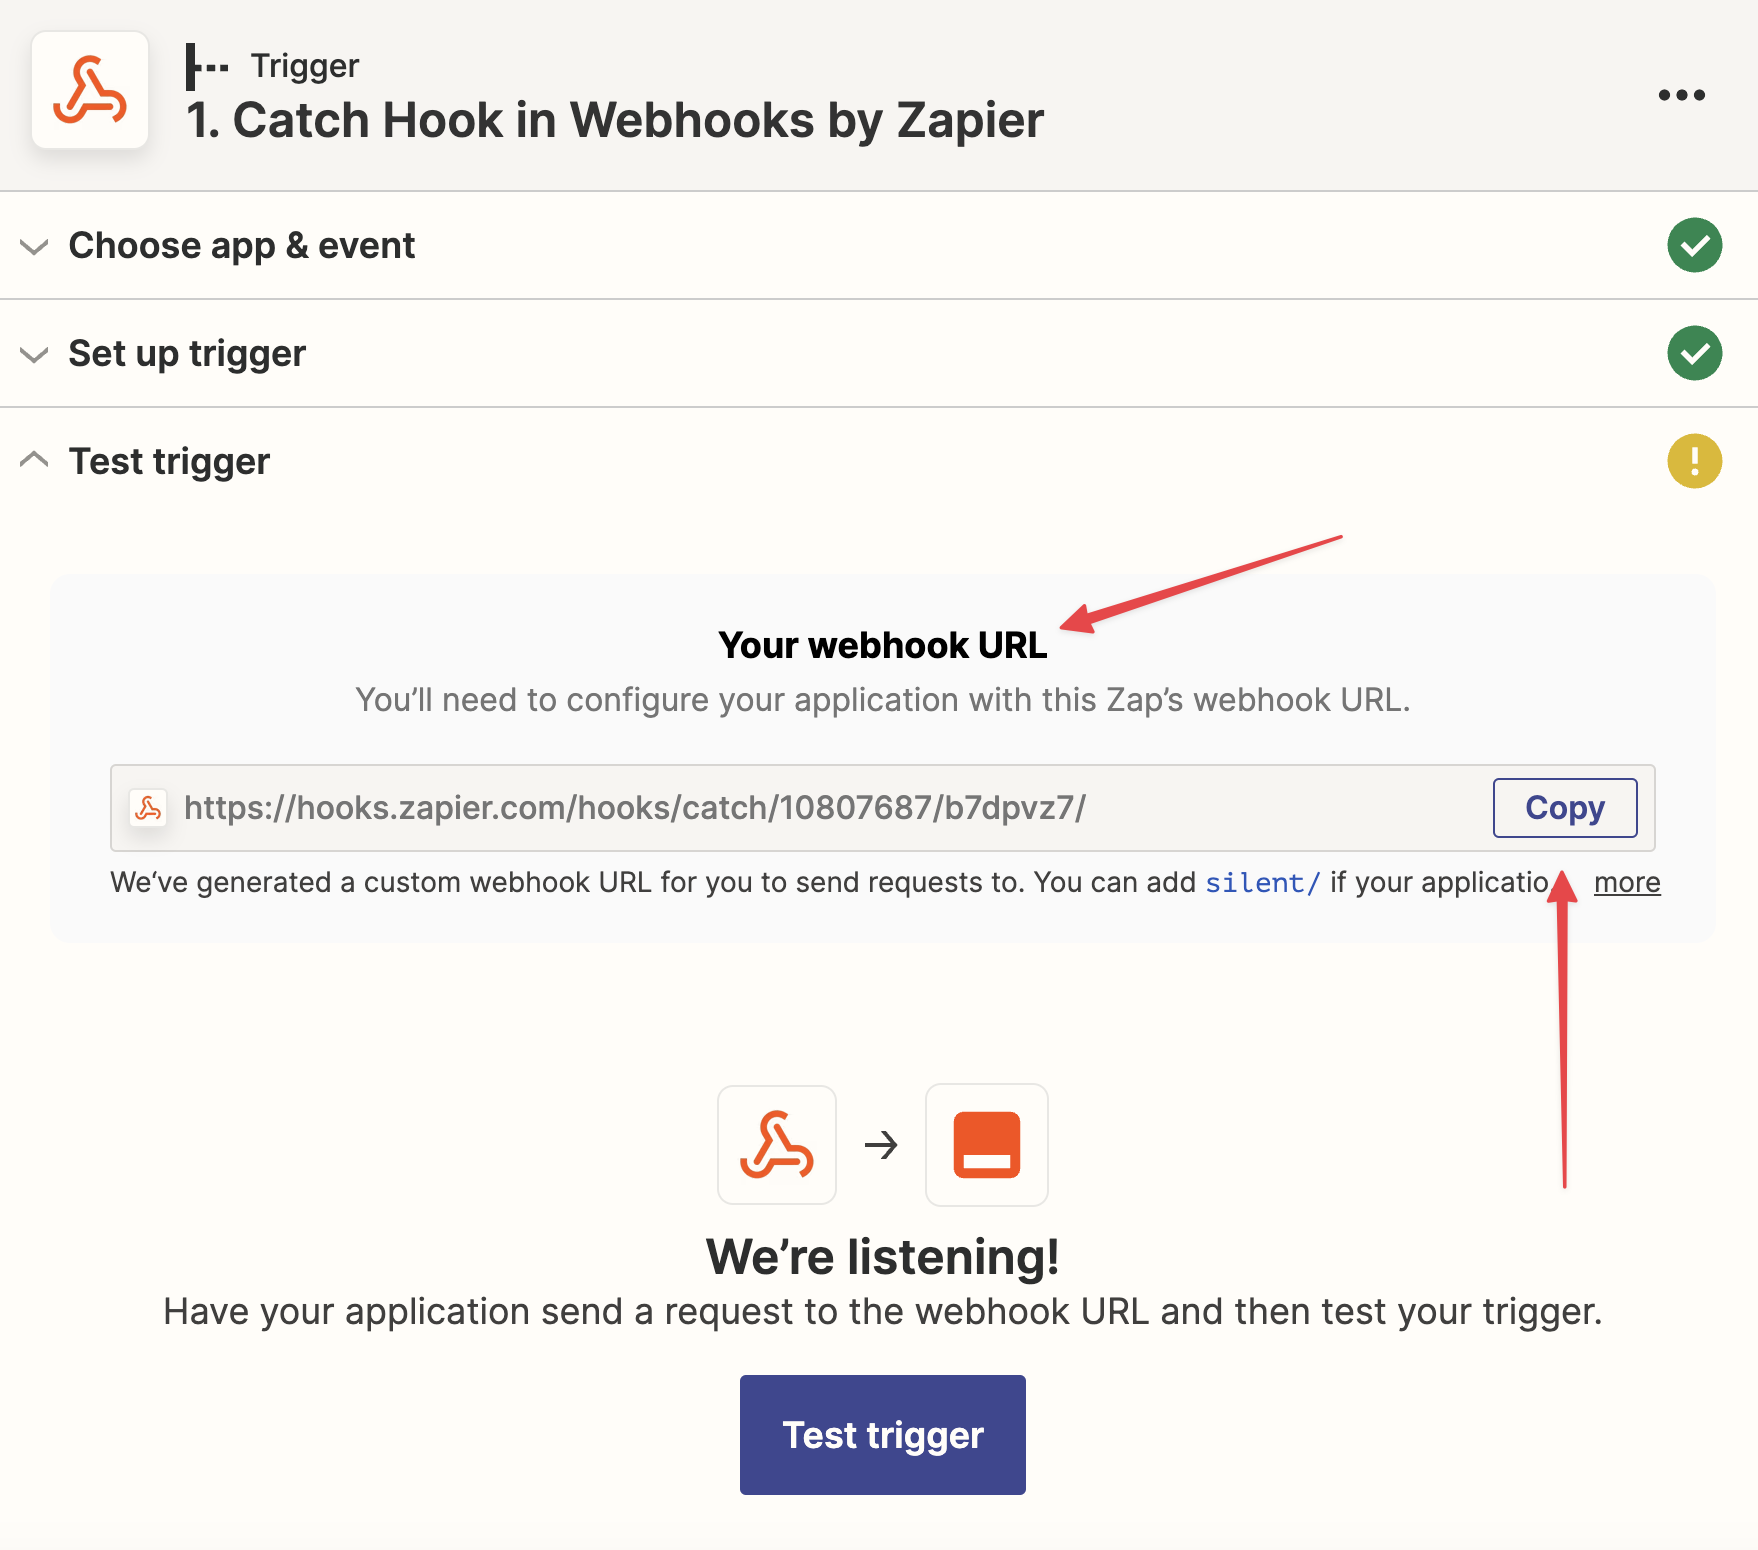
Select the second option, "Catch a Hook," and press continue. Zapier will generate a custom webhook URL that you need to paste into the campaign in Dripify.
-
Paste the URL into the appropriate field in Dripify and press test to send test data to Zapier.
-
Go back to Zapier, and you should see the test data you sent from Dripify.
-
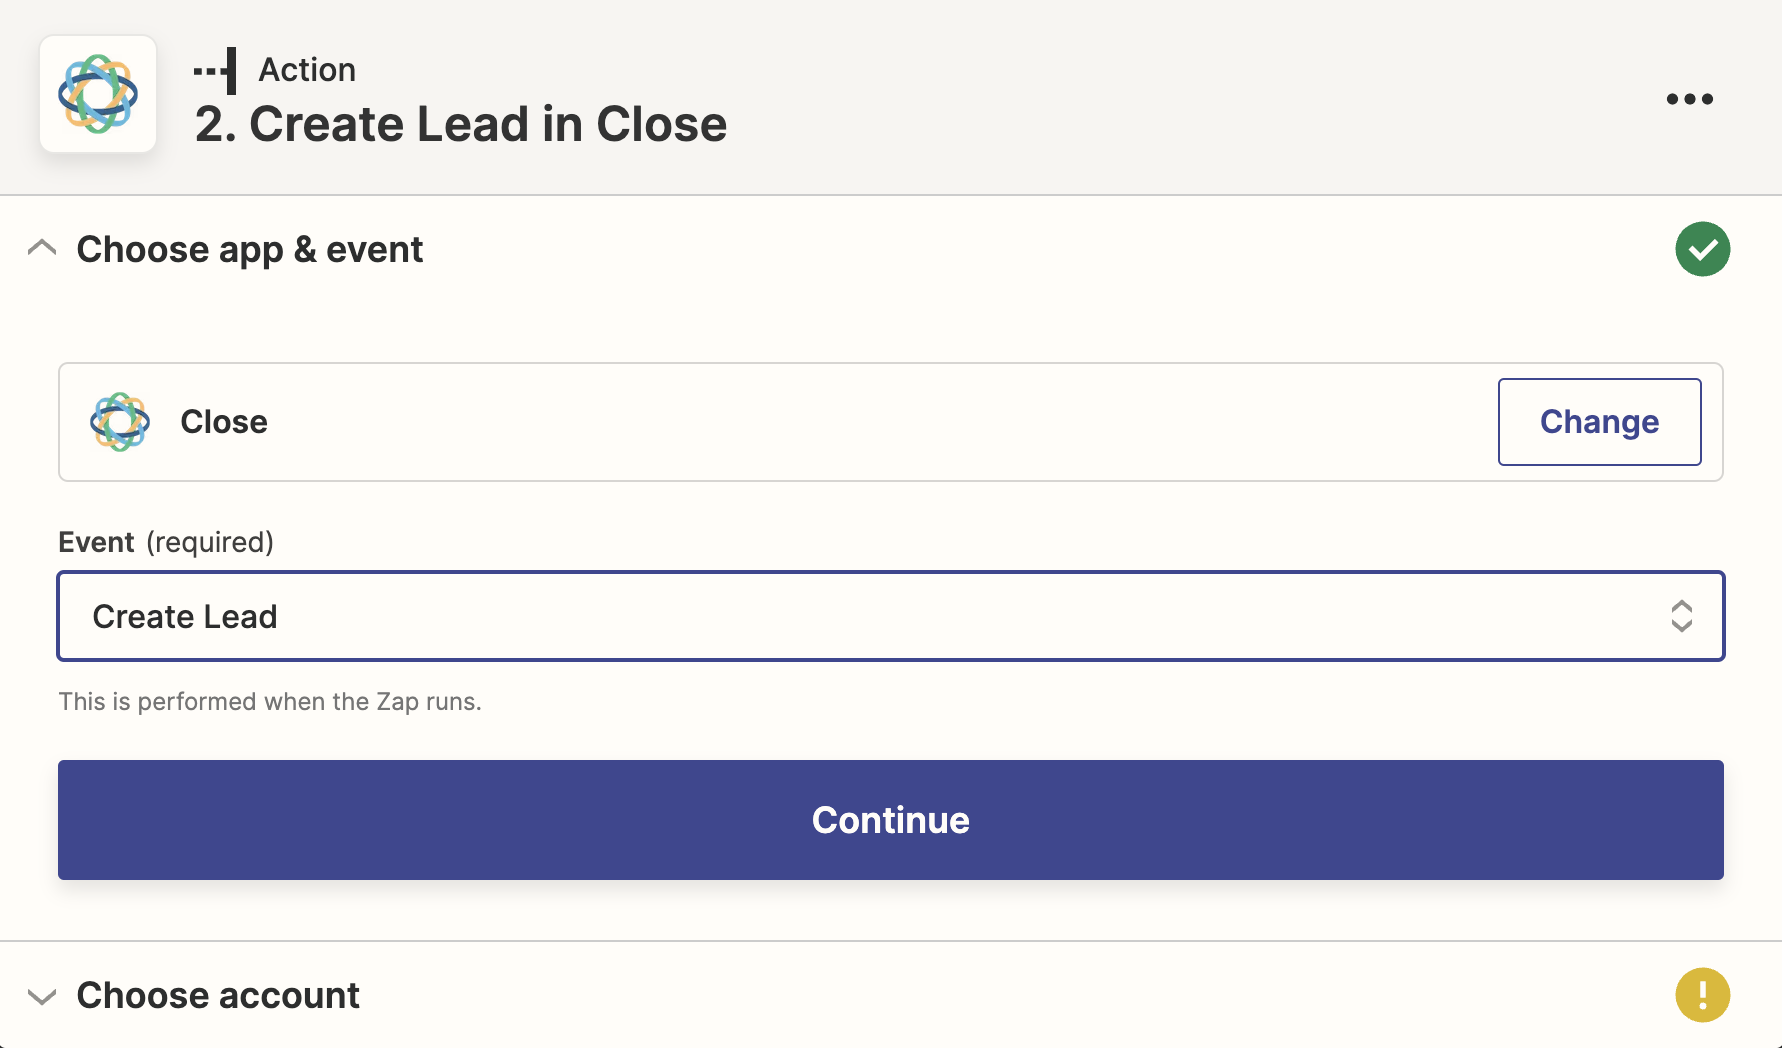
Select Close as the app that needs to receive this data. Under the action event field, select "Create Lead" This means that once a connection request is accepted by your lead in LinkedIn, their data will be added as a new lead in Close.
-
Press continue and choose your Close account. Then match the information from Dripify to the appropriate fields in Close. For example, click on "First Name" and choose the appropriate field from Dripify. Repeat this for all the other fields.
-
Click continue and send test data to Close to see if everything is working correctly.
-
If everything looks good, go back to Zapier, turn your Zap on, and name it.
-
Launch your campaign, and every time someone accepts your connection request within this particular campaign, their data will be added as a new lead in Close.
To stop sending data to Close, simply remove the webhook and save the changes in the campaign settings in Dripify.
Overall, integrating Dripify with Close using Zapier and webhooks can greatly improve the efficiency of your workflows and help you automate repetitive tasks. With a little bit of setup, you can easily connect these two systems and start taking advantage of their combined power.
If you are having trouble with the integration, check the documentation provided by Dripify or contact their customer support team for assistance. See the full tutorial video on Dripify youtube channel here.
Step 3: Start using the integration
Once you have set up and tested the integration, you can start using it to streamline your marketing efforts. You can use Close to manage your customer relationships and use Dripify to automate your LinkedIn marketing campaigns and personalize your communication with customers.
By integrating Close with Dripify, you can save time and improve your marketing results, making it easier to build strong, lasting relationships with your customers.
We hope this tutorial has helped you understand how to integrate your Dripify campaigns with Close using Zapier. If you have any questions or need further assistance, don't hesitate to contact our support team.