Script installation & setup
Instructions on how to install and set up the environment for running Close scripts
Almost anything that can be done in the Close application by the end-user can be done via the Close API (Application Programming Interface) as well – for example, send an email, create reports, add notes, search leads, etc.
API is simply a way of interacting with Close using the programming language, instead of using mouse & keyboard. Here at Close, we use the Python programming language. Using Python, we write computer scripts (programs) that interact with the Close API to perform various tasks.
In this document, we will explain how to set up a computer environment where such Python scripts can be executed. We will install Python to run the scripts and Git, which is used to retrieve scripts we wrote for common tasks at GitHub: Close API scripts. Finally will run a sample script that will print out your organization name to make sure everything is set up correctly for more complex scripts.
Prerequisites
A script can get access to your specific organization (user account) only if you provide it with the Close API key, which you can create in Close app > Settings > API Keys. If you delete the API key, the script that used it will no longer work.
Go ahead and create a new API key and write it down as you'll need it for the later steps. Copy it somewhere safe, as it's displayed only once when created.
Continue reading if you are on Mac OS, otherwise, jump into instructions for Windows.
Mac OS X
Before starting the process, make sure you have at least 30GB of free space, otherwise, you won't be able to install Xcode tooling.
GCC
First, we install the GCC (GNU Compiler Collection) which is required for Python by running the following command inside the Terminal (Terminal can be opened from the Applications > Utilities > Terminal) - copy and paste inside Terminal and press Enter:
$ xcode-select --install
Homebrew
Next, we install Homebrew which will help us install Python and Git using the instructions from the Homebrew homepage.
Run brew help to see if it's properly installed. If you get brew command not found, then run this line as well as you're likely using M1 Mac and/or zsh shell (you can find out which shell you're using by running echo $0 in your Terminal):
echo "export PATH=/opt/homebrew/bin:$PATH" >> ~/.zshrc
Restart the terminal and now brew help should work.
After Homebrew is installed, we are ready to install Python.
Python 3
While Mac OS X comes with Python 2.7 installed, we need to install a more recent version using
$ brew install python@3.10And to make sure we use newer Python by default, run the following command if you're using Bash terminal
$ echo export PATH="/usr/local/opt/python/libexec/bin:$PATH" >> ~/.bash_profile
or this one if you're using Z Shell:
$ echo 'export PATH="/usr/local/opt/python/libexec/bin:$PATH"' >> ~/.zshrc
To make sure everything is set up correctly we restart the Terminal and check for the version of Python with
$ python --version
Which should output the Python version 3.10.x (e.g.3.10.9).
virtualenv
We also need to install virtualenv, a library which will help us run the scripts in an isolated environment using:
$ pip install virtualenv
ImportError
If you encounterImportError: cannot import name 'PackageFinder' error during pip install, reinstall the pip using
$ curl https://bootstrap.pypa.io/get-pip.py -o get-pip.py && python get-pip.pyand once installed, remove the installation file with
$ rm get-pip.pyGit
Because of the GCC we installed earlier, Git is already installed. Just make sure to check it's working by outputting its version with
$ git --version
Which should give you the current Git version.
Running a sample script
To make sure everything is set up correctly and that we can reach your organization's data in Close, we will run a simple script that will connect to Close via the API and print out the organization's name.
Retrieve the script using the following command in Terminal:
$ git clone https://github.com/closeio/close-api-scripts.git
Then, we enter the directory, install and activate the virtual environment, install the libraries
$ cd close-api-scripts
$ virtualenv venv
$ . venv/bin/activate
$ pip install -r requirements.txt
Then, run the script using
$ python scripts/sample_script.py -k MYAPIKEY
Where MYAPIKEY is replaced with the API key that you've created previously.
Press Enter and the script result should be your organization's name.
Congratulations – your setup is complete!
Windows
Python 3
Start with downloading a Python 3.10.9 installer from the official website.
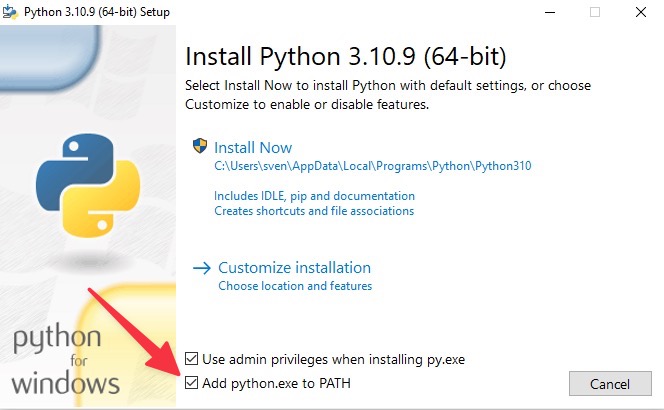
Run the Installer by double-clicking and selecting Install Now and make sure to check the "Add Python python.exe to PATH".
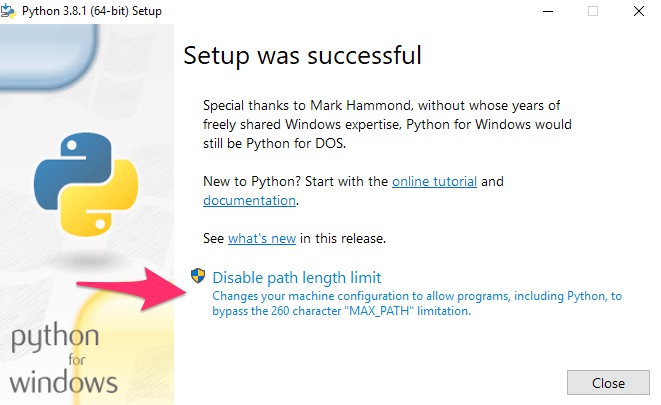
A few minutes later you should have a working Python 3 installation on your system. Before clicking on Close, click on the Disable path length limit if available, and then click Close.
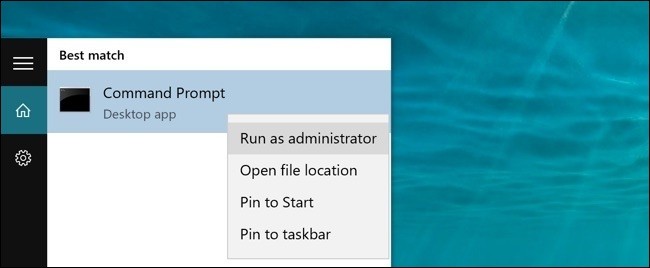
Confirm you have working Python installation by using Command Prompt. Open Command Prompt as an Administrator via Windows start menu by right-clicking > Run as Administrator:
and then type in
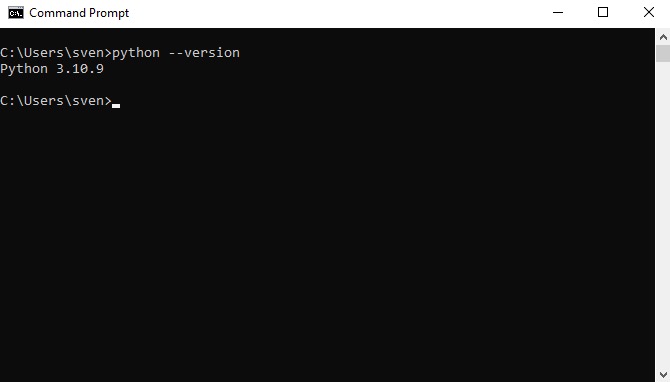
> python --version
and press Enter. It should output your Python version.
If you get the wrong/older Python version, make sure that the older version path is not within global Environment Variables. To make sure you're using the newest Python version, go to Edit the system environment variables in Windows Search and change the PATH variable so that the newest Python is listed, and delete the others.
virtualenv
Next, we need to install virtualenv, a library that will help us run the scripts in an isolated environment.
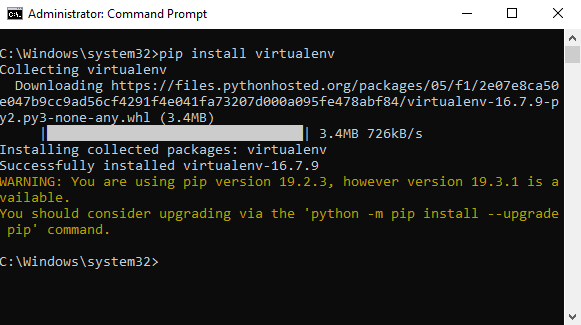
virtualenv is installed also using Command Prompt. Copy-paste the following command and press Enter:
> pip install virtualenv
After a few seconds, you will see a confirmation that virtualenv is successfully installed (note: you can ignore those warnings regarding pip version).
Git
Lastly, we need to install Git which will help us retrieve public Close scripts from the internet. Download the latest Git for Windows installer and run it.
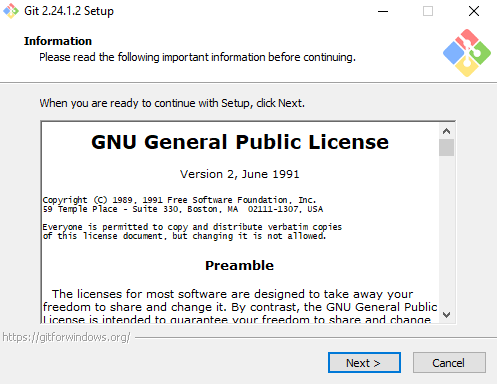
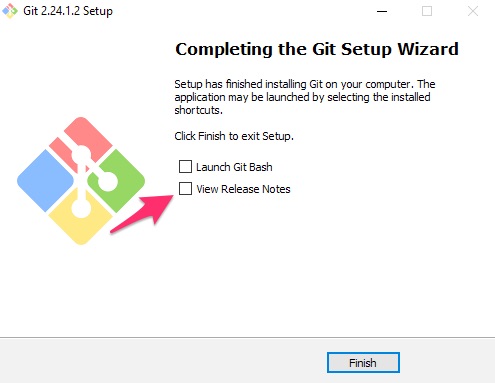
Go through the whole installer just by clicking Next. When finished, you can uncheck View Release Notes and click Finish.
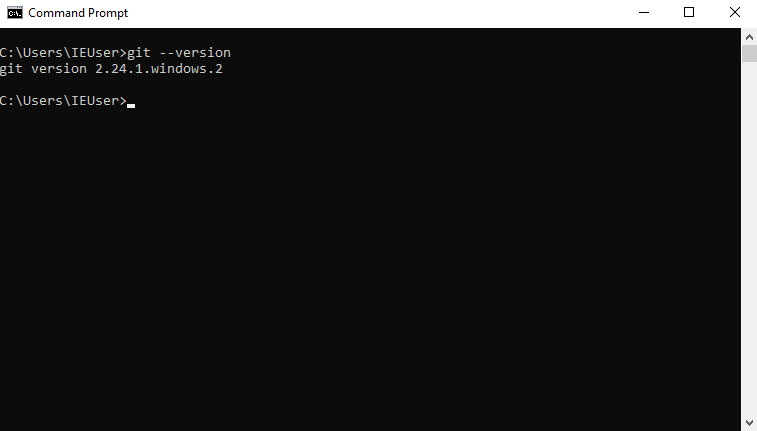
Test it out by running the following command in Command Prompt:
> git --version
Running a sample script
To make sure everything is set up correctly and that we can reach your organization's data in Close, we will run a simple script that will connect to Close via the API and print out the organization's name.
Retrieve the script using the following command in Command Prompt:
> git clone https://github.com/closeio/close-api-scripts.git
Then, we enter the directory, install and activate the virtual environment, and install the libraries
> cd close-api-scripts
> virtualenv venv
>    (when asked to use the base prefix, just press Enter)
> venv\Scripts\activate.bat
> pip install -r requirements.txt
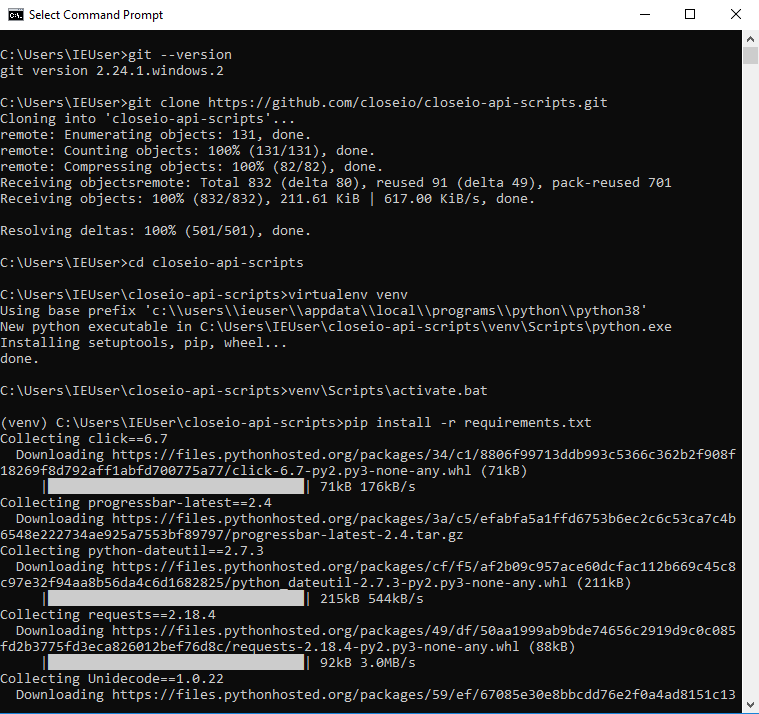
If you don't get any response after trying to activate the (venv) environment, make sure that your execution policies allow for running unsigned scripts.
Open Microsoft PowerShell as Administrator, then run the Set-ExecutionPolicy Unrestricted -Force command that will allow unsigned scripts to run on the local machine for all users. Re-open Command Prompt and give it another go. See more at https://docs.microsoft.com.
If you get the error: Microsoft Visual C++ 14.0 is required. error - simply download the required libraries from Microsoft's site and run the pip install -r requirements.txt command again.
During installation make sure that the Visual C++ build tools / MSVC v140 - VS2015 C++ Build Tools (v14.00) components are selected to install. You can check for this by going to your installed apps - Visual Studio - click Modify.
> python scripts/sample_script.py -k MYAPIKEY
Where MYAPIKEY is replaced with the API key that you've created previously.
Press Enter and the script result should be your organization's name.
Congratulations – your setup is complete!
Support
For any further assistance, please reach out to support@close.com

